Welcome
This Documentation describes the installation and configuration steps of script.
While the installation process is rather simple, some of the instructions presented here will require minimum understanding in working with databases and managing files on a server.
If you're not familiar with the procedures presented, We can help you via support desk. Support Desk
License
Regular License
Use, by you or one client, in a single end product which end users are not charged for. The total price includes the item price and a buyer fee.
Extended License
Use, by you or one client, in a single end product which end users can be charged for. The total price includes the item price and a buyer fee.
Please purchase an Extended License if you are going to sell as a service. Envato License Policy
Server Requirements
We are using laravel so minimum server requirements of script should be same as the requirements of laravel framework.
- PHP >= 8.3
- BCMath PHP Extension
- Ctype PHP Extension
- Fileinfo PHP Extension
- GD PHP Extension
- Intl PHP Extension
- JSON PHP Extension
- Mbstring PHP Extension
- OpenSSL PHP Extension
- PDO PHP Extension
- Tokenizer PHP Extension
- XML PHP Extension
- MySQL >= 5.7 / MariaDB >= 10.3
- Apache mod_rewrite
Creating a New Database
Before installing, you will need to create a new empty database. If you already know how to do this or have already created one, skip to the next step. Please use an empty database. In most cases you should be able to create a database from your cPanel.
Useful resources
Via cPanel:
- Log in to your cPanel account.
- Go to MySQL Database Wizard under the Databases section.
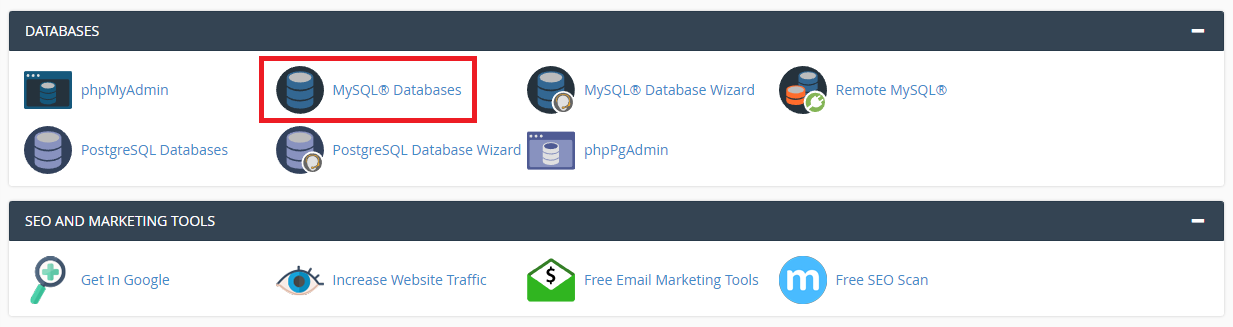
cPanel → Databases → MySQL Databases
- Create a new database (e.g.,
craft).
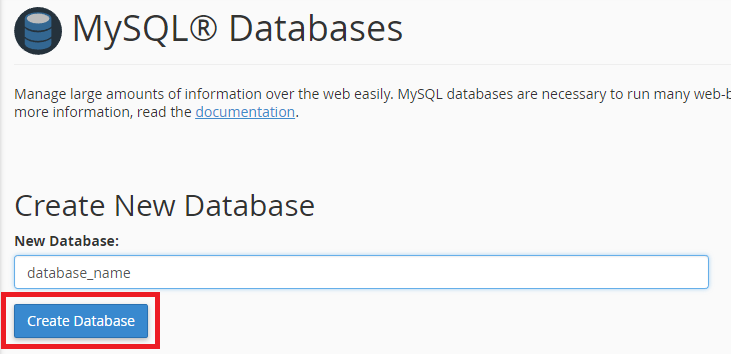
Enter database name and click Create Database
- Create a new database user with a strong password.

Create a new database user
- Add the user to the database.
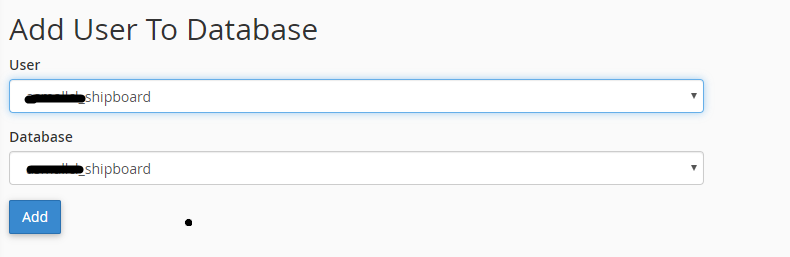
Add user to the database
- Grant ALL PRIVILEGES to the user.
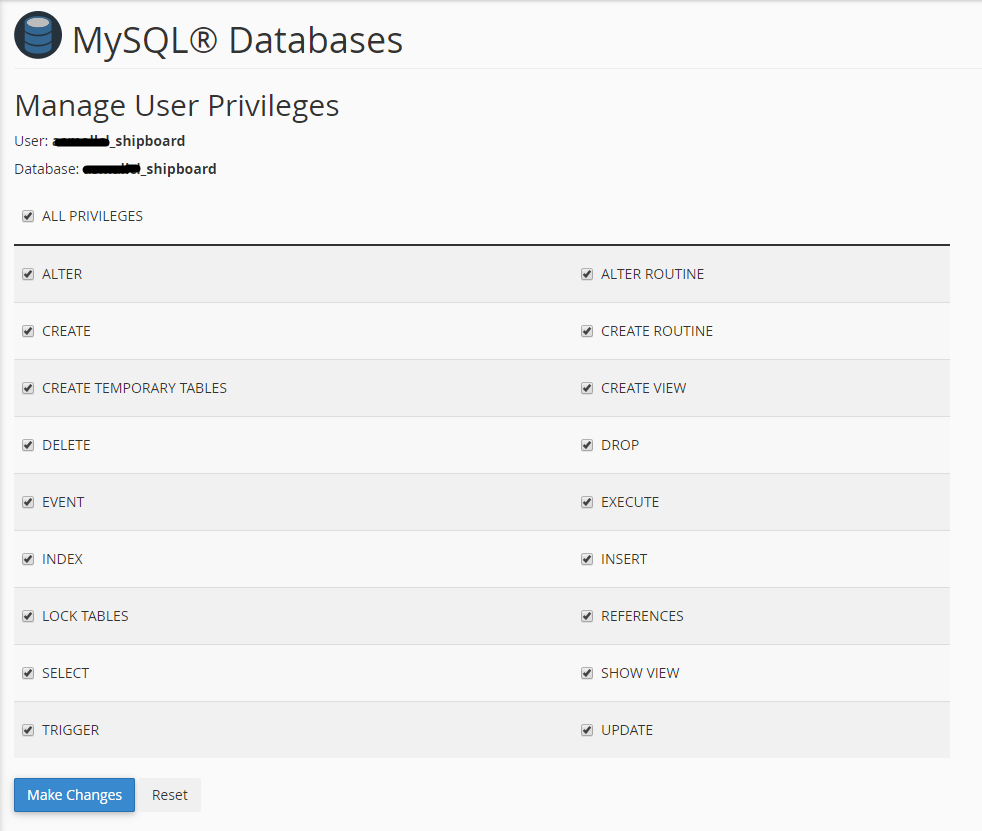
Select All Privileges and click Make Changes
Via Command Line:
mysql -u root -p
CREATE DATABASE craft CHARACTER SET utf8mb4 COLLATE utf8mb4_unicode_ci;
CREATE USER 'craft_user'@'localhost' IDENTIFIED BY 'your_strong_password';
GRANT ALL PRIVILEGES ON craft.* TO 'craft_user'@'localhost';
FLUSH PRIVILEGES;
EXIT;
Uploading Files
.env file in your folder and the .htaccess file got copied properly from the download to your server.
Upload the contents of the main_file folder to your web root (usually public_html, html, or your domain folder).
Required folder permissions:
chmod -R 775 storage/
chmod -R 775 bootstrap/cache/
chmod -R 775 public/storage/
chmod 644 .env.env and .htaccess are hidden by default. Make sure your file explorer has the option to view hidden files turned on before uploading.
Installation Wizard
Go to your website address, then you'll see an installation wizard. To open the installer, visit:
https://yourdomain.com/install
Now the installer will show up. The first screen will be the Welcome Screen.
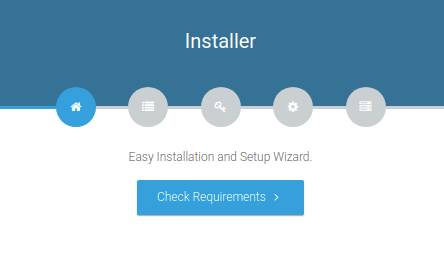
Welcome Screen — Click Check Requirements
yourdomain.com/install, but you are able to access it via yourdomain.com/index.php/install, this means that you probably don't have Apache mod_rewrite installed and enabled.
System Requirements
After clicking on "Check Requirements" button, you will be redirected to the System Requirements step during the installation wizard.
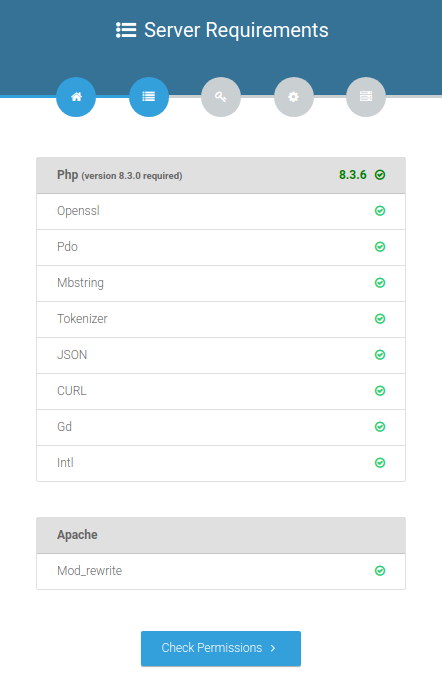
System Requirements — Verify PHP extensions
Directory Permissions
After successfully enabling and installing all required PHP extensions, the next step is to set the appropriate permissions for some system folders as shown below.
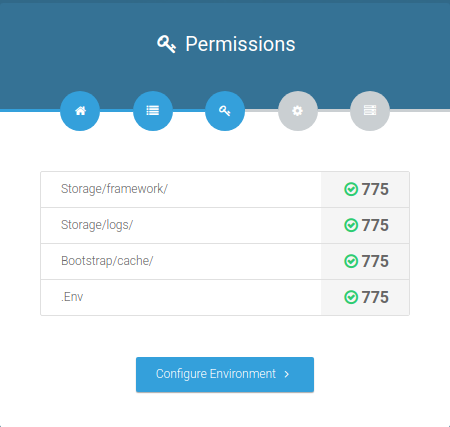
Directory Permissions — Set write permissions
For giving permissions, open your terminal window and type:
sudo chmod 777 directory_nameFor example:
sudo chmod 777 storage
sudo chmod 777 bootstrap/cache
Environment Settings
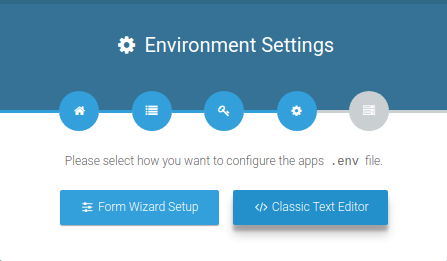
Please select how you want to configure the apps .env file. You have two options:
Form Wizard Setup
Step-by-step guided form to configure your environment.
Classic Text Editor
Directly edit the .env file in a text editor.
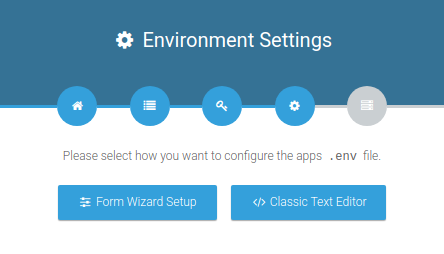
Choose between Form Wizard Setup or Classic Text Editor
Option A — Form Wizard Setup
If you choose Form Wizard Setup, you will be guided through three tabs:
1. Environment — Configure app name, environment, debug mode, log level, and app URL.
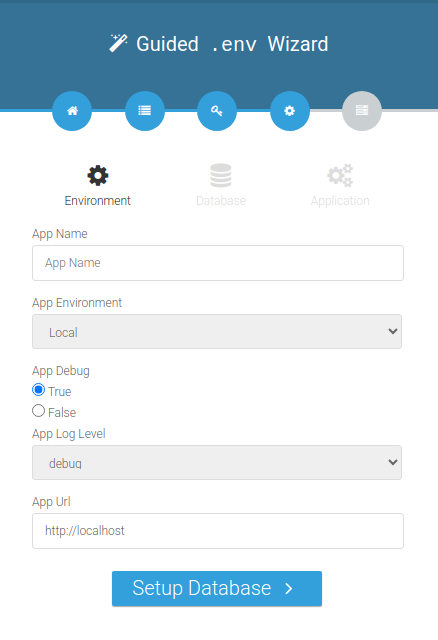
Form Wizard — Environment tab
2. Database — Enter your database connection details (host, port, name, username, password).
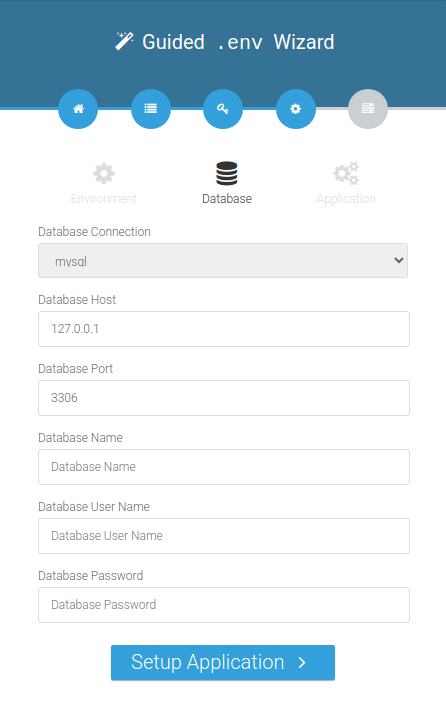
Form Wizard — Database tab
3. Application — Configure broadcasting, caching, session, queue, and mail drivers.
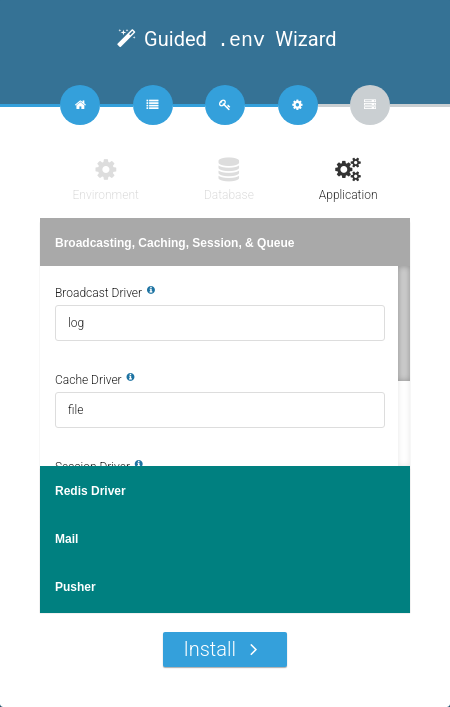
Form Wizard — Application tab
Option B — Classic Text Editor
If you choose Classic Text Editor, you can directly edit the .env file contents in a text area and save.
Classic Text Editor option
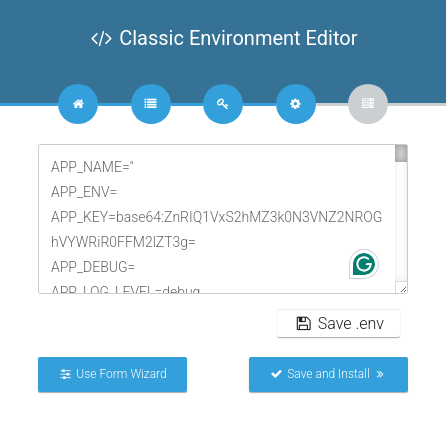
Edit .env file directly and click Save .env
Installation Finished
The last step is the exit step. After successful installation, you will see the completion screen.
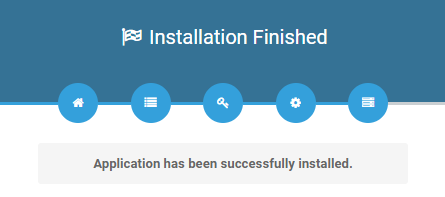
Application has been successfully installed
.env file permission to 644 for security:
chmod 644 .envDefault Login
After installation, use the following credentials to log in:
Email: admin@example.com
Password: admin@1232
Upgrade
- Make a backup of the
.envconfig file and.htaccesslocated on your server. - Upload and
replace allthe files on your server with what's inside themain_filefolder. - Restore your
.envconfig file and.htaccesson your server. - Run
php artisan migrateto apply any new database changes. - Run
php artisan optimize:clearto clear cached files.
FAQ
You can contact us via our Support Desk. We typically respond within 24-48 hours on business days.
Please ensure that you have mod_rewrite enabled on your server. Also verify that the .htaccess file exists in the public directory.
This generally happens when one of the server requirements is not met. Enable debug mode by setting APP_DEBUG=true in your .env file to see the actual error message.
Go to the admin panel settings page to upload your logo (light & dark versions) and favicon. Changes apply immediately.
Yes. Add the following to your .htaccess file to force HTTPS:
RewriteCond %{HTTPS} !=on
RewriteRule ^/?(.*) https://%{HTTP_HOST}%{REQUEST_URI} [R,L]Craft Laravel Admin Panel supports English, Arabic, and French out of the box. Translation files are located in resources/lang/ and lang/. Copy the en folder and translate the files for your new language.