Documentation
Prime Laravel Form Builder Sass Documentation
-
Created On: 11 February 2022
If you have any questions that are beyond the scope of this help
file, Please feel free to email via Item Support Page.
License
Regular License
Use, by you or one client, in a single end product which end users are not
charged for. The total price includes the item price and a buyer fee.
Extended License
Use, by you or one client, in a single end product which end users can be
charged for. The total price includes the item price and a buyer fee.
Please purchase Extended License if you are going to sell as a service. Envato License
Policy
Installation
It comes with prebuilt installer. Follow these steps to step guide on your
server.
Server Requirements
We are using laravel 9 So these are the minimum server
requirements, the installer will check if your server meets these or alternatively you can
contact your hosting provider in order to make sure your server meets them.
- PHP >= 8.1
- BCMath PHP Extension
- Ctype PHP Extension
- Fileinfo PHP extension
- JSON PHP Extension
- Mbstring PHP Extension
- OpenSSL PHP Extension
- PDO PHP Extension
- Tokenizer PHP Extension
- XML PHP Extension
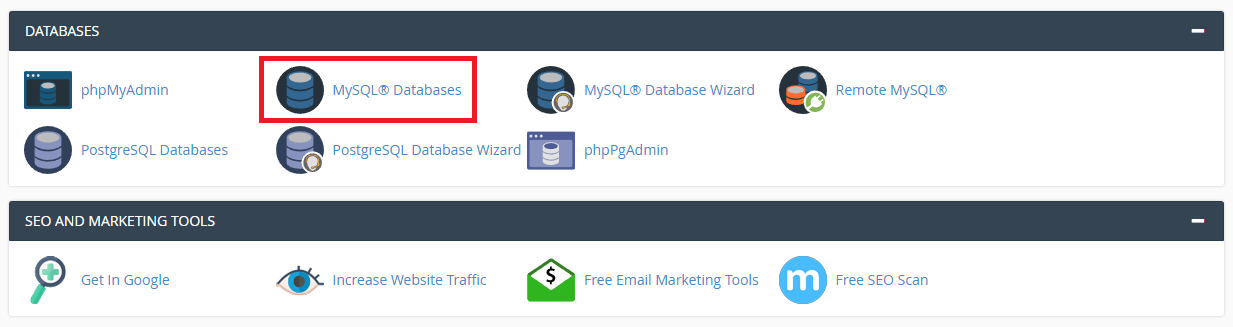
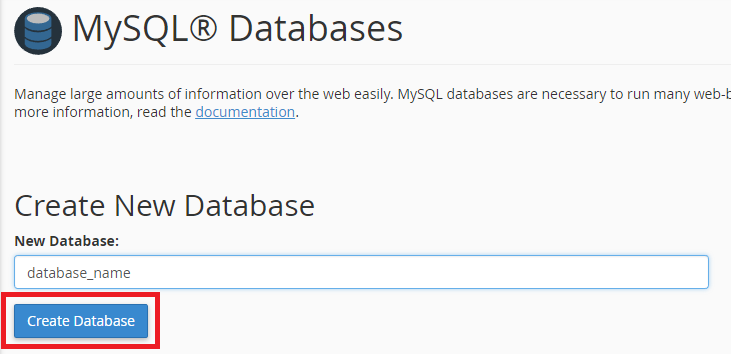
Creating a new database
- Before installing, you will need to create a new database. If you already know how to do
this or have already created one, skip to the next step.Please use empty
database . In most cases you should be able to create a database from your
cpanel.
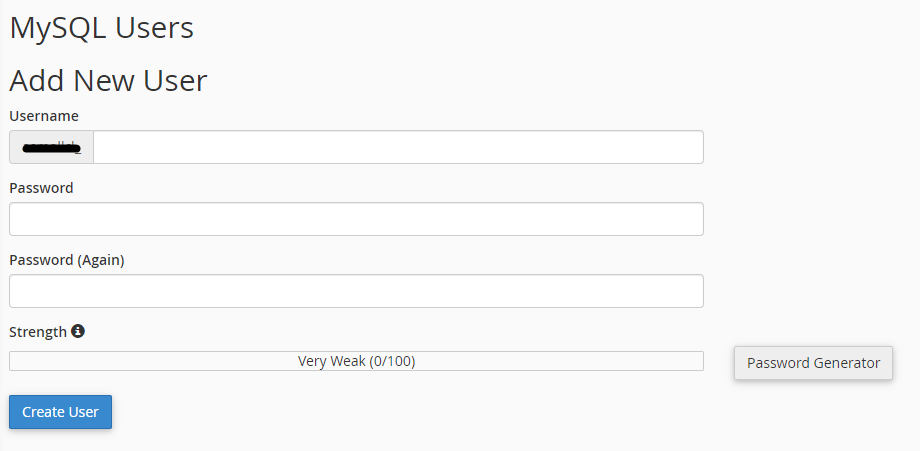
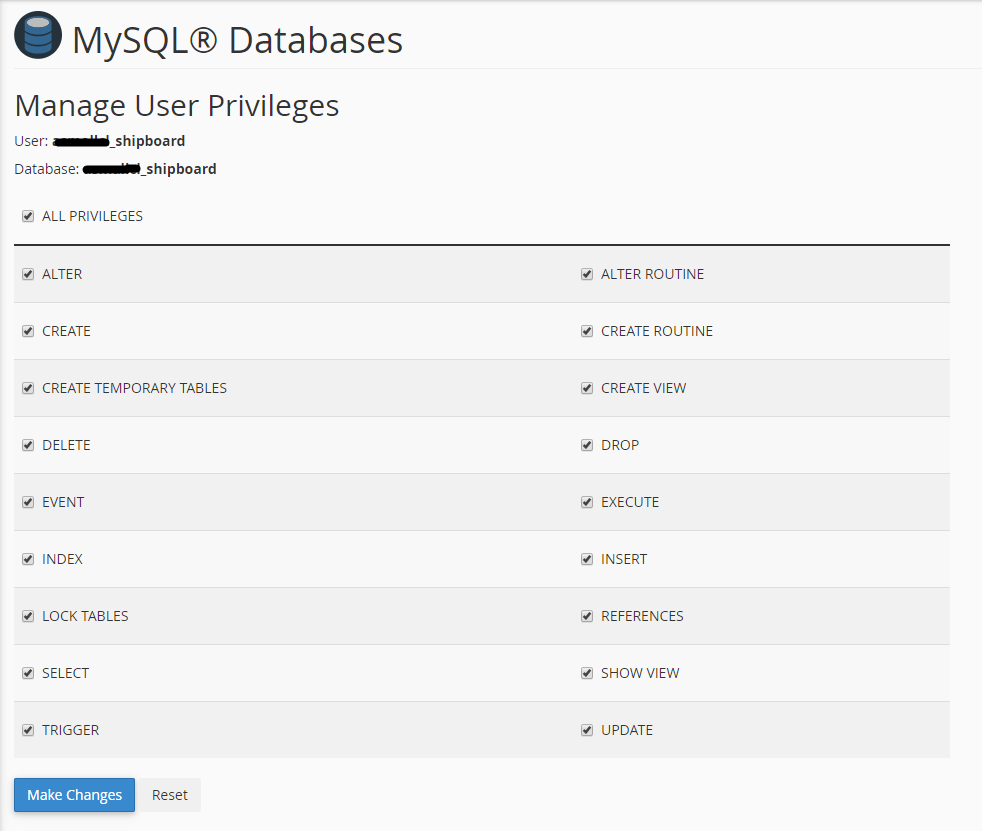
- Now you need to create a new user. On the same page go to create a new database user
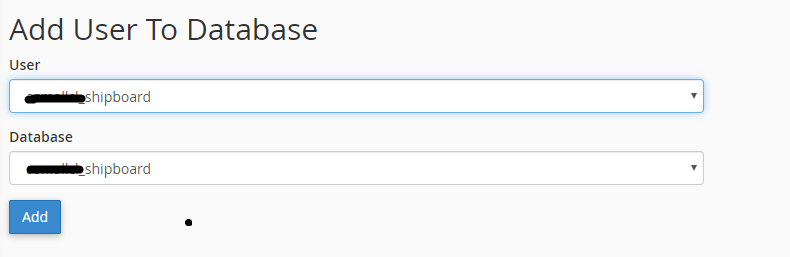
- Now add the user to the database
- And select full permissions on the database to that user
Uploading Files
On some operating systems, the dotfiles are hidden by default.
Before starting to upload the files, please make sure your file explorer has the option to
view hidden files turned on.
- After creating a database, Upload what's inside the
main_file folder on the web root folder of your
domain. This folder is generally called public_html, html, or example.com, but depending on your server's
configuration, it might be named differently.
Important Important Make sure that you have .env file in your folder.
Important Make sure that .htaccess file got copied properly from the
download to your server.
Installation Wizard
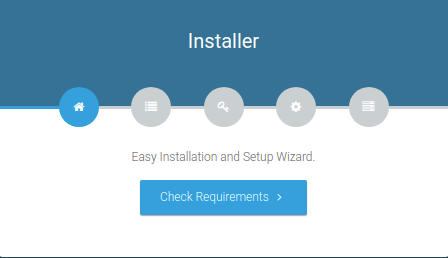
Go to your website address, then you'll see an installation wizard. To open the installer.
Visit
yourdomain.com/install
Now the installer will show up.The First screen will be Welcome Screen
Note : If you are not able to access the website by accessing
yourdomain.com/install, but you are able to access it via yourdomain.com/index.php/install,
this means that you probably don't have Apache mod_rewrite installed and enabled.
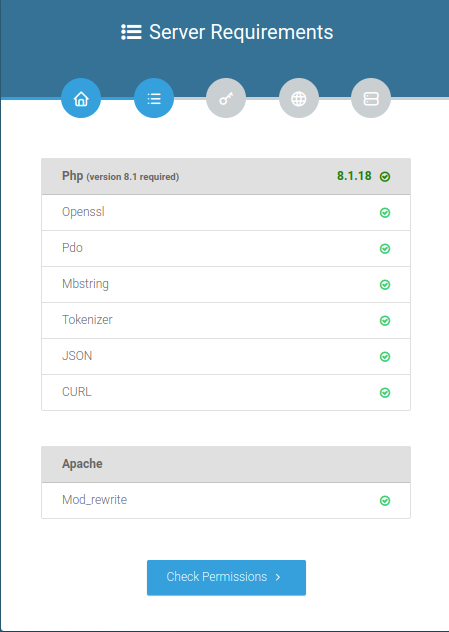
System Requirements
After clicking on "Check requirement" button, you will be redirected to System Requirements
step during the installation wizard, System Requirements.
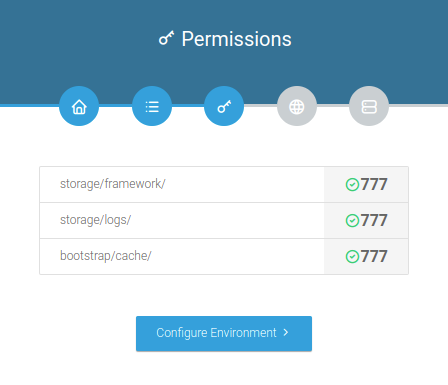
Directory Permissions
After successfully enabling and installing all required PHP extensions, next step is to set
the appropriate permissions for some system folders that shows on below picture.
For giving permissions please open your terminal window. and type command sudo chmod 777 directory_name
for example sudo chmod 777 app
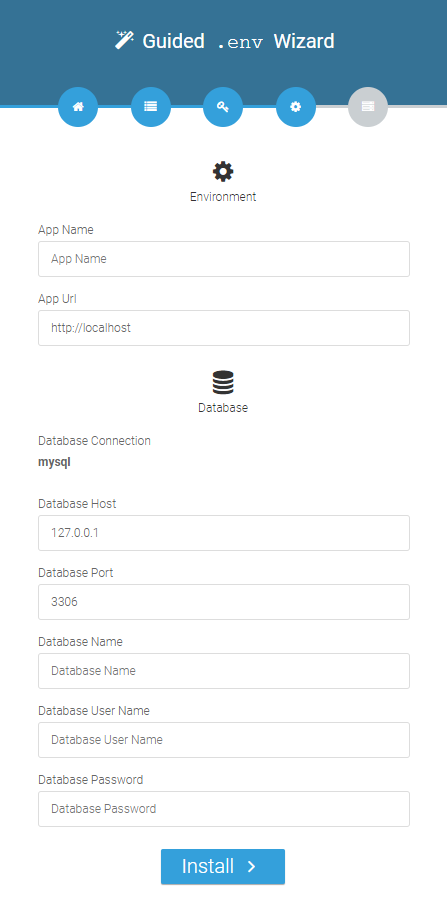
Database/Environment Setting
You have to fill in your database credentials
Exit
The last step is exit step.
Note : After successful installation reset .env in permission and change to
664.
Default Login
Now You are ready to login with below detail.
Admin Login Detail
superadmin@example.com / admin@1232
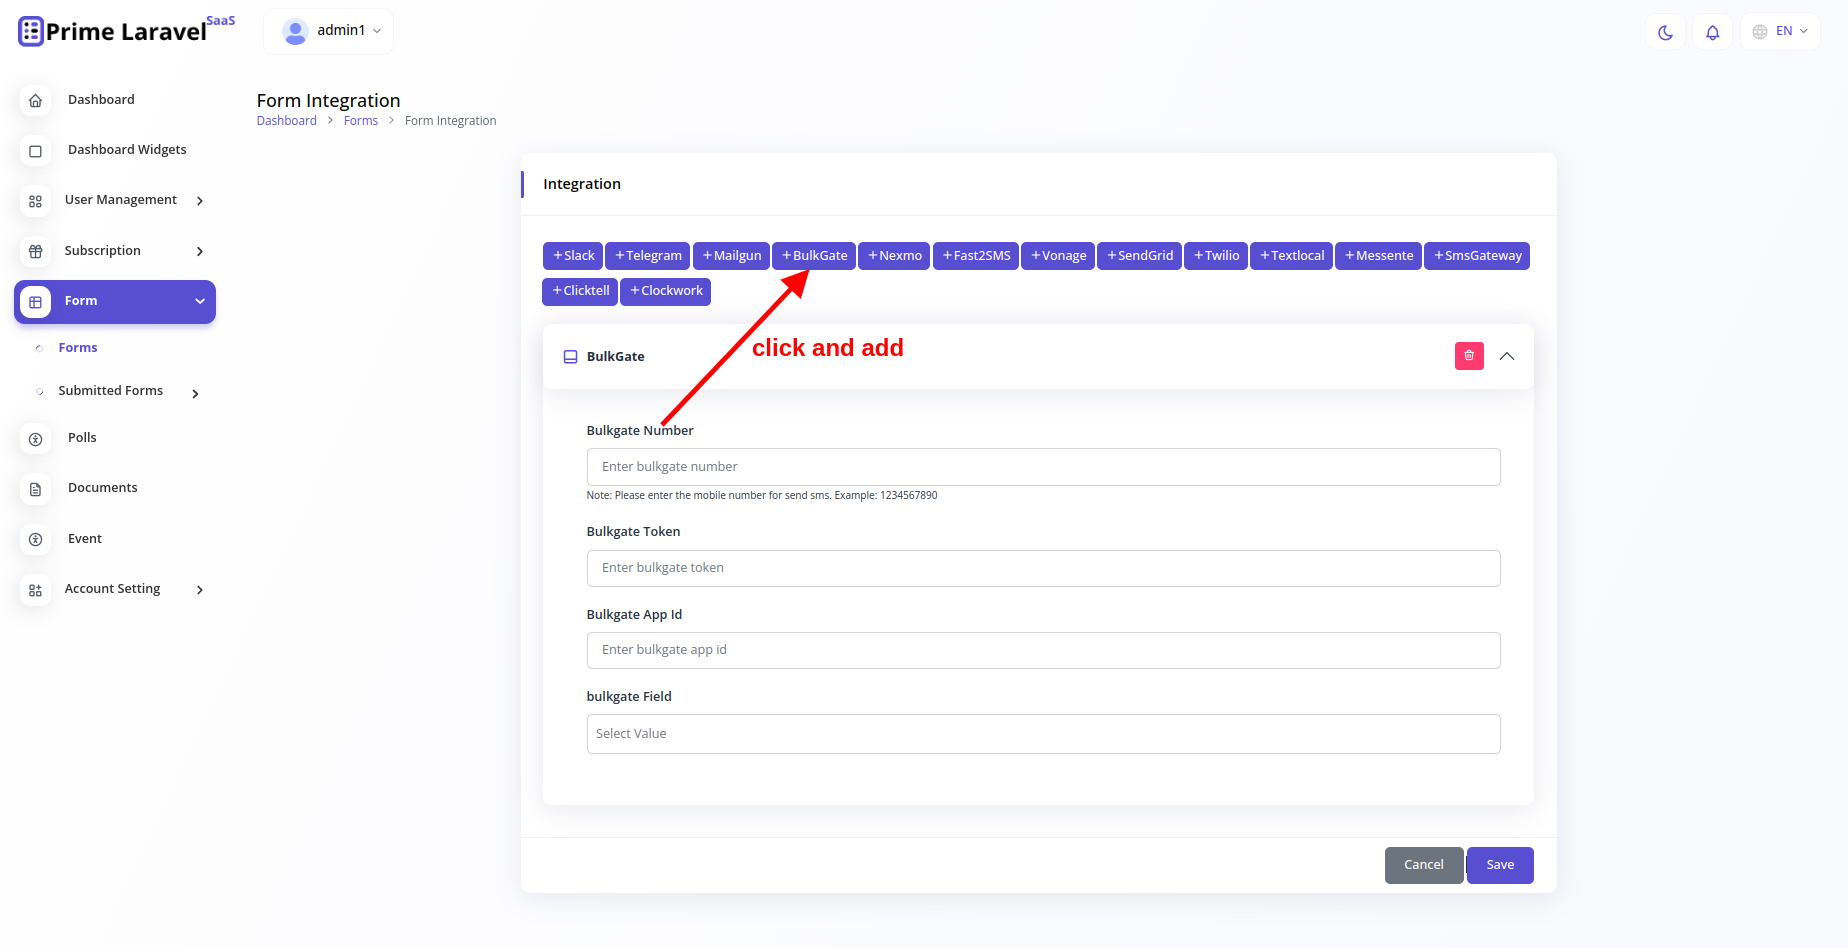
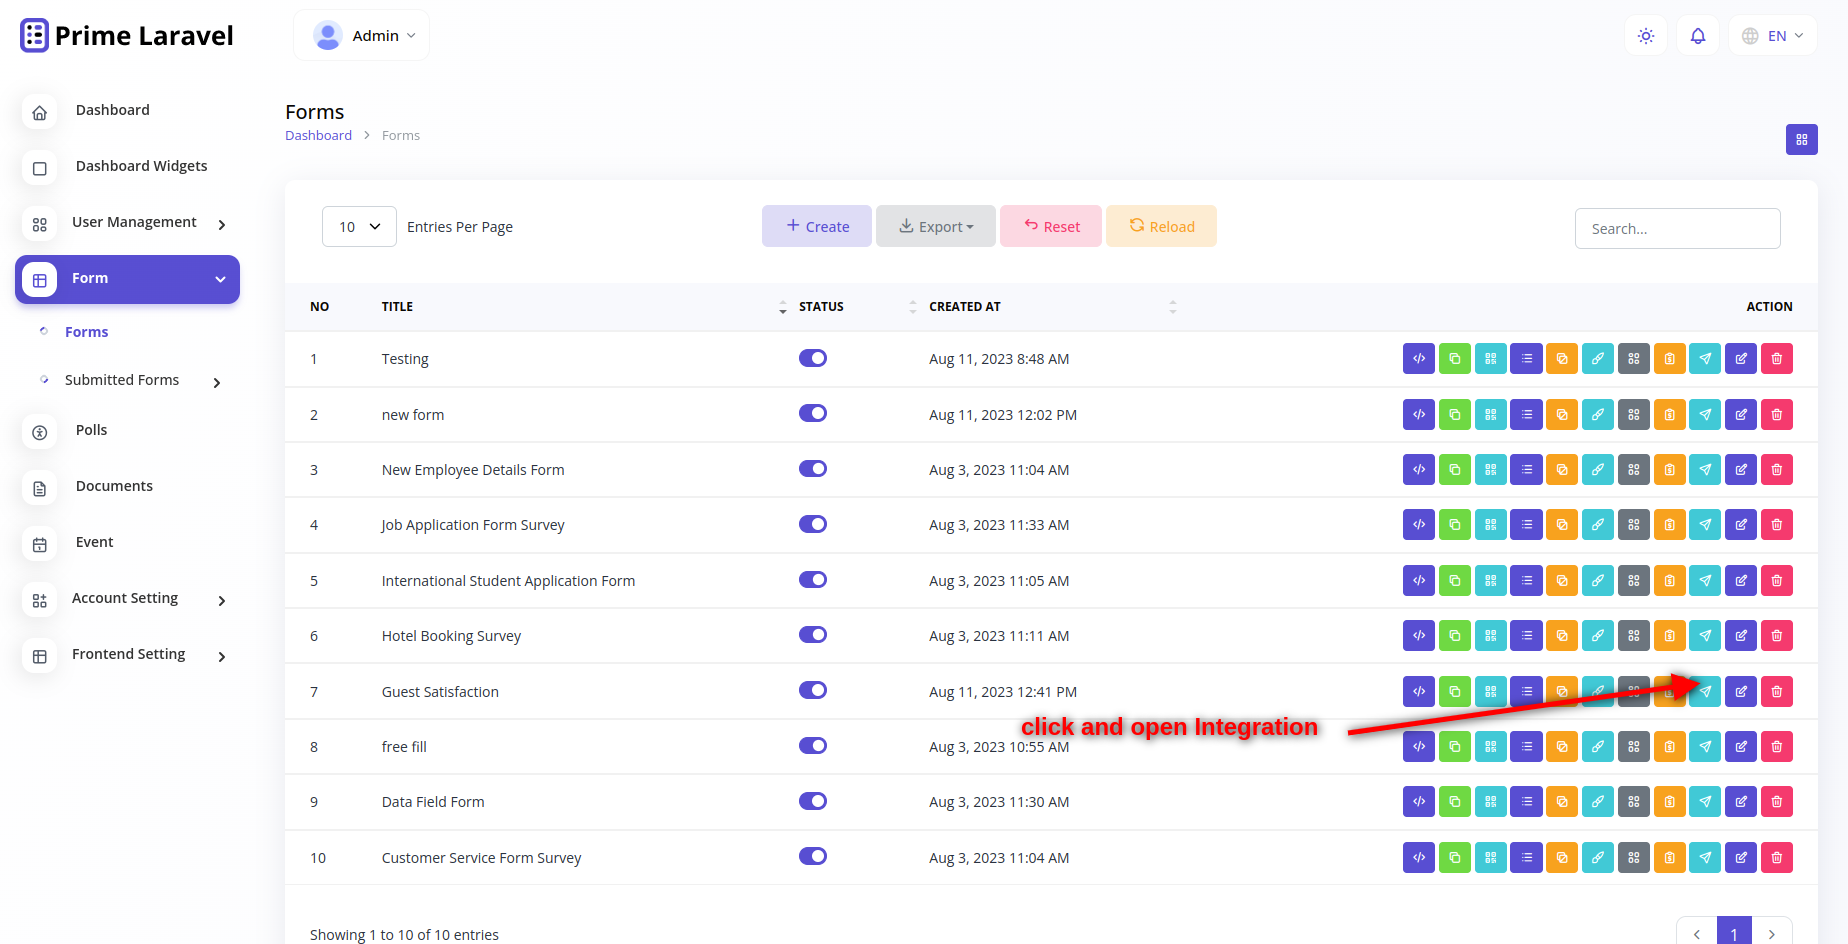
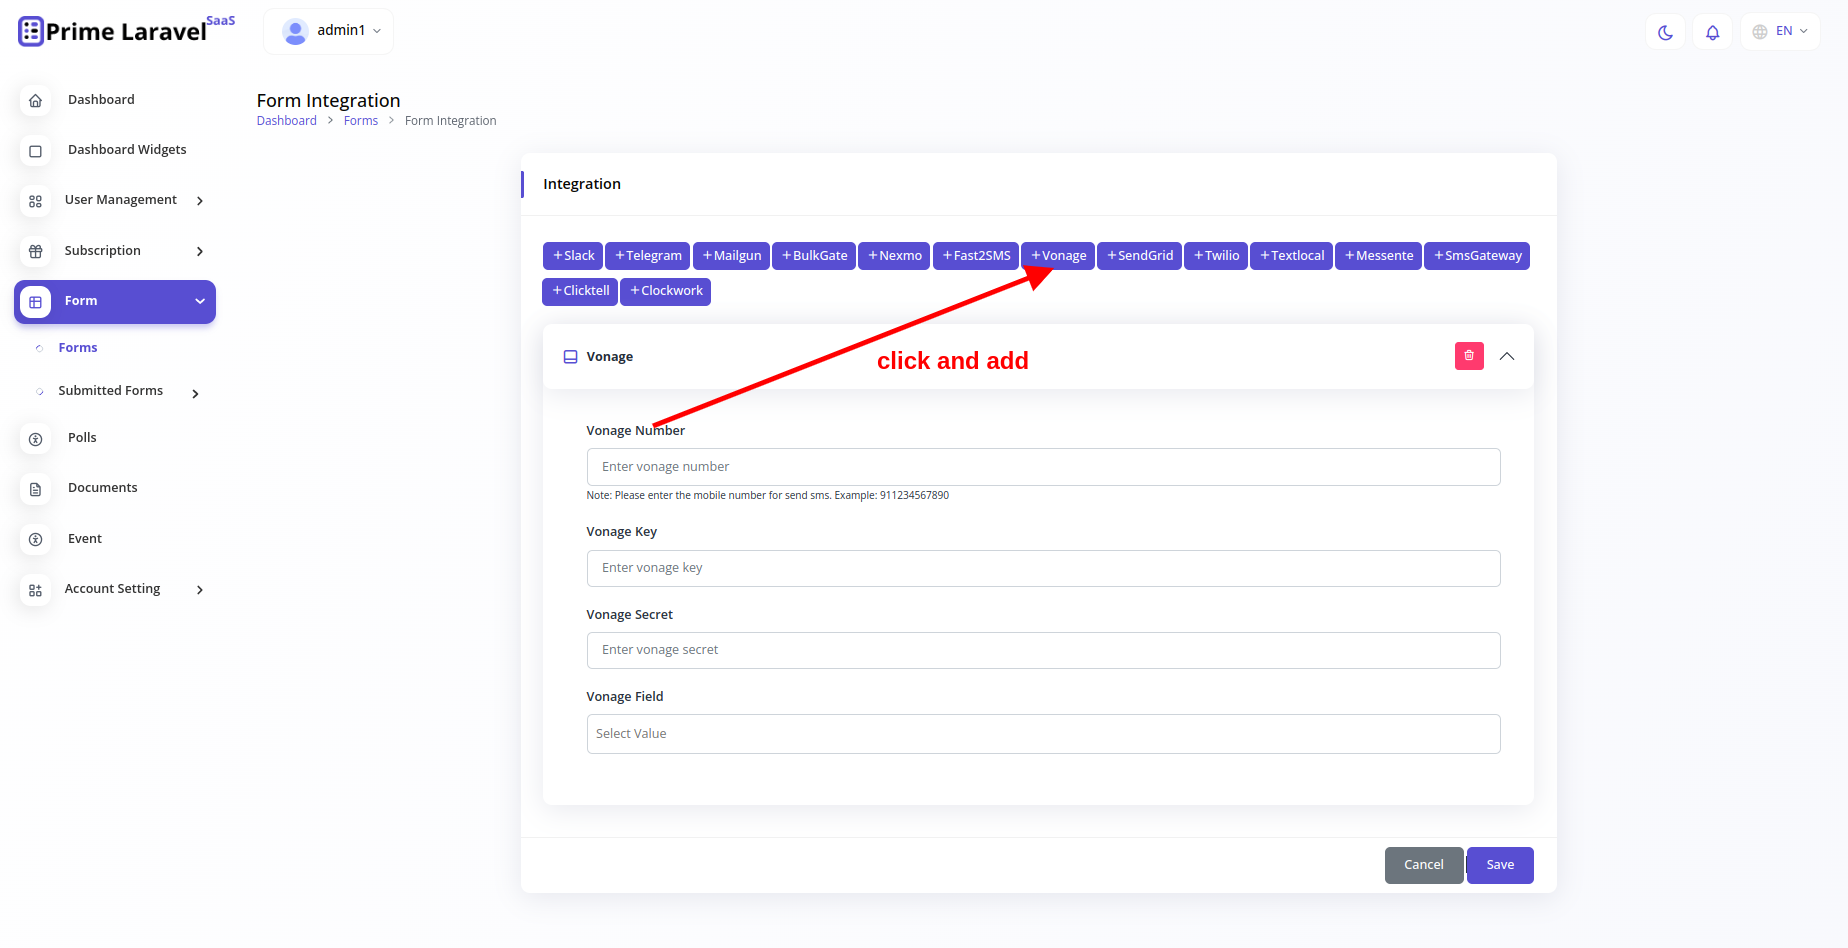
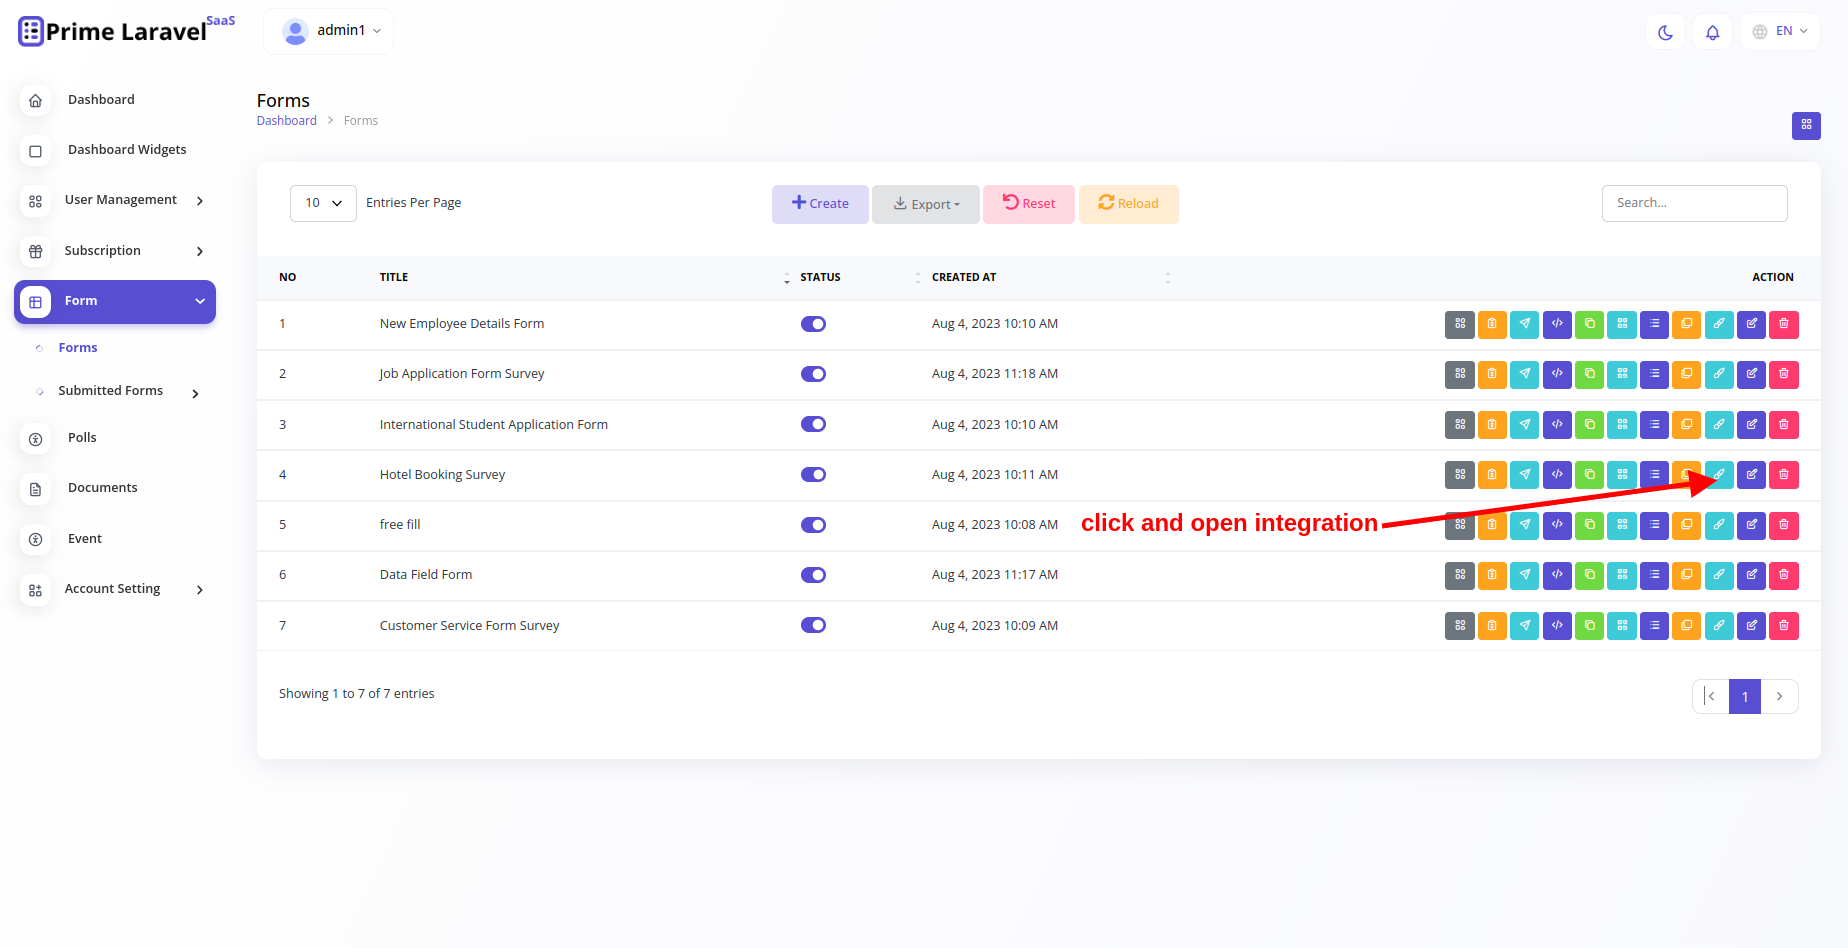
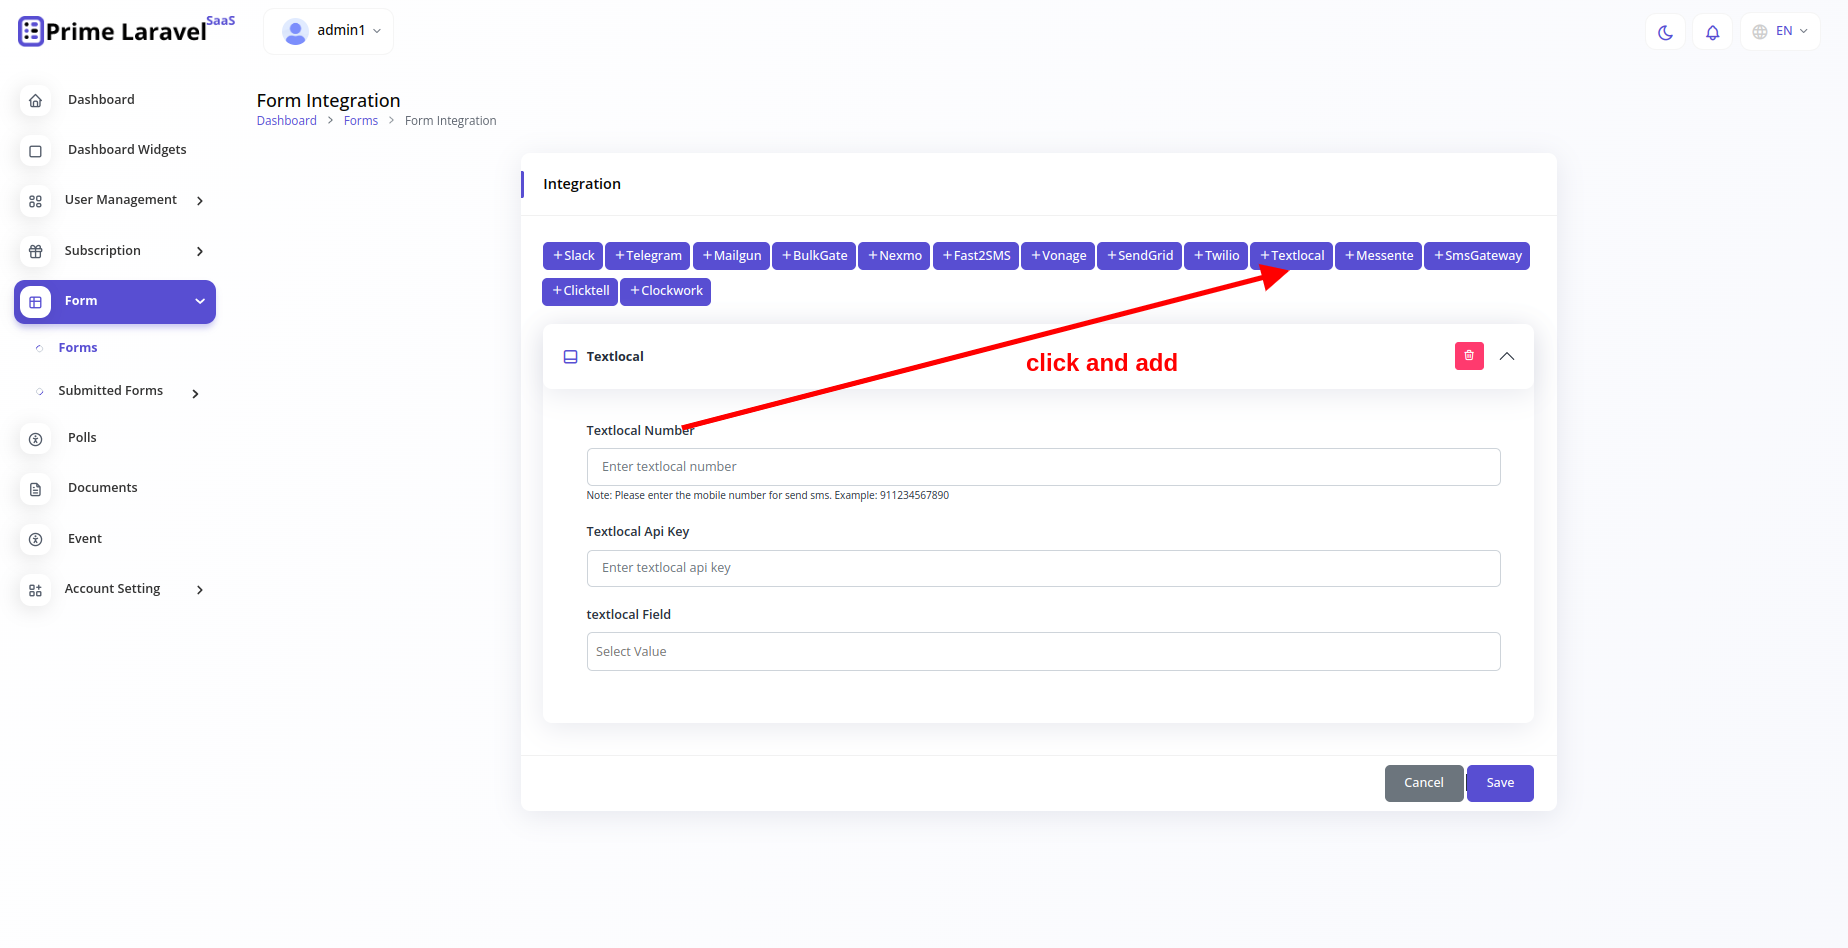
Integration
It comes with prebuilt integration. Follow these steps to step guide on
your
web app.
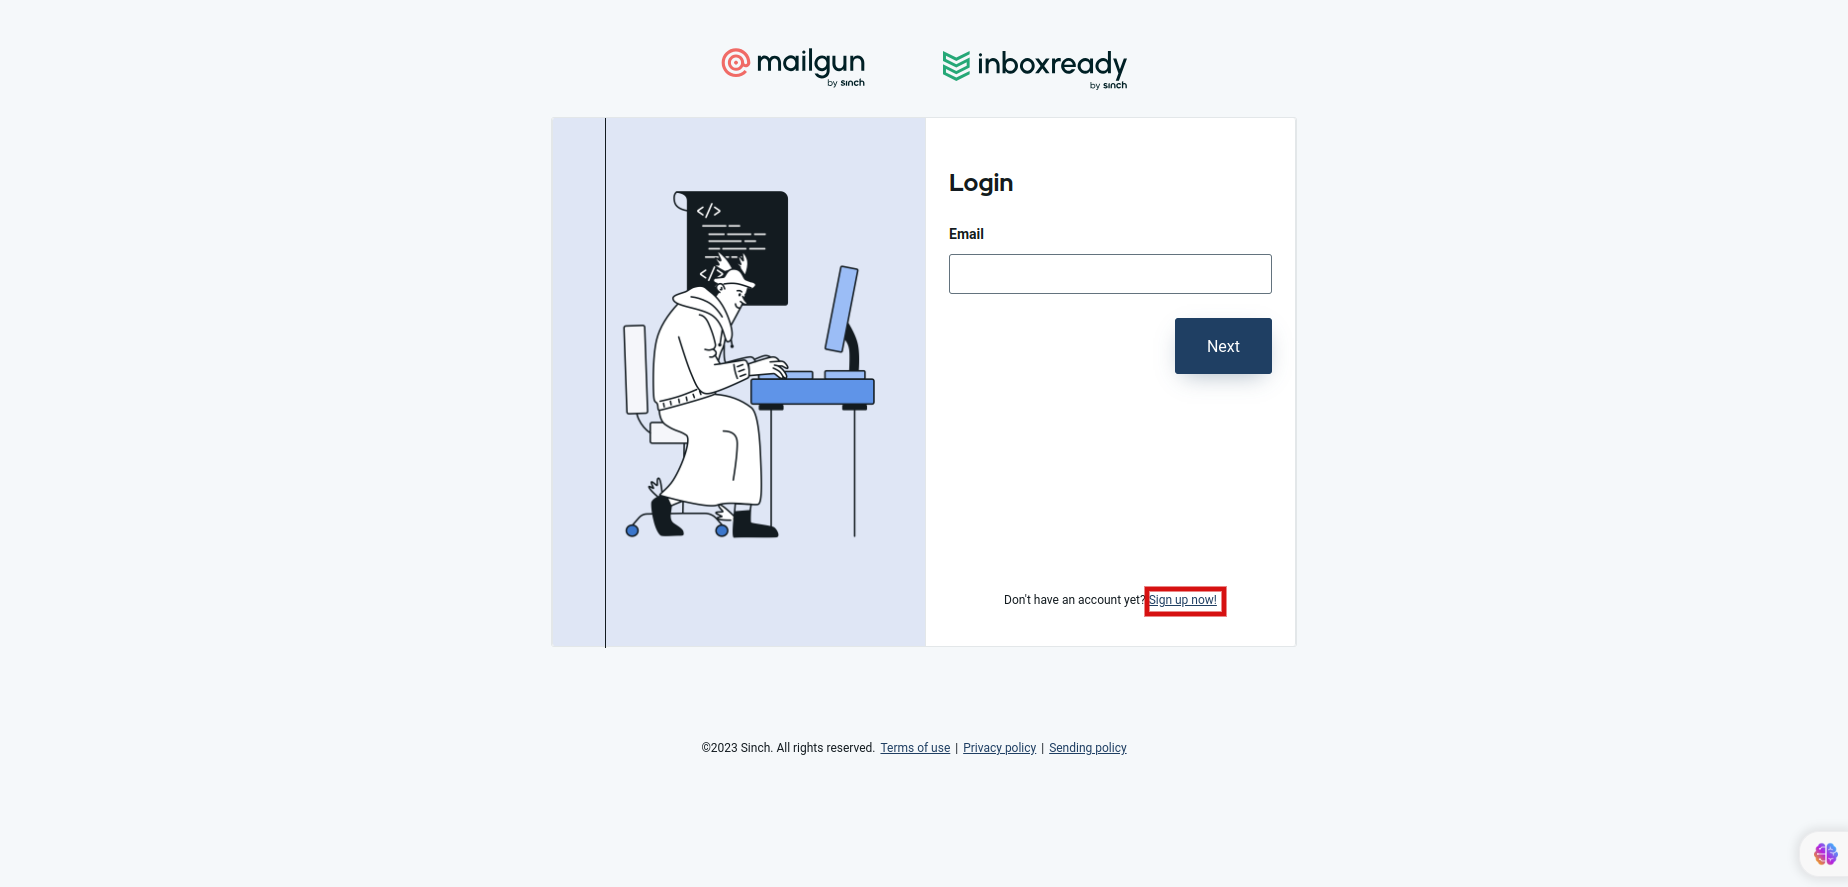
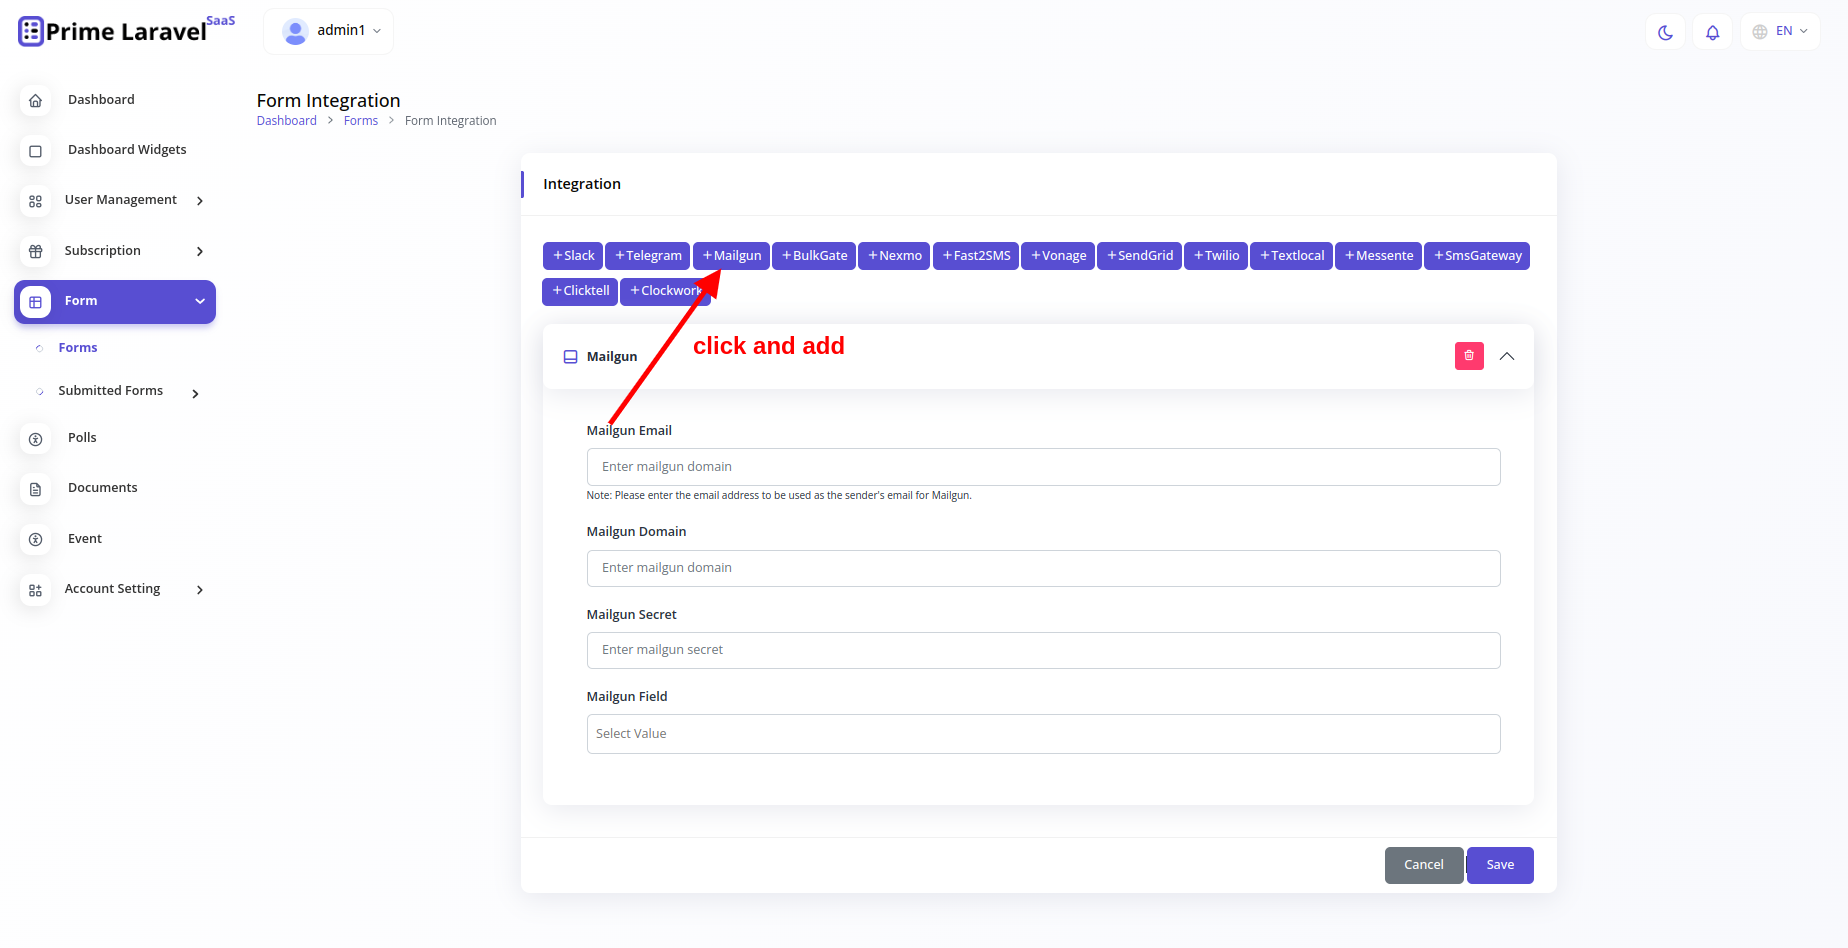
Mailgun Mailer
first complate your login and signup in https://login.mailgun.com website.
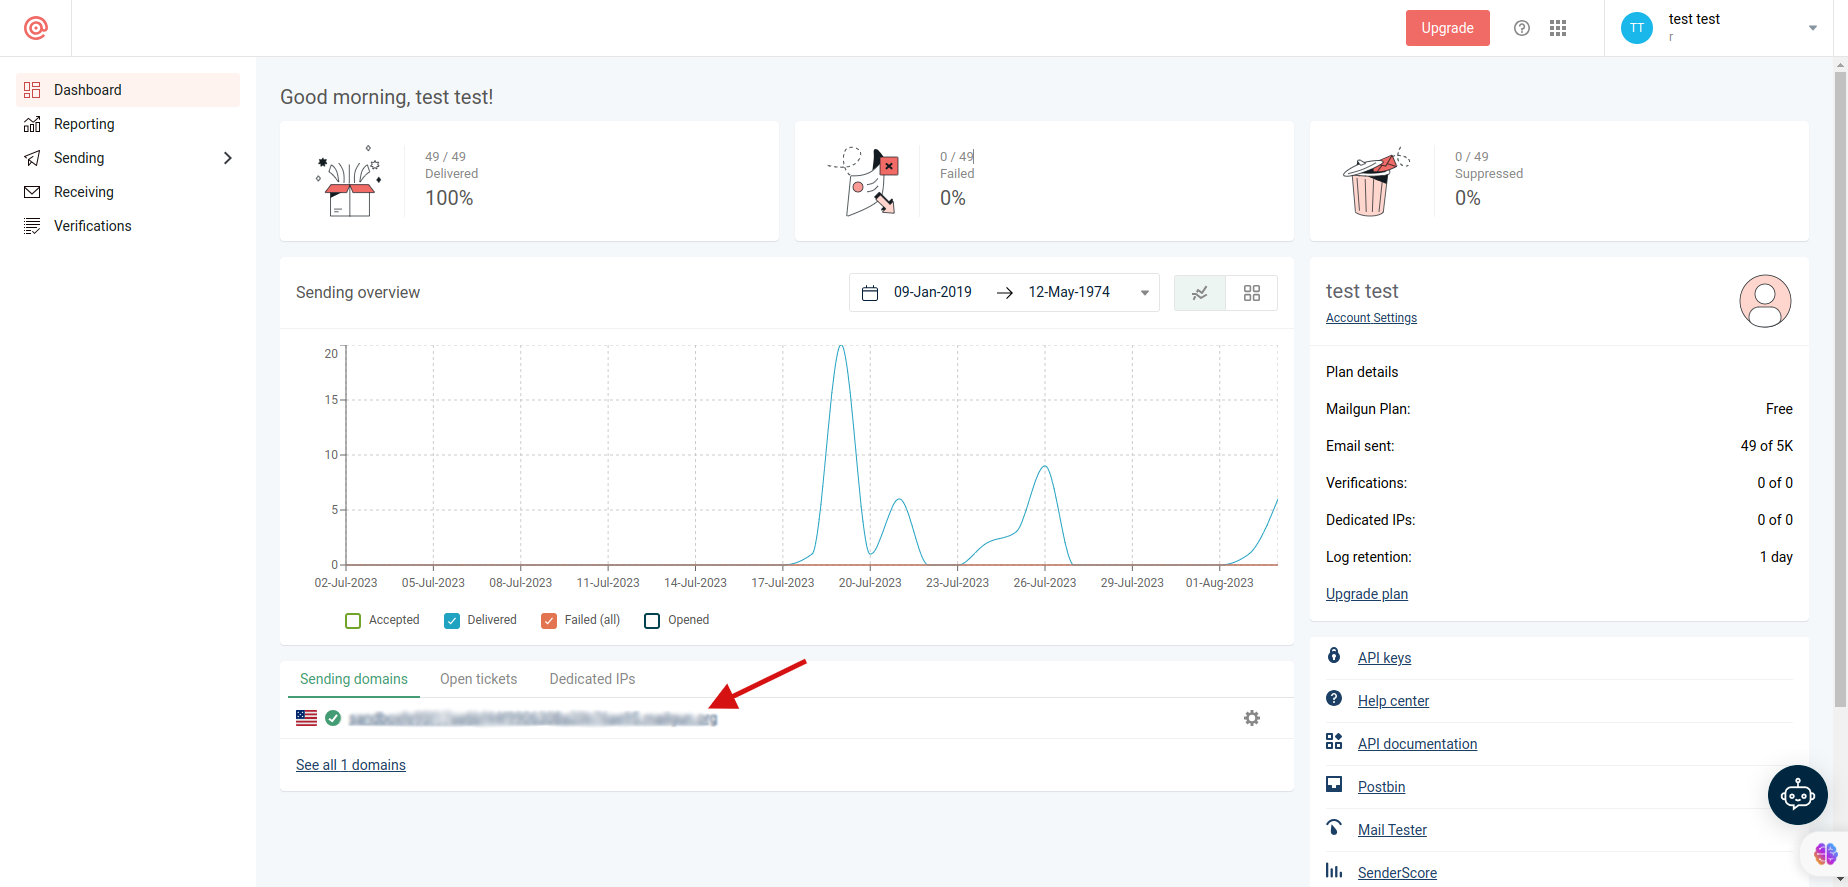
How to get "mailgun domain" ?
After Login goto "dashboard" and get your "mailgun domain"
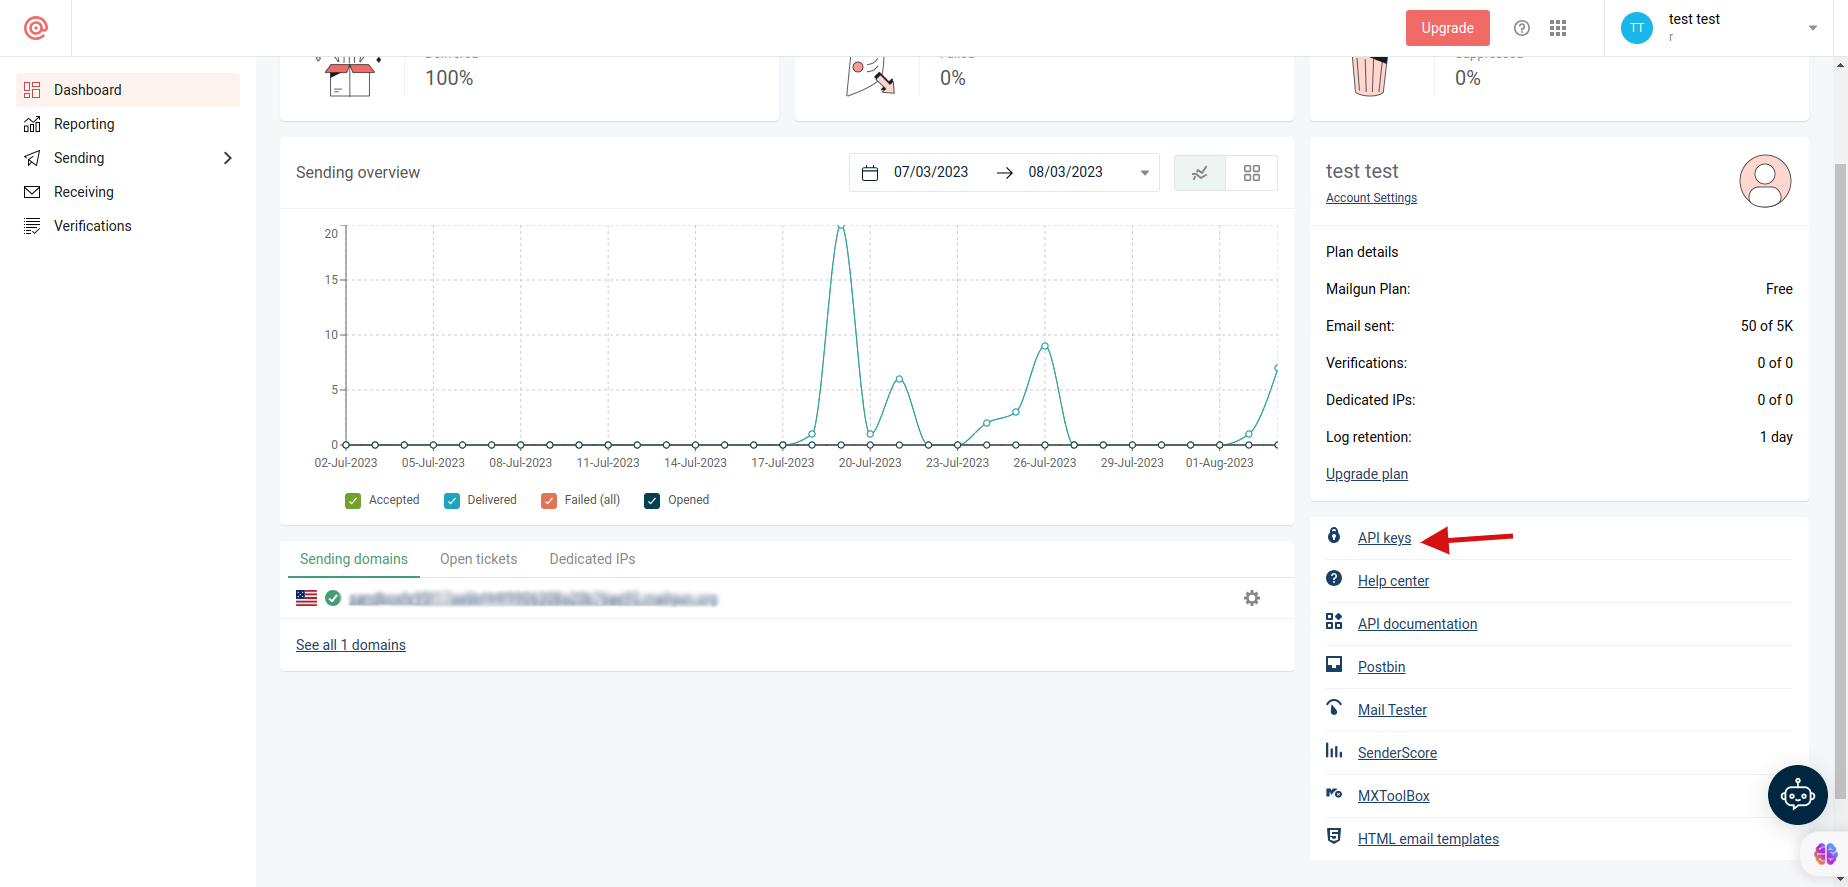
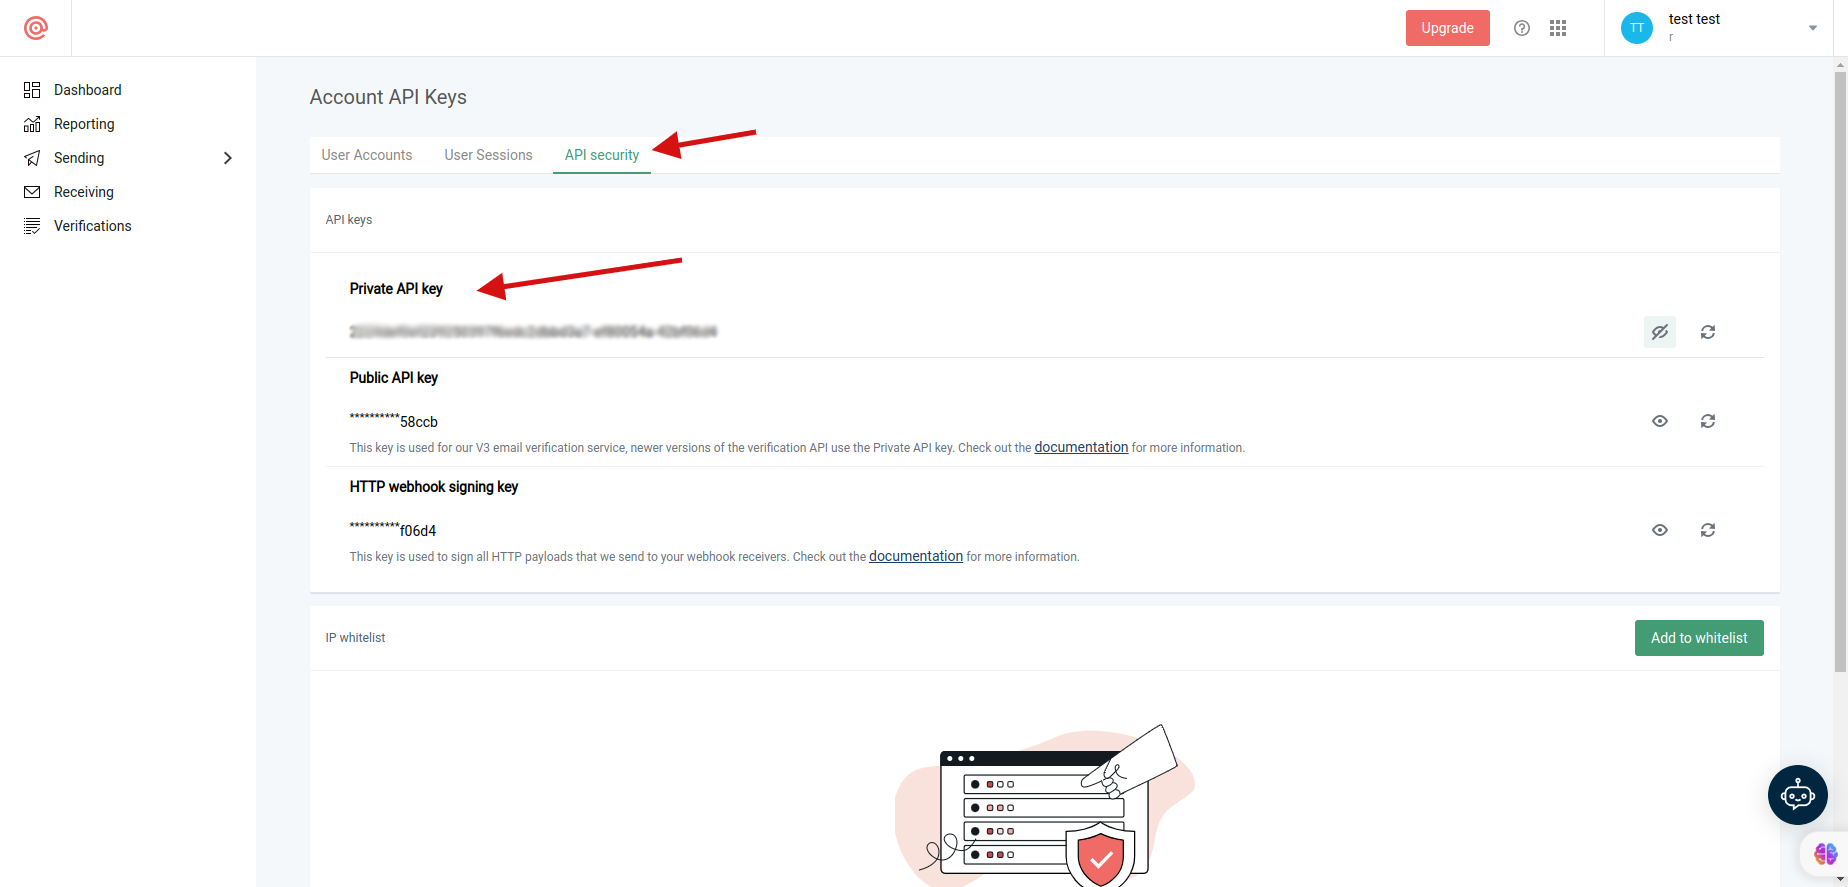
How to get "mailgun secret" ?
Goto "dashboard" and click "api keys".
then goto "API Security" and get "mailgun secret".
copy "Private Api Key" and get "mailgun secret".
Mailgun Email : The email address associated with your Mailgun account. It represents the
sender's address for emails
sent through the Mailgun service.
Mailgun Domain : The domain configured in your Mailgun account, used to identify the domain
from which your emails are
sent. This domain is often used in the "From" address of your emails.
Mailgun Secret : A secure authentication key or secret token provided by Mailgun. It's used
to authenticate your application
when sending emails via the Mailgun API.
Mailgun Field : This likely refers to an additional parameter or customization option
specific to your integration with
Mailgun. It could involve settings, options, or metadata used to customize the behavior or
content of your emails, such as
adding tags, tracking options, or custom headers.
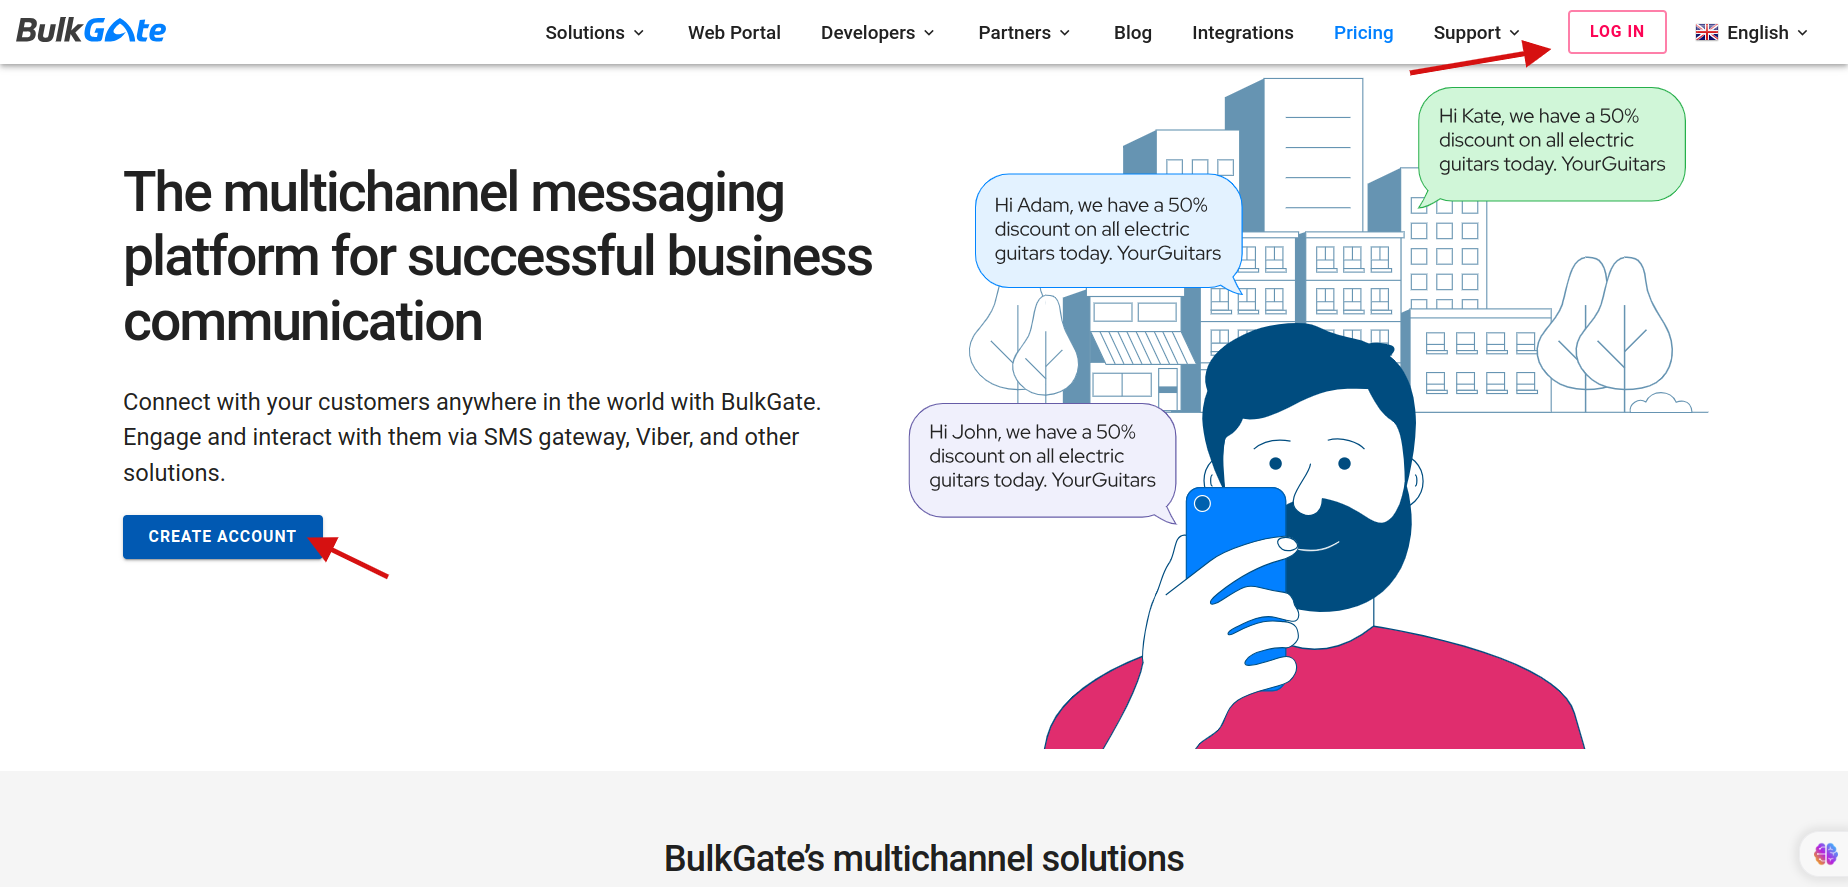
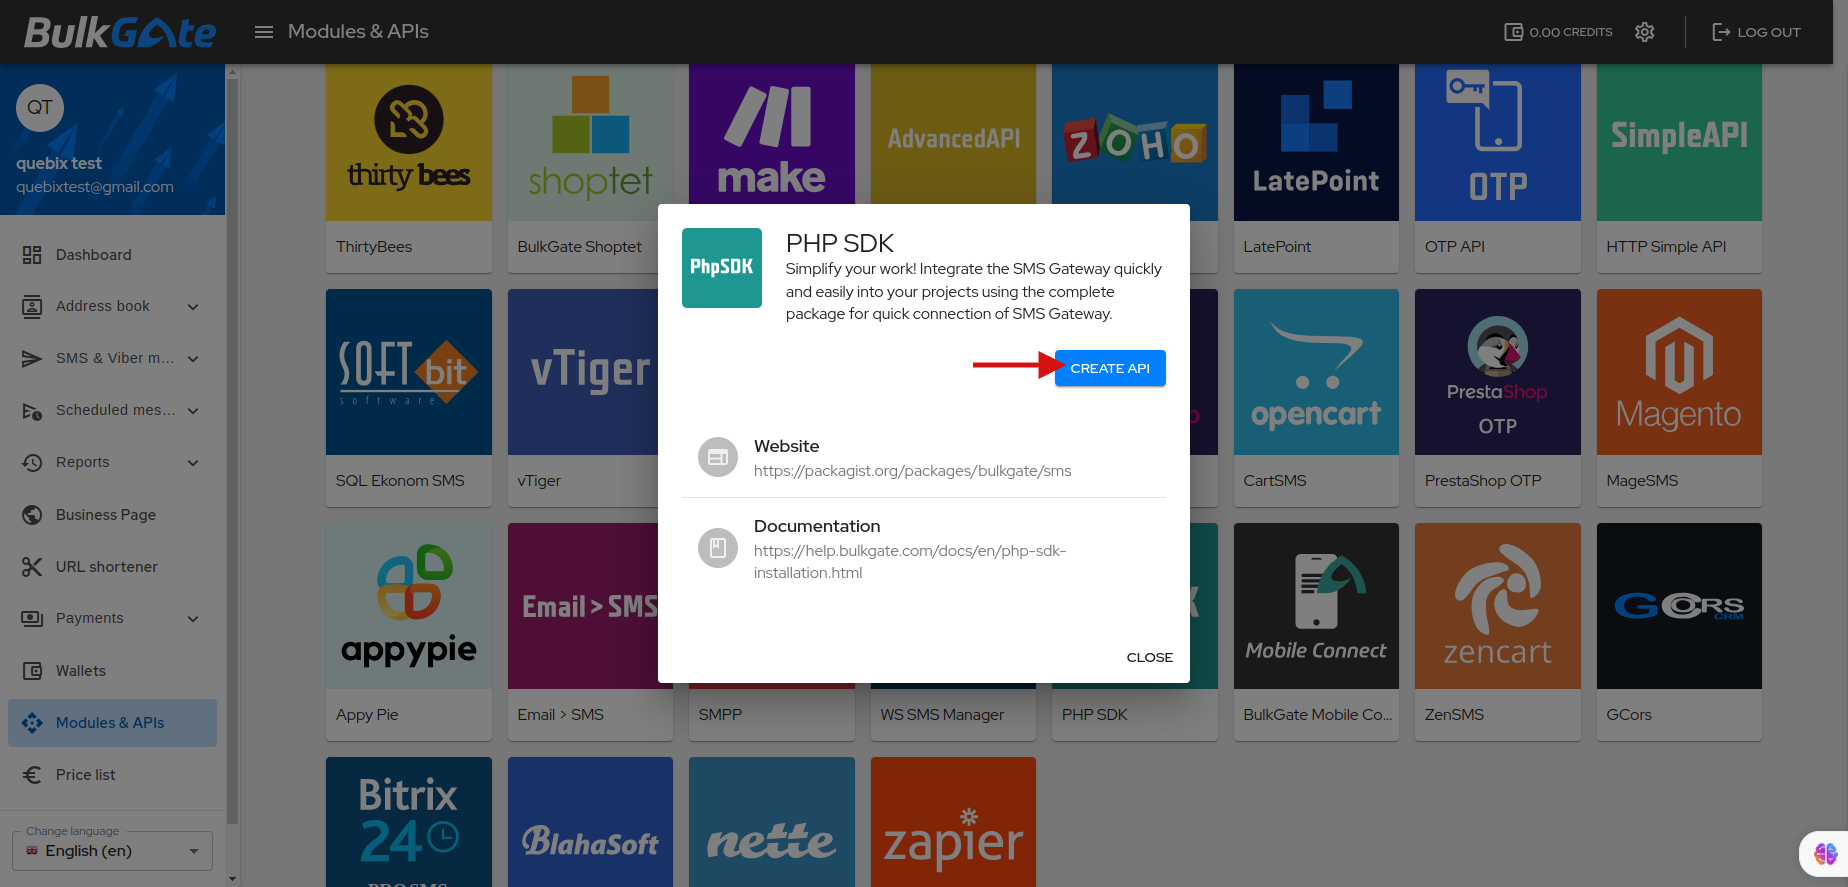
Bulkgate SMS
first complate your login and signup in https://www.bulkgate.com website.
Note: sign up time "Affiliate ID" is not required.
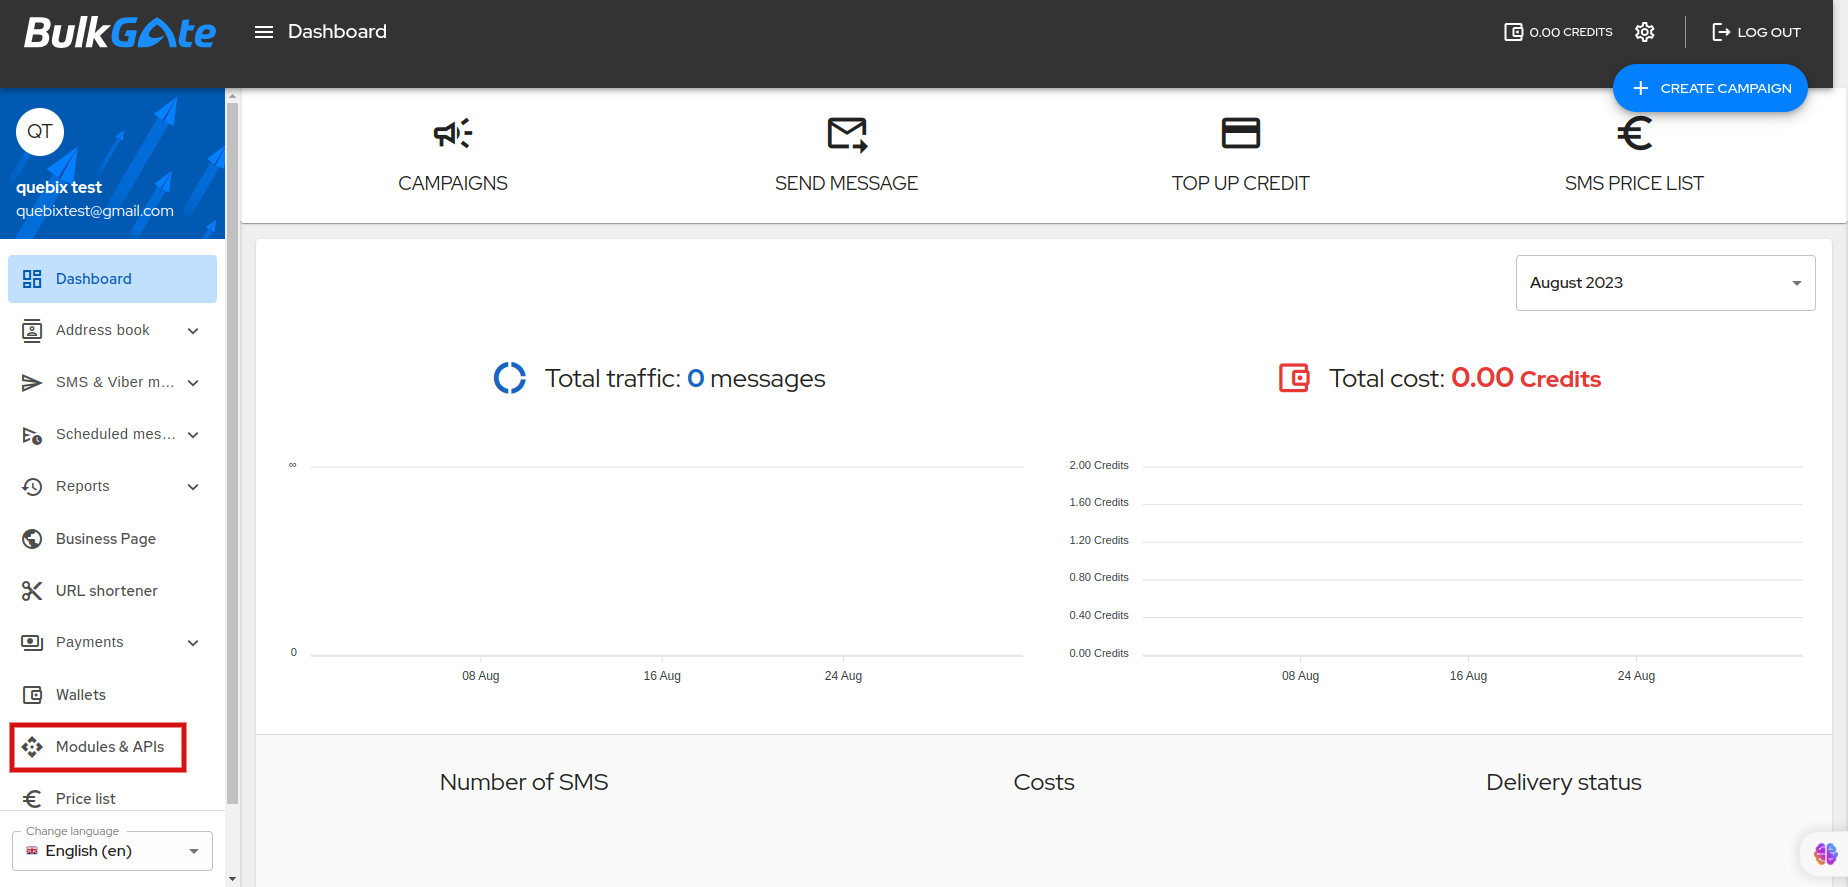
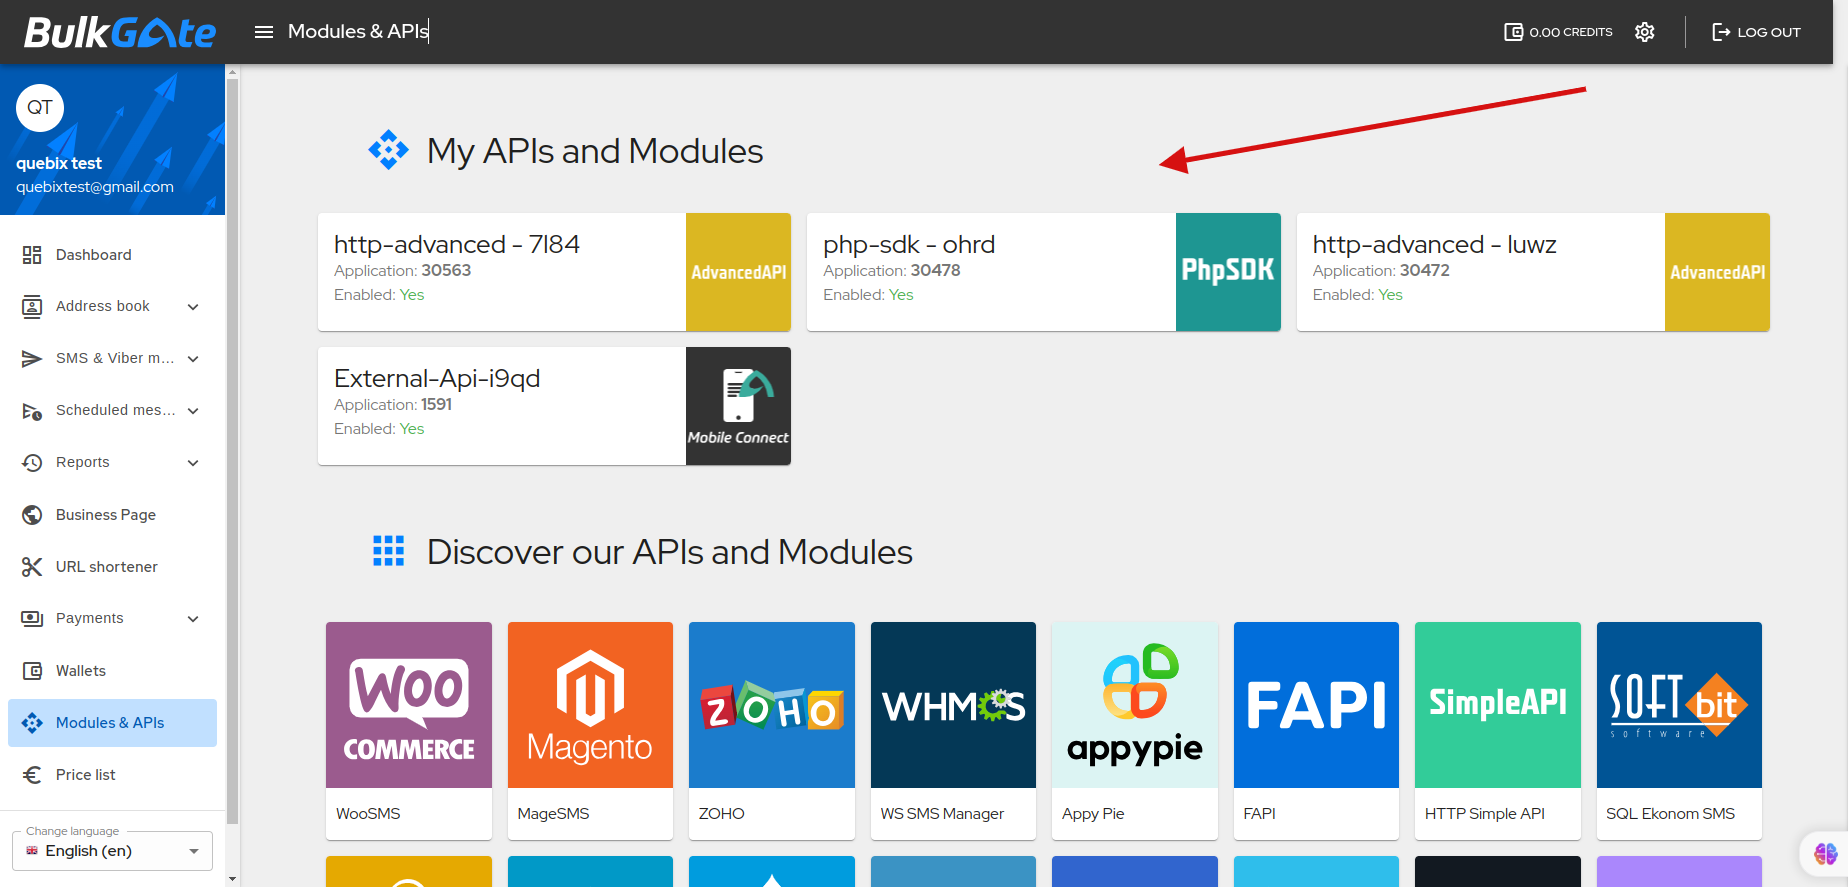
After login goto "modules & APIs".
Select Your "web app" and click "CREATE API".
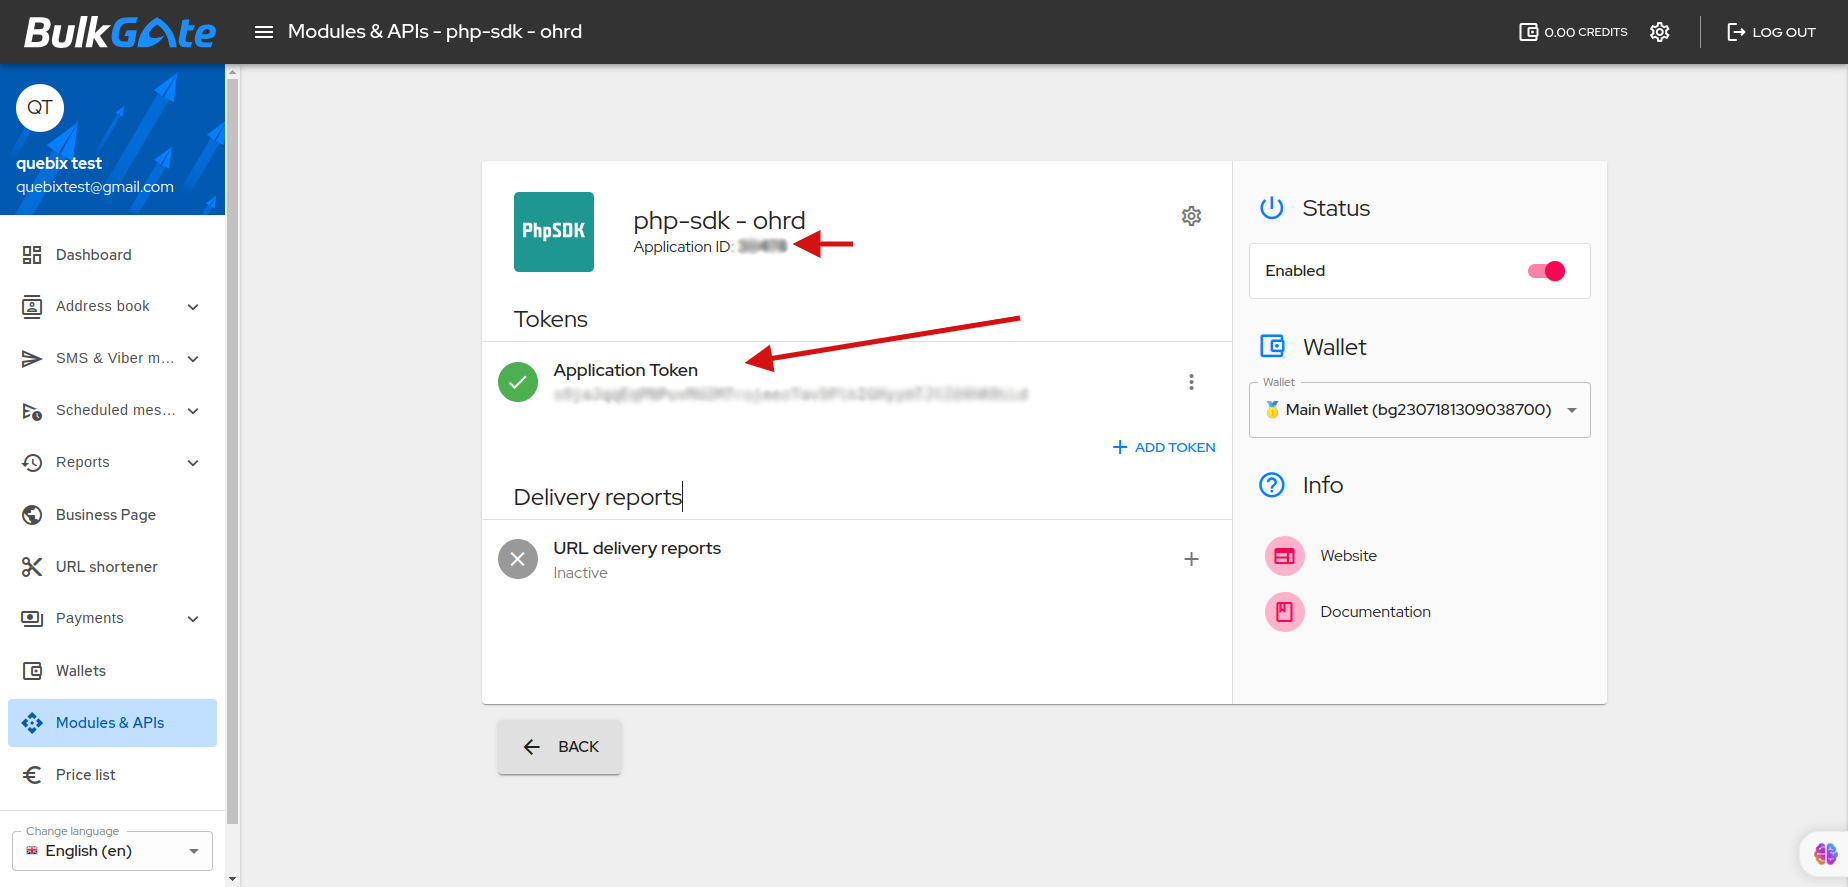
Click "created" api module.
Then get your "Bulkgate Token" and "App ID".
Bulkgate Number : The phone number associated with the Bulkgate service. It represents the
recipient's phone
number for sending SMS messages.
Bulkgate Token : An authentication token provided by Bulkgate, used to authorize access to
their API. This token
allows your application to send SMS messages through the Bulkgate service.
Bulkgate App Id : An identifier for your application or integration provided by Bulkgate.
It helps identify your
usage of their services and might be required for authentication or tracking purposes.
Bulkgate Field : This likely refers to an additional parameter or customization specific to
your integration with
Bulkgate. It could involve settings, options, or metadata used to tailor the behavior or
content of your SMS messages,
such as delivery options, message templates, or scheduling.
Nexmo SMS
first complate your login and signup in https://developer.vonage.com/en/messaging/sms/overview
website.
After login get "Nexmo Key" and "Nexmo Secret".
Nexmo Number : The phone number associated with the Nexmo service. It typically represents
the recipient's phone number for
sending SMS messages.
Nexmo Key : An authentication key provided by Nexmo, used to authenticate your application
with their API. This key allows
your application to send SMS messages through the Nexmo service.
Nexmo Secret : The corresponding secret associated with the provided Nexmo Key. This secret
is used as part of the authentication
process to verify your identity when interacting with Nexmo's API.
Nexmo Field : This appears to refer to a field name within a form. It might be used to
indicate which field in a form contains
the phone number of the recipient for sending SMS messages. This could be part of your
integration to automate sending SMS
notifications based on form submissions.
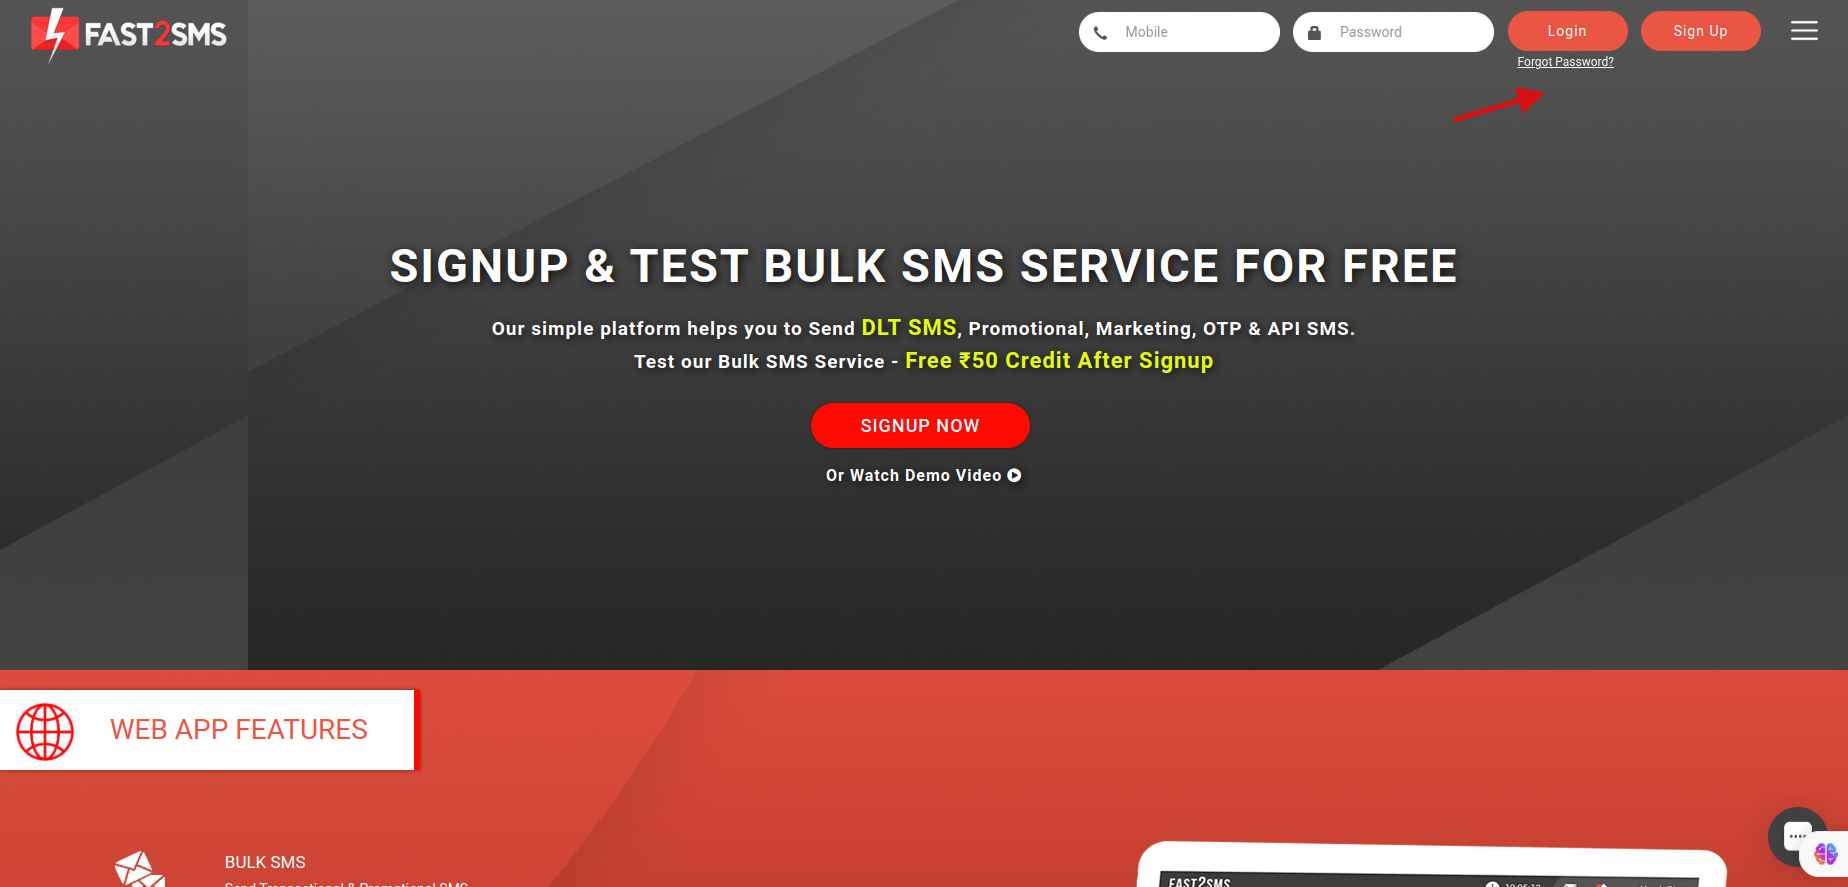
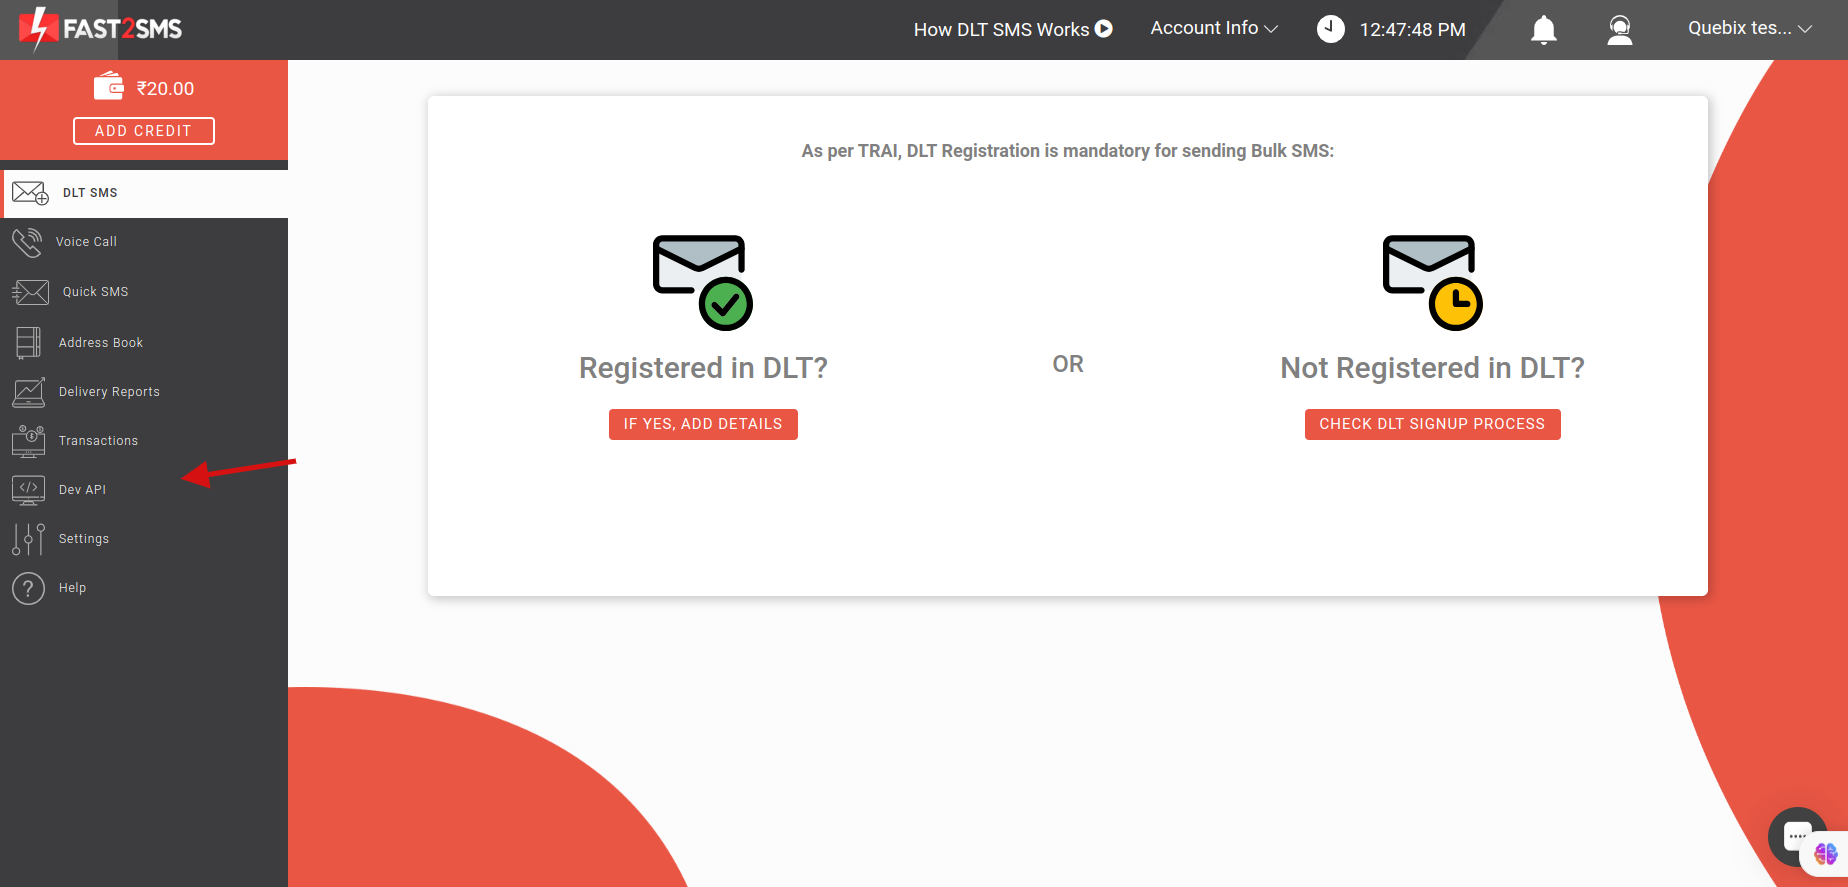
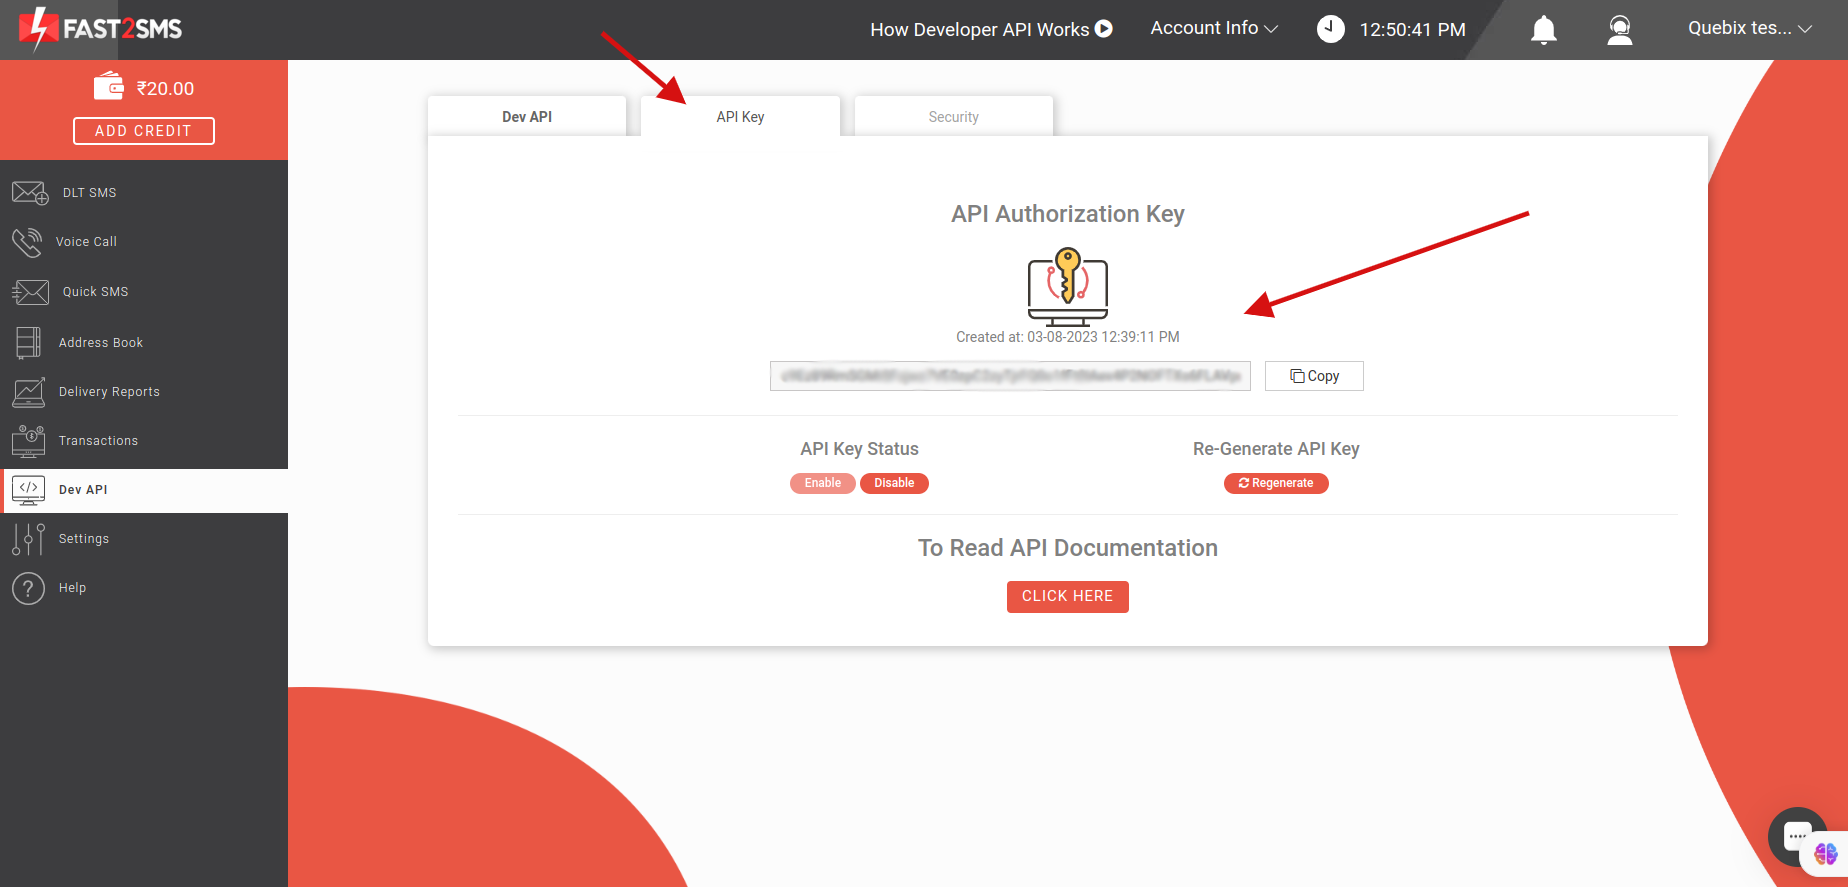
Fast2SMS
first complate your login and signup in https://www.fast2sms.com
website.
After login goto "Dev API".
Then goto "API Key" and get your "Fast2SMS Api Key".
Fast2SMS Number : The phone number associated with the Fast2SMS service. It typically
represents the recipient's phone number for
sending SMS messages.
Fast2SMS Api Key : An authentication key provided by Fast2SMS, used to authorize access to
their API. This key allows your application
to send SMS messages through the Fast2SMS service.
Fast2SMS Field : This likely refers to an additional parameter or customization specific to
your integration with Fast2SMS. It could
involve settings, options, or metadata used to customize the behavior or content of your SMS
messages, such as message templates, sender
IDs, or other features.
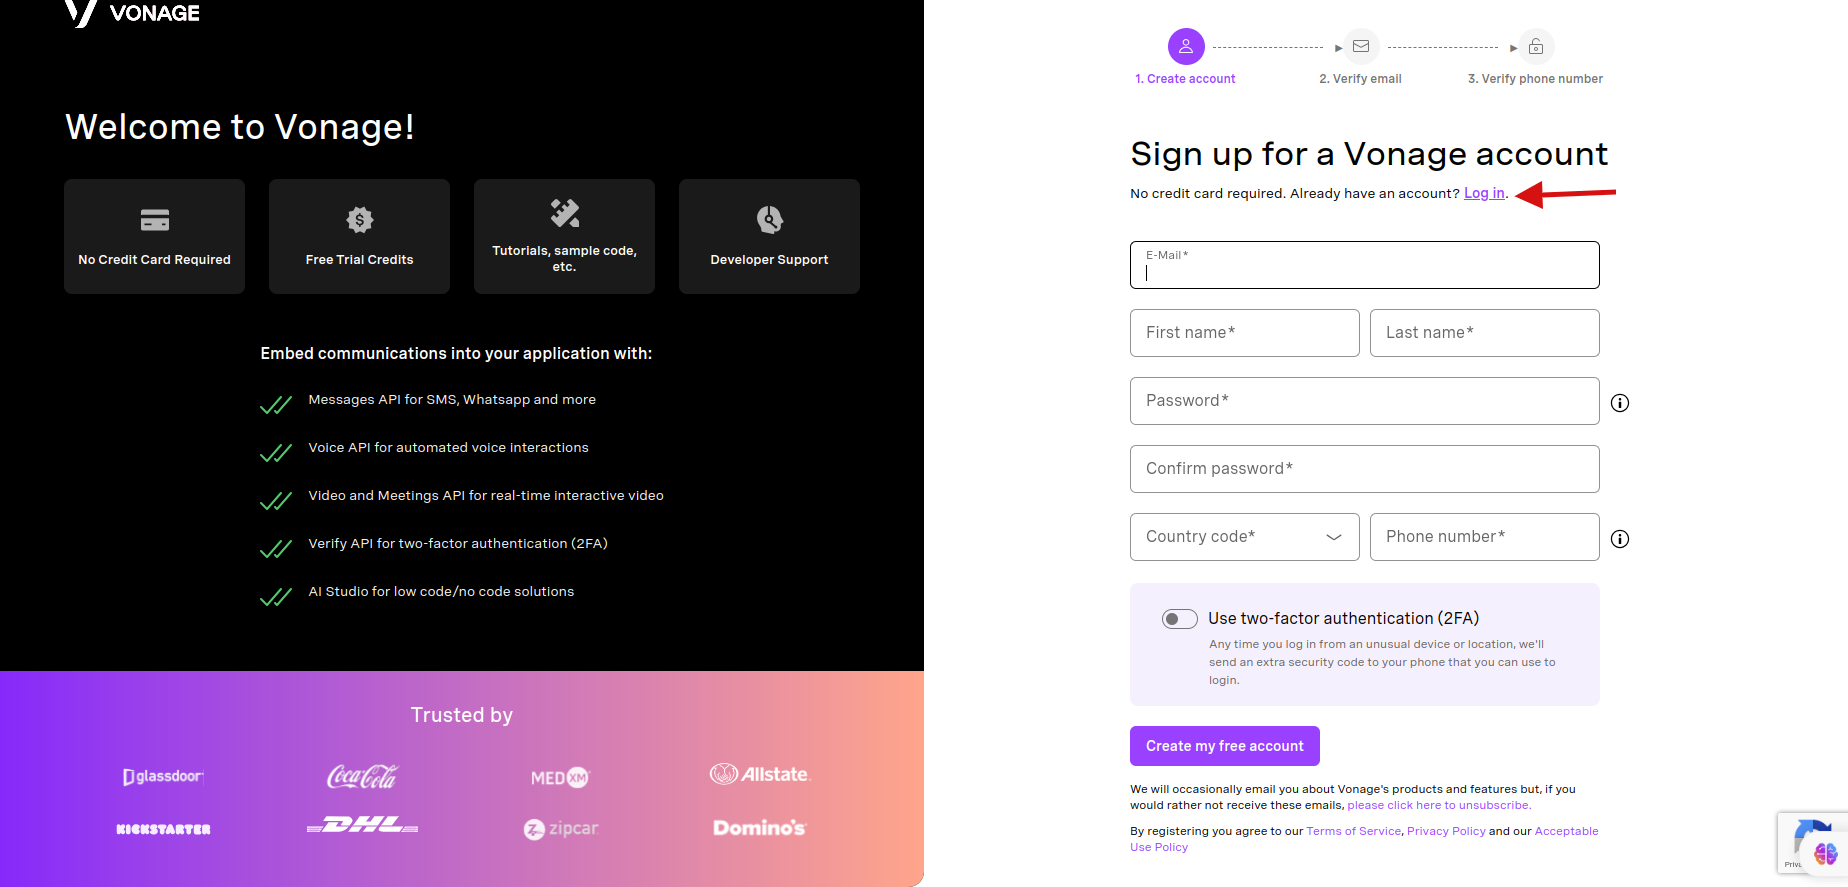
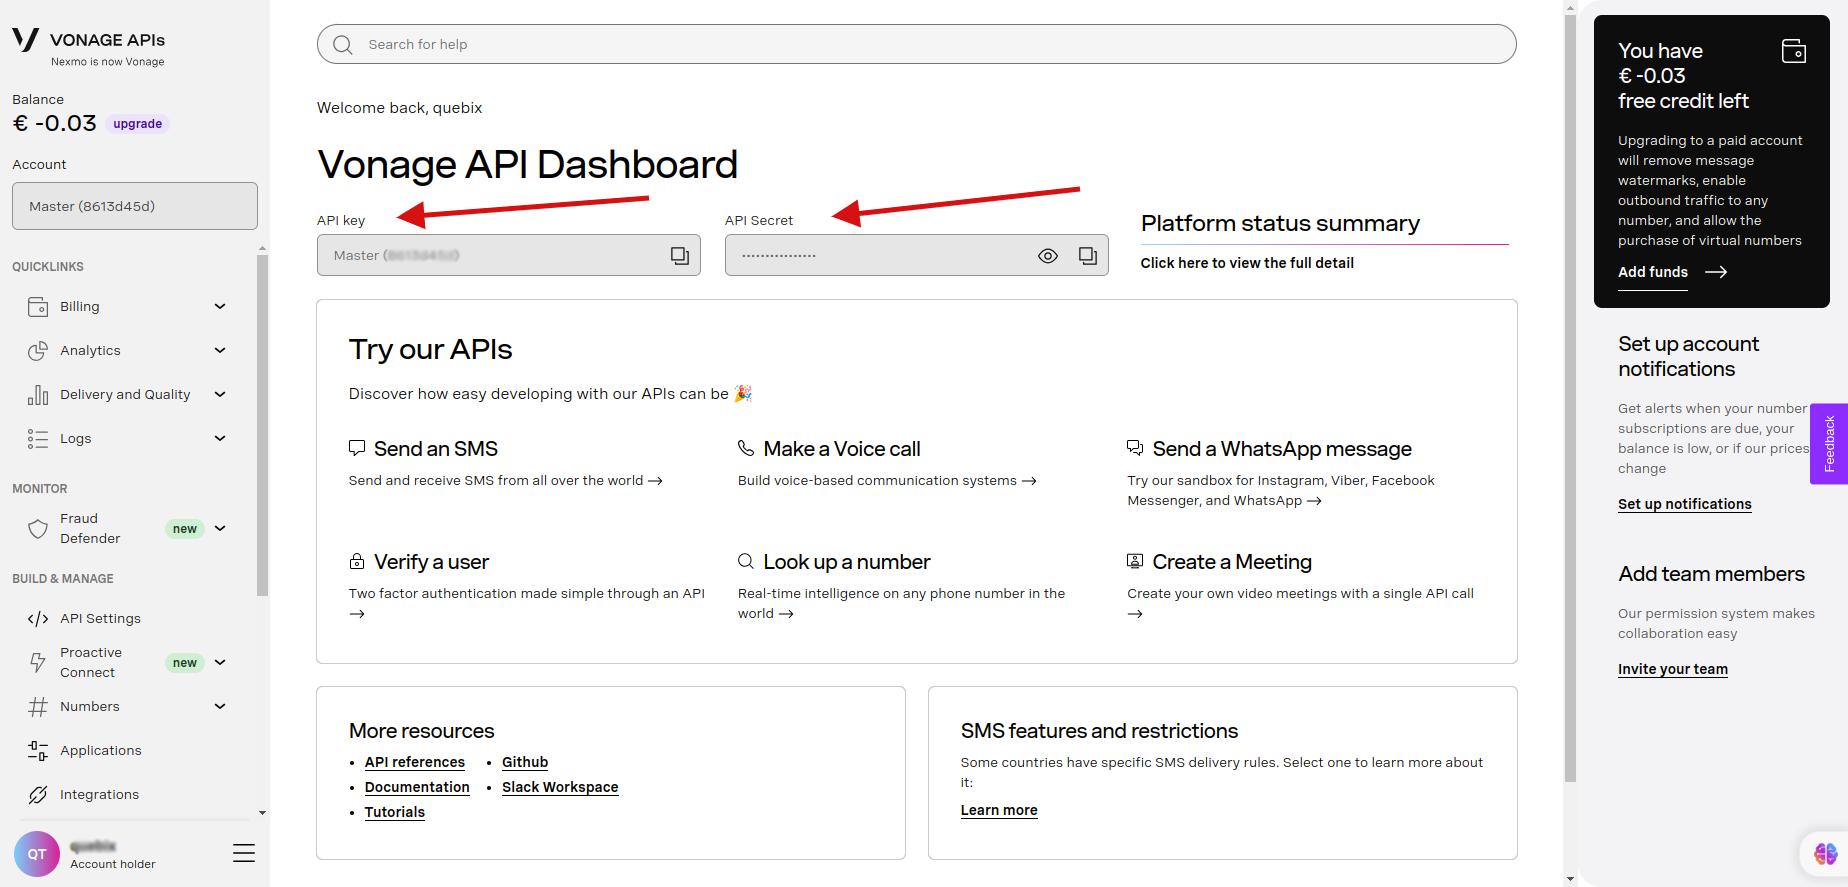
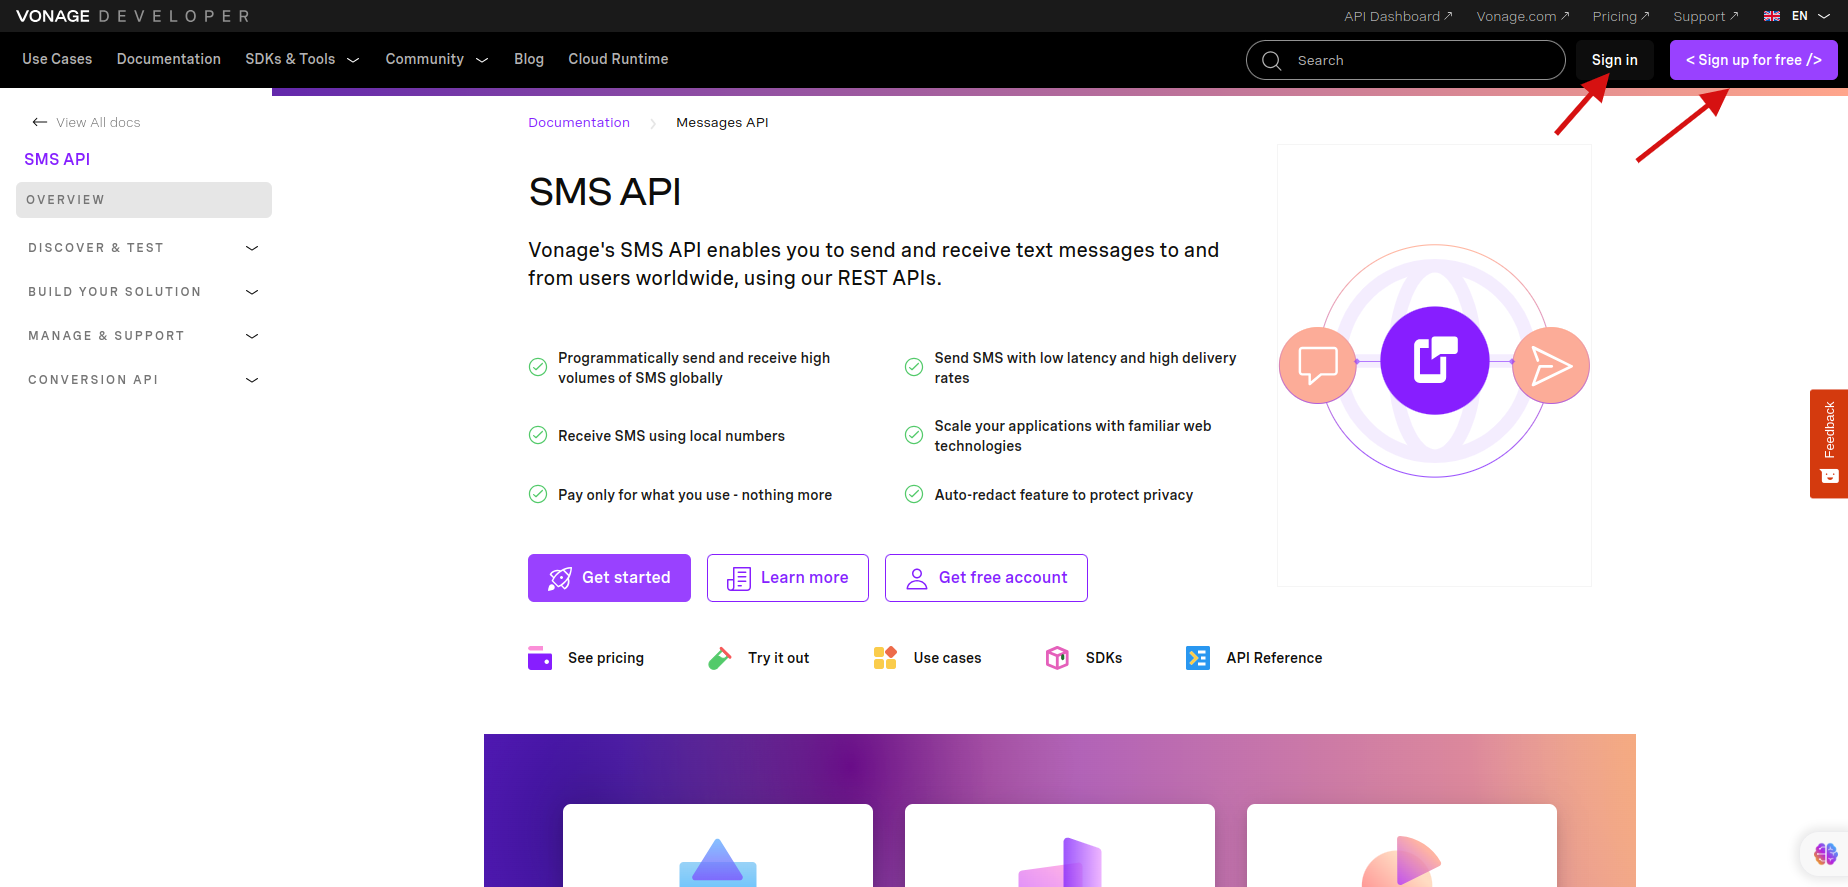
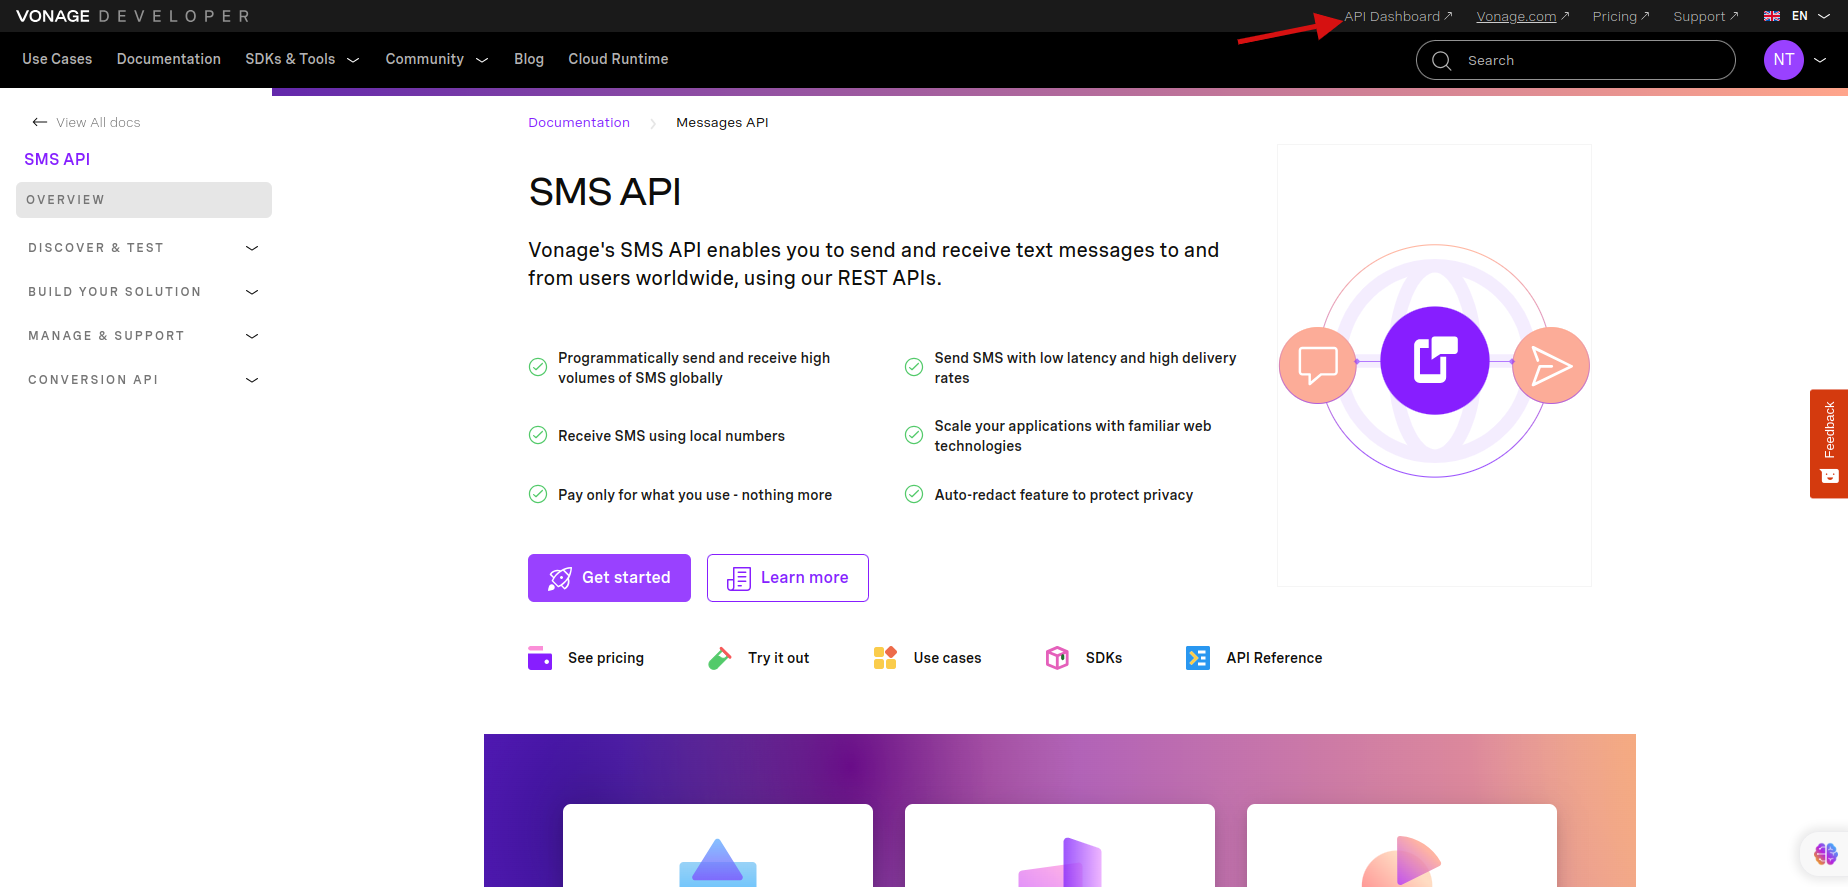
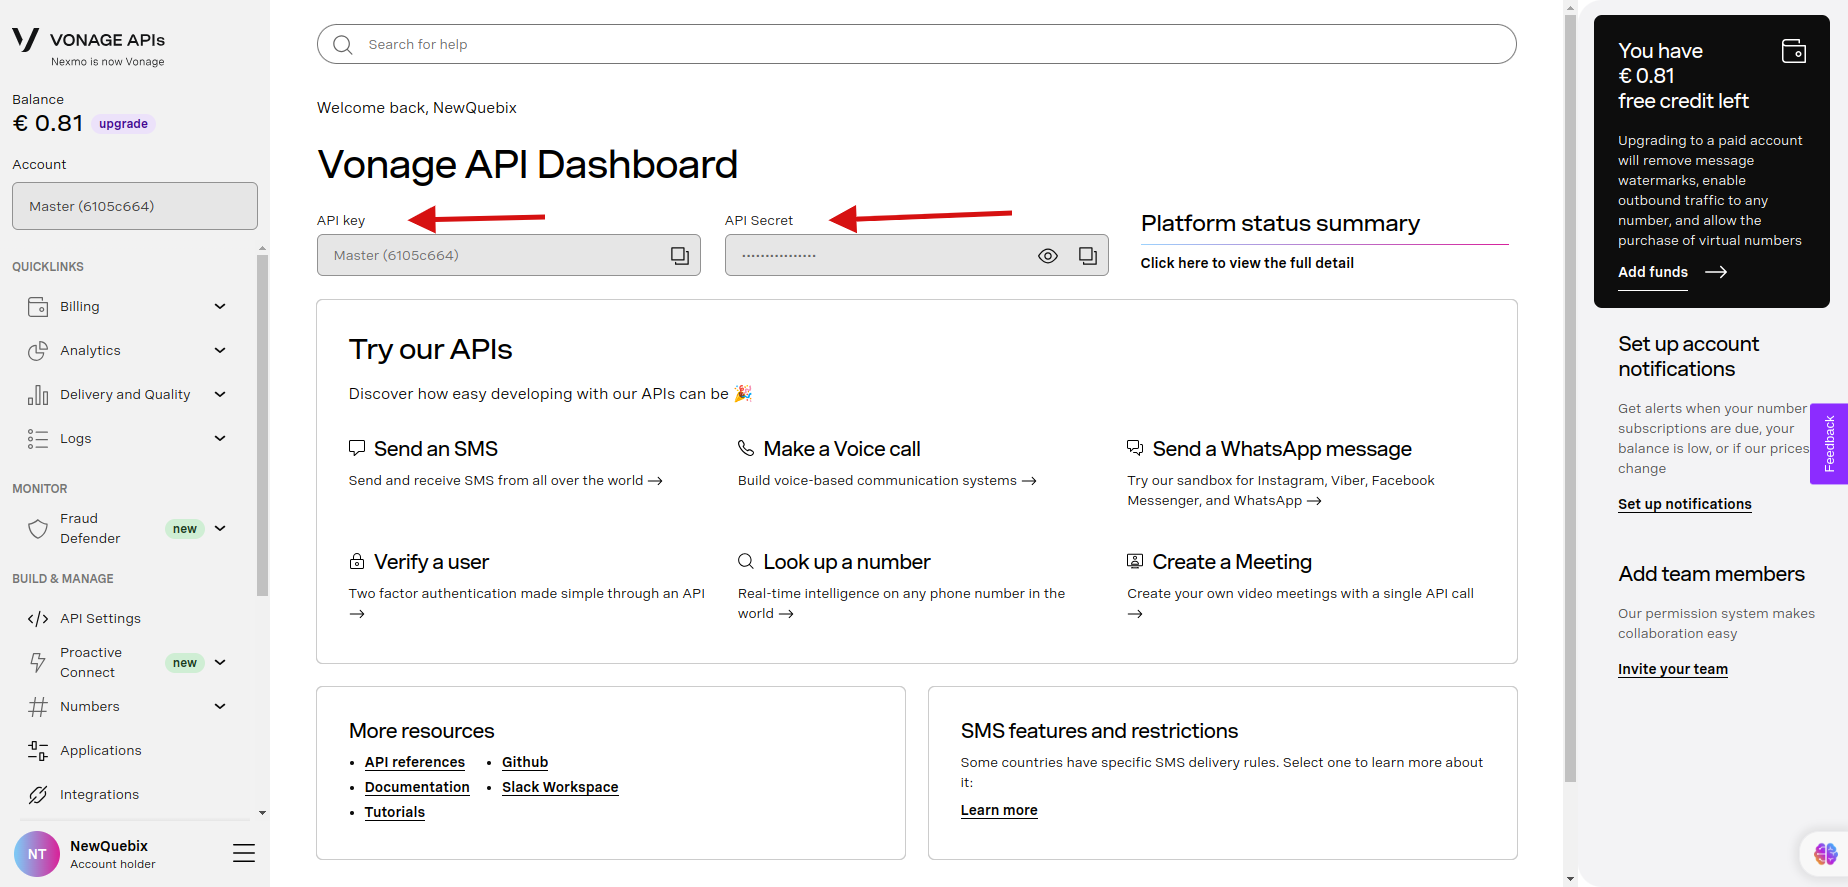
Vonage SMS
first complate your login and signup in https://developer.vonage.com/en/messaging/sms/overview
website.
After Login goto "API Dashboard".
Get Your "Vonage Key" and "Vonage Secret".
Vonage Number : The phone number associated with the Vonage service. This is typically the
recipient's phone number to which you
want to send SMS messages.
Vonage Key : An authentication key provided by Vonage, used to authenticate your
application when interacting with their API. This
key allows your application to send SMS messages through the Vonage service.
Vonage Secret : The corresponding secret associated with the provided Vonage Key. This
secret is used as part of the authentication
process to verify your identity when making requests to Vonage's API.
Vonage Field : This appears to refer to a field name within a form. It might be used to
indicate which field in a form contains the
phone number of the recipient for sending SMS messages. This could be part of your
integration to automate sending SMS notifications
based on form submissions.
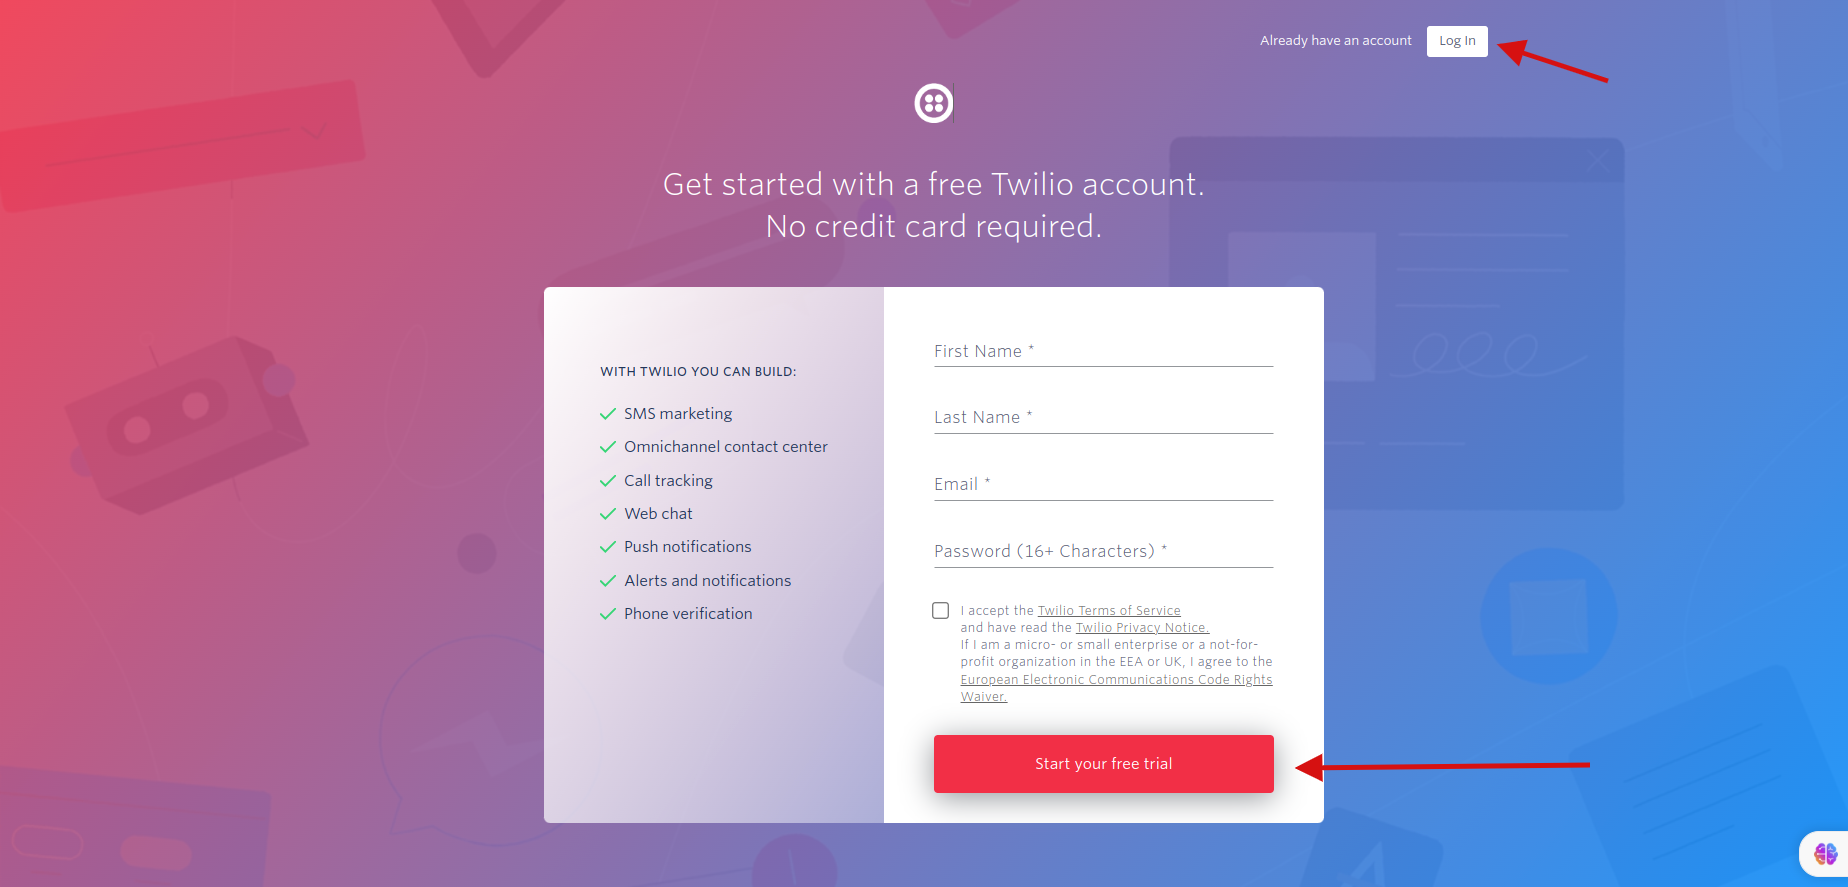
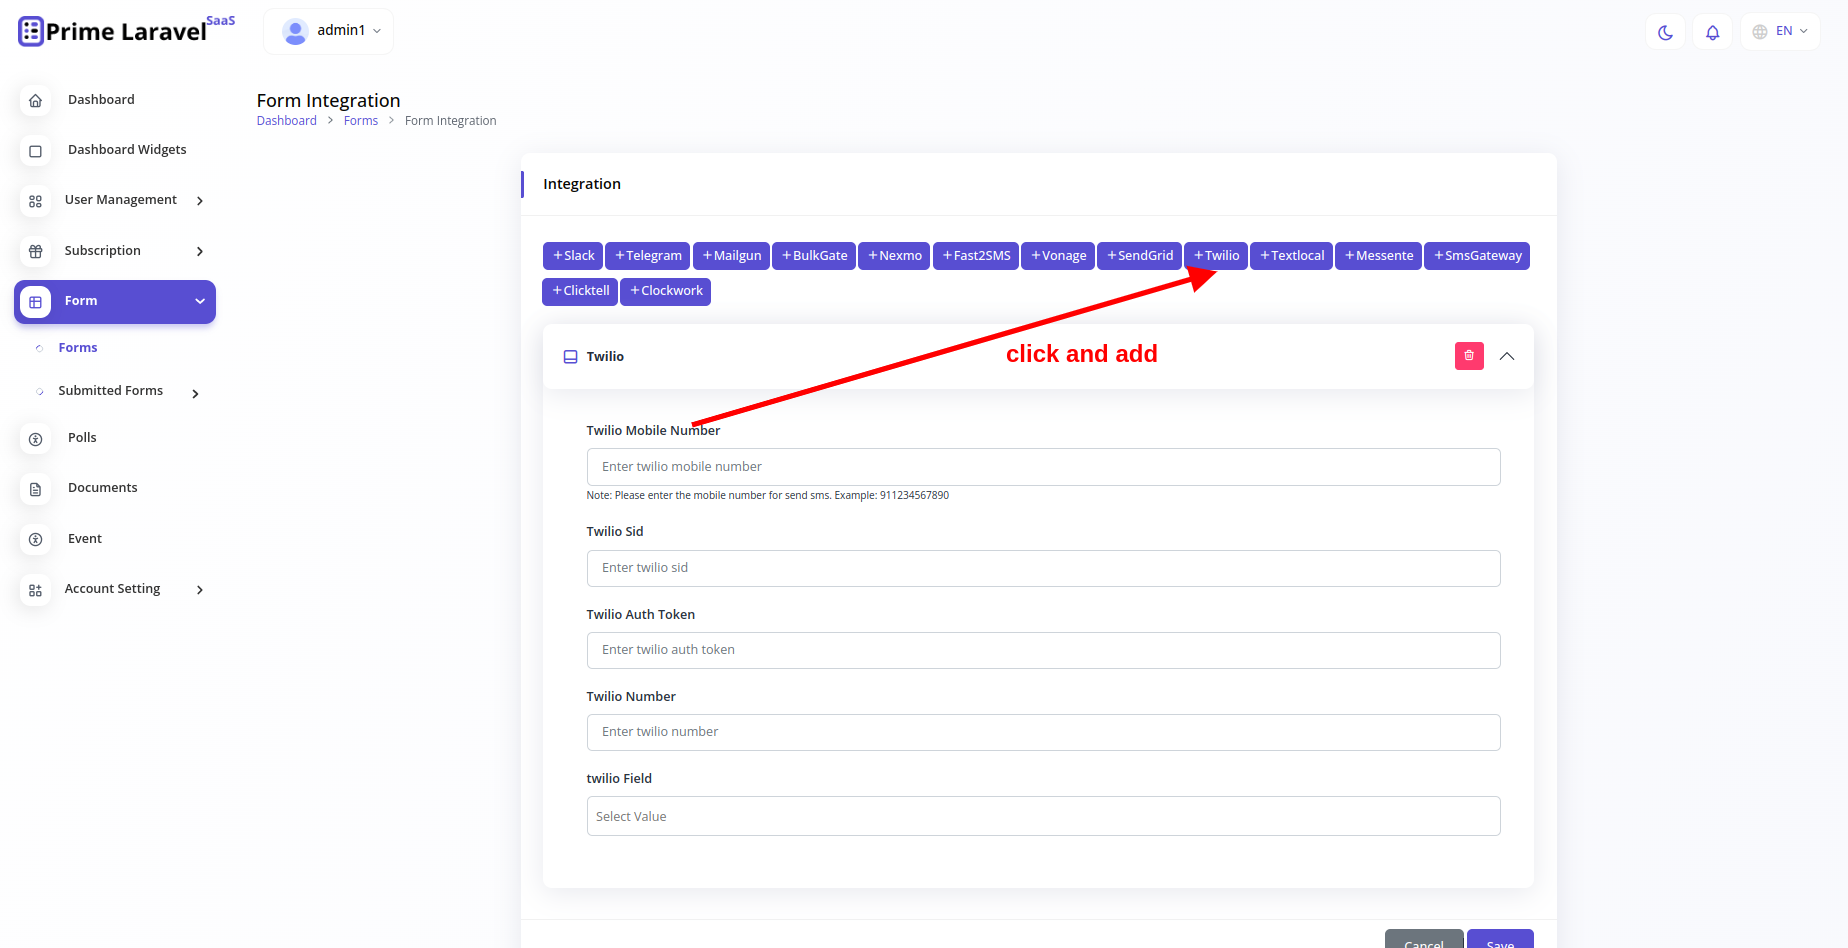
Twilio SMS
First complate your login and signup in https://www.twilio.com/try-twilio
website.
After Login get your "Twilio Sid" ,"Twilio Auth Token","Twilio Number".
Twilio Mobile Number : The phone number associated with the Twilio service. This is
typically the recipient's phone number for sending
SMS messages.
Twilio Sid : A unique identifier provided by Twilio, known as the Account SID. It's used to
authenticate your application when interacting
with Twilio's API. This SID allows your application to send SMS messages through the Twilio
service.
Twilio Auth Token : An authentication token provided by Twilio. It's paired with the
Account SID and used as part of the authentication
process to verify your identity when making requests to Twilio's API.
Twilio Number : A phone number associated with your Twilio account. This is typically the
sender's phone number that will appear as the
sender when recipients receive SMS messages.
Twilio Field : This appears to refer to a field name within a form. It might be used to
indicate which field in a form contains the phone
number of the recipient for sending SMS messages. This could be part of your integration to
automate sending SMS notifications based on
form submissions.
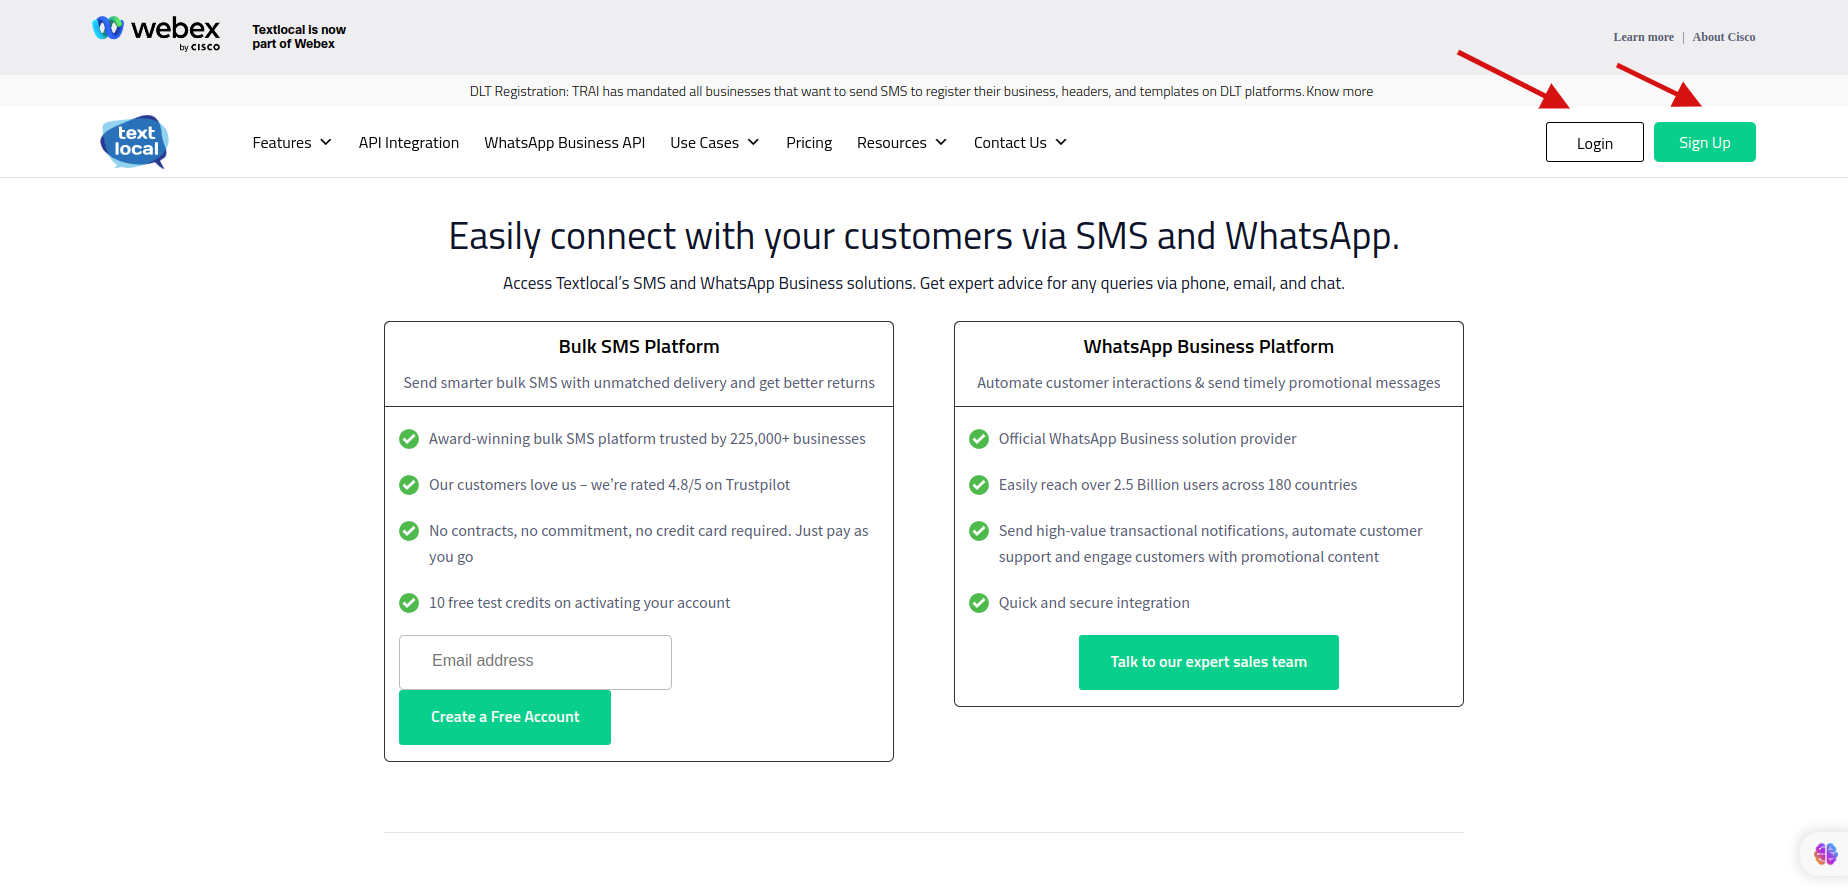
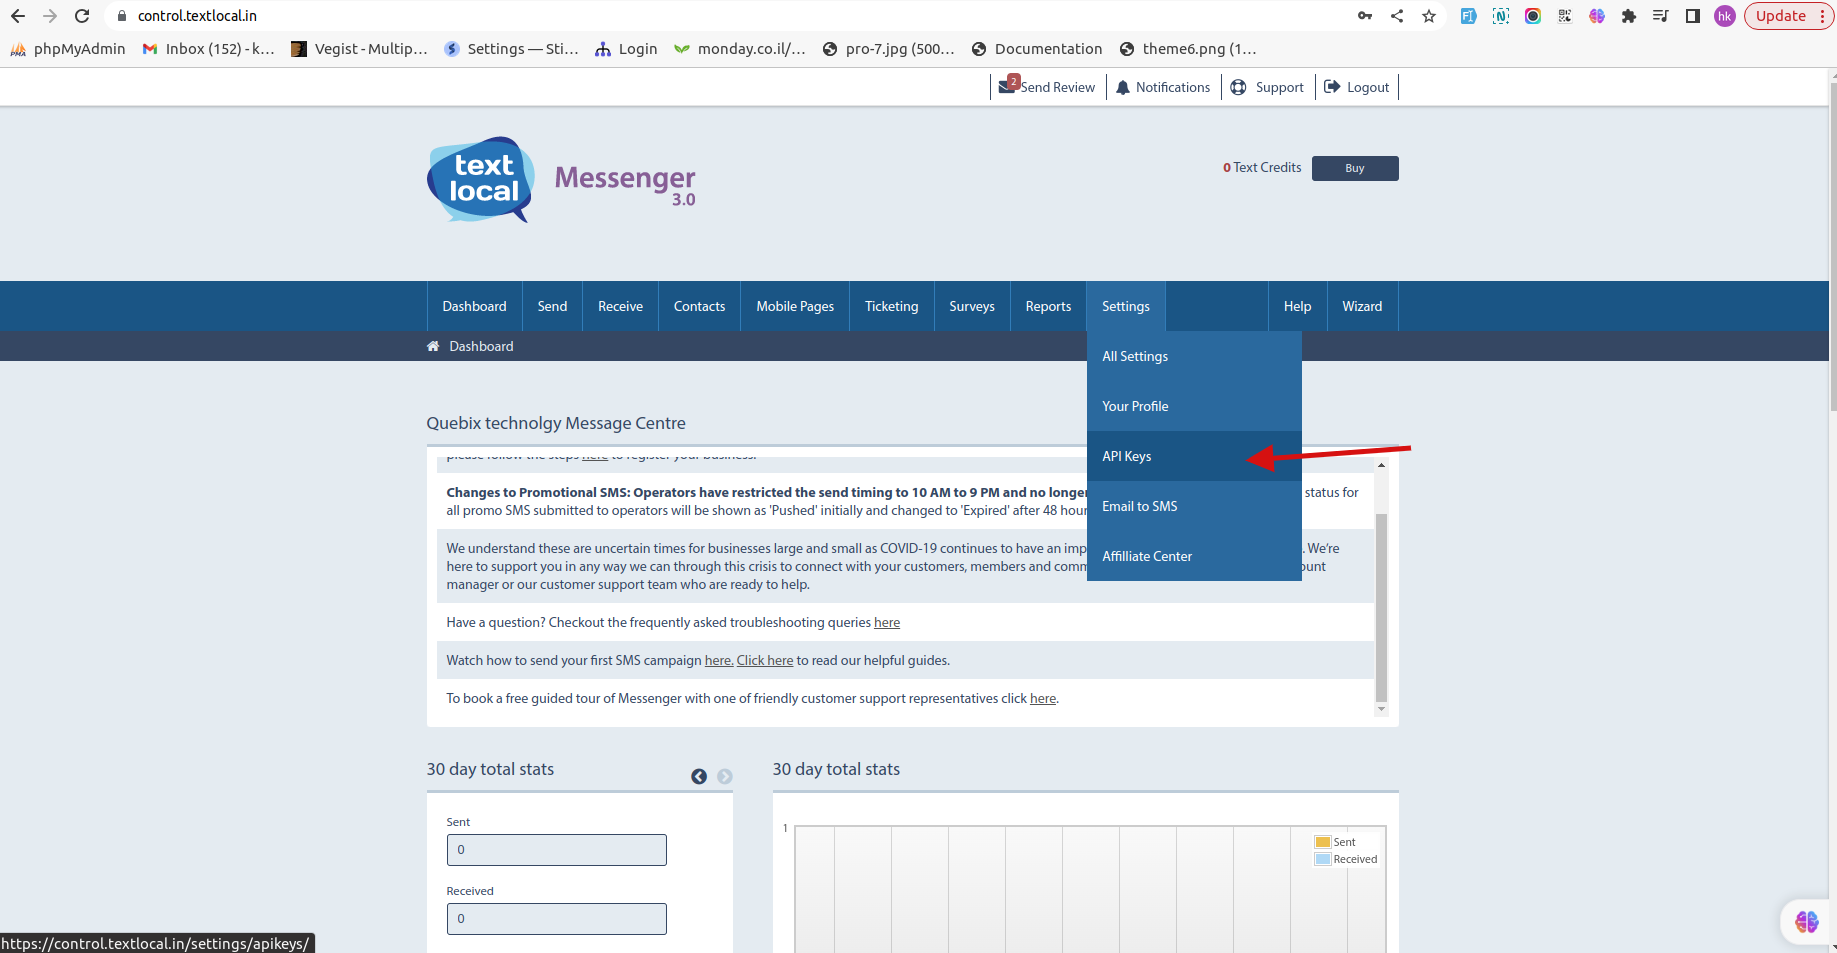
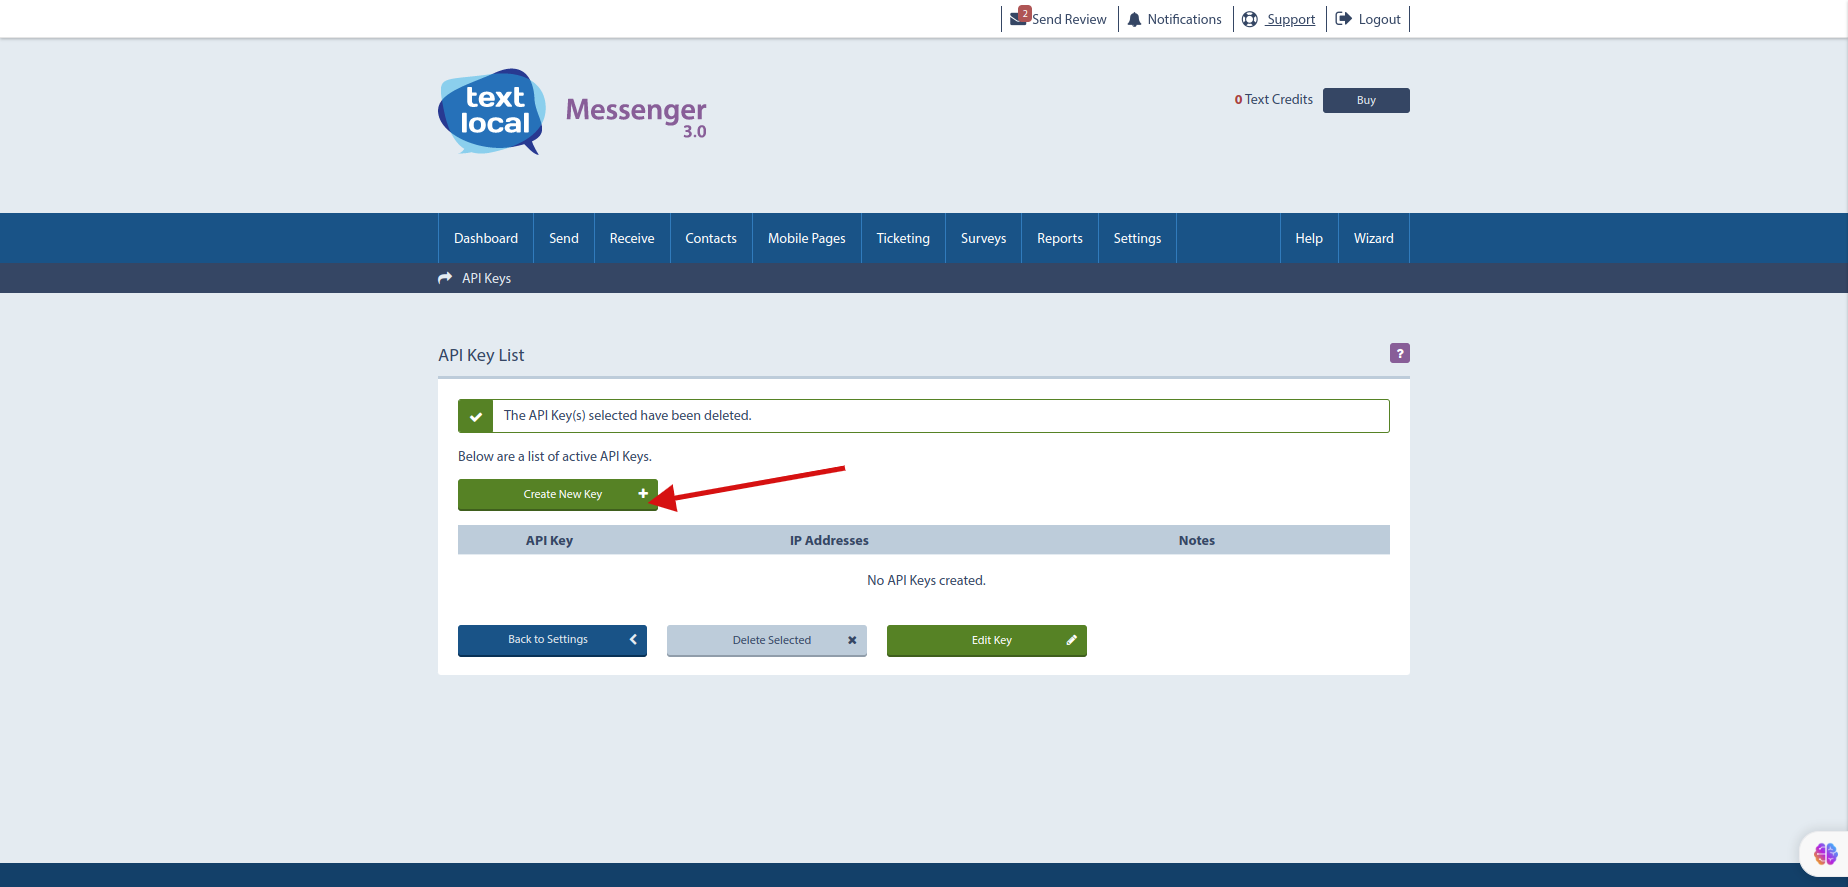
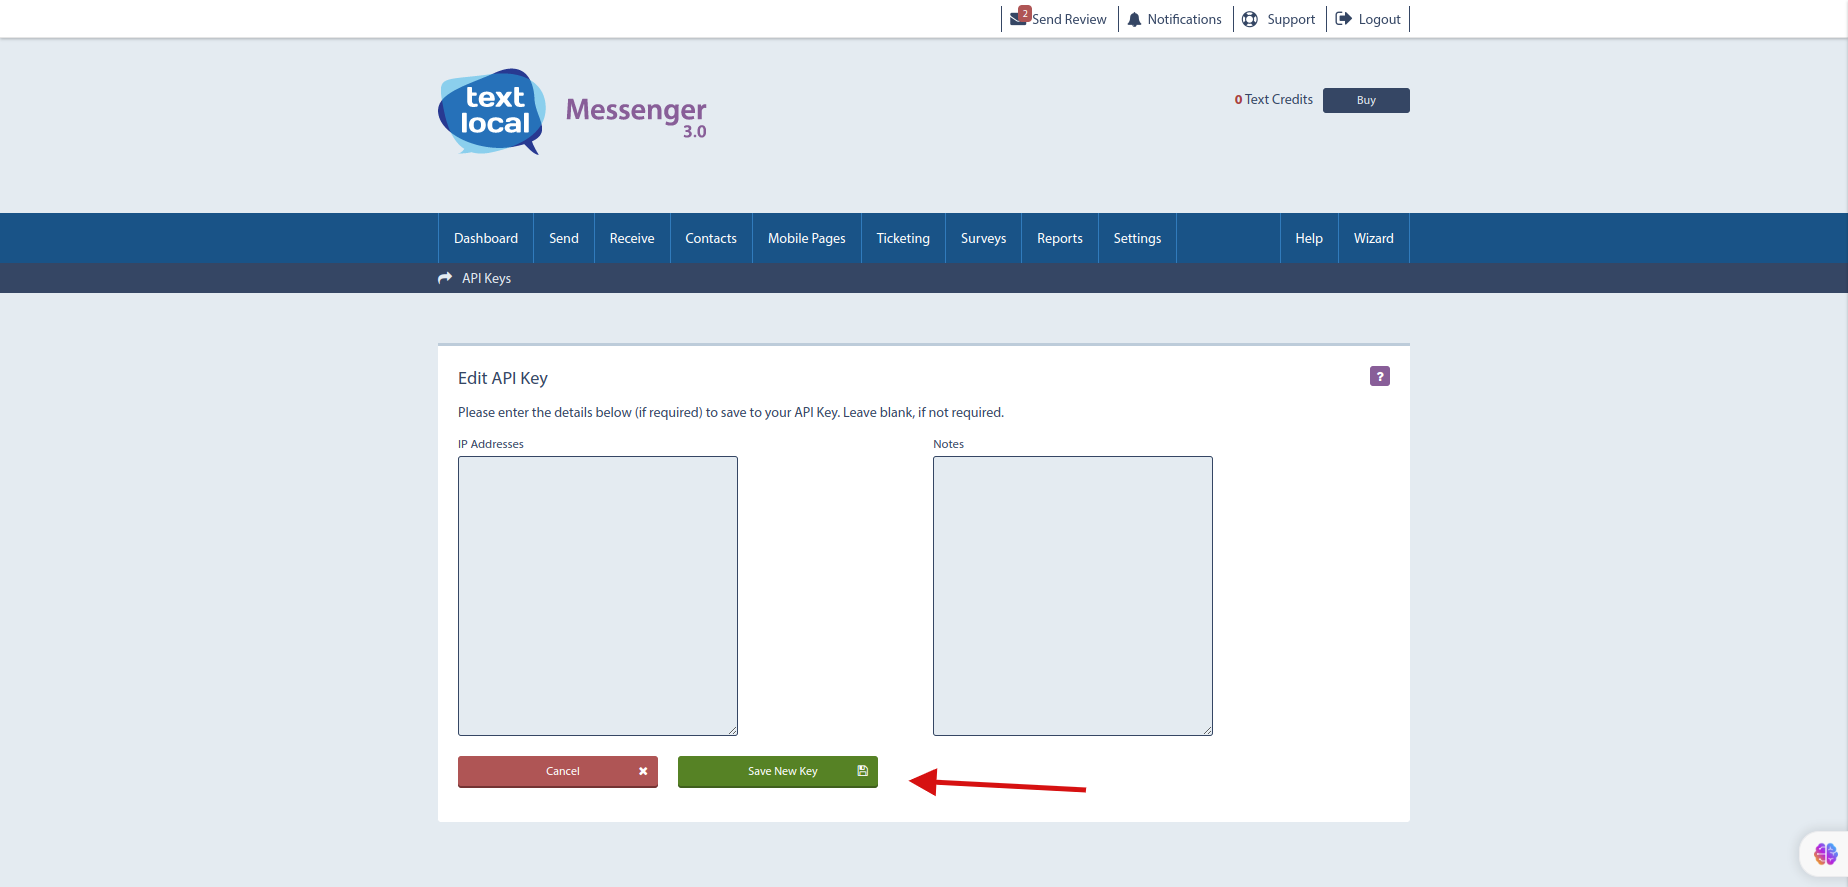
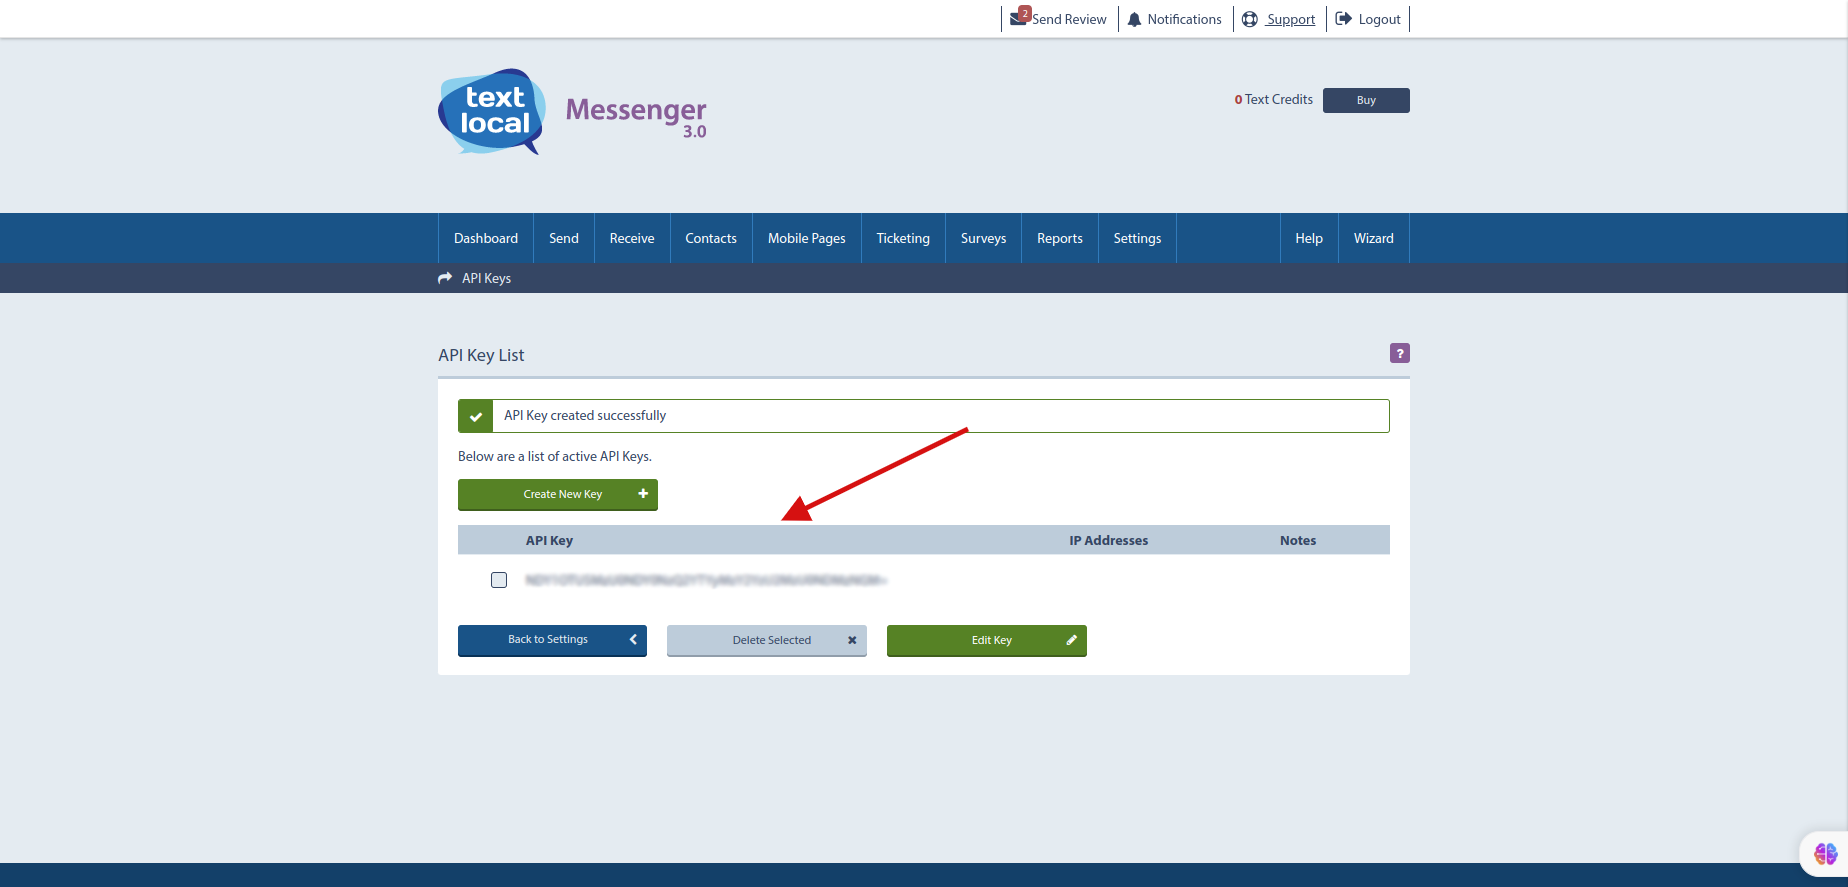
Textlocal SMS
First complate your login and signup in https://www.textlocal.in/signup
website.
After Login goto Settings > API Keys.
Click "Create New Key".
Click "Save New Key".
Now You Get "Textlocal Api Key".
Textlocal Number : The phone number associated with the Textlocal service. This is
typically the recipient's phone number for
sending SMS messages.
Textlocal Api Key : An authentication key provided by Textlocal. It's used to authenticate
your application when interacting
with their API. This key allows your application to send SMS messages through the Textlocal
service.
Textlocal Field : This appears to refer to a field name within a form. It might be used to
indicate which field in a form contains
the phone number of the recipient for sending SMS messages. This could be part of your
integration to automate sending SMS notifications
based on form submissions.
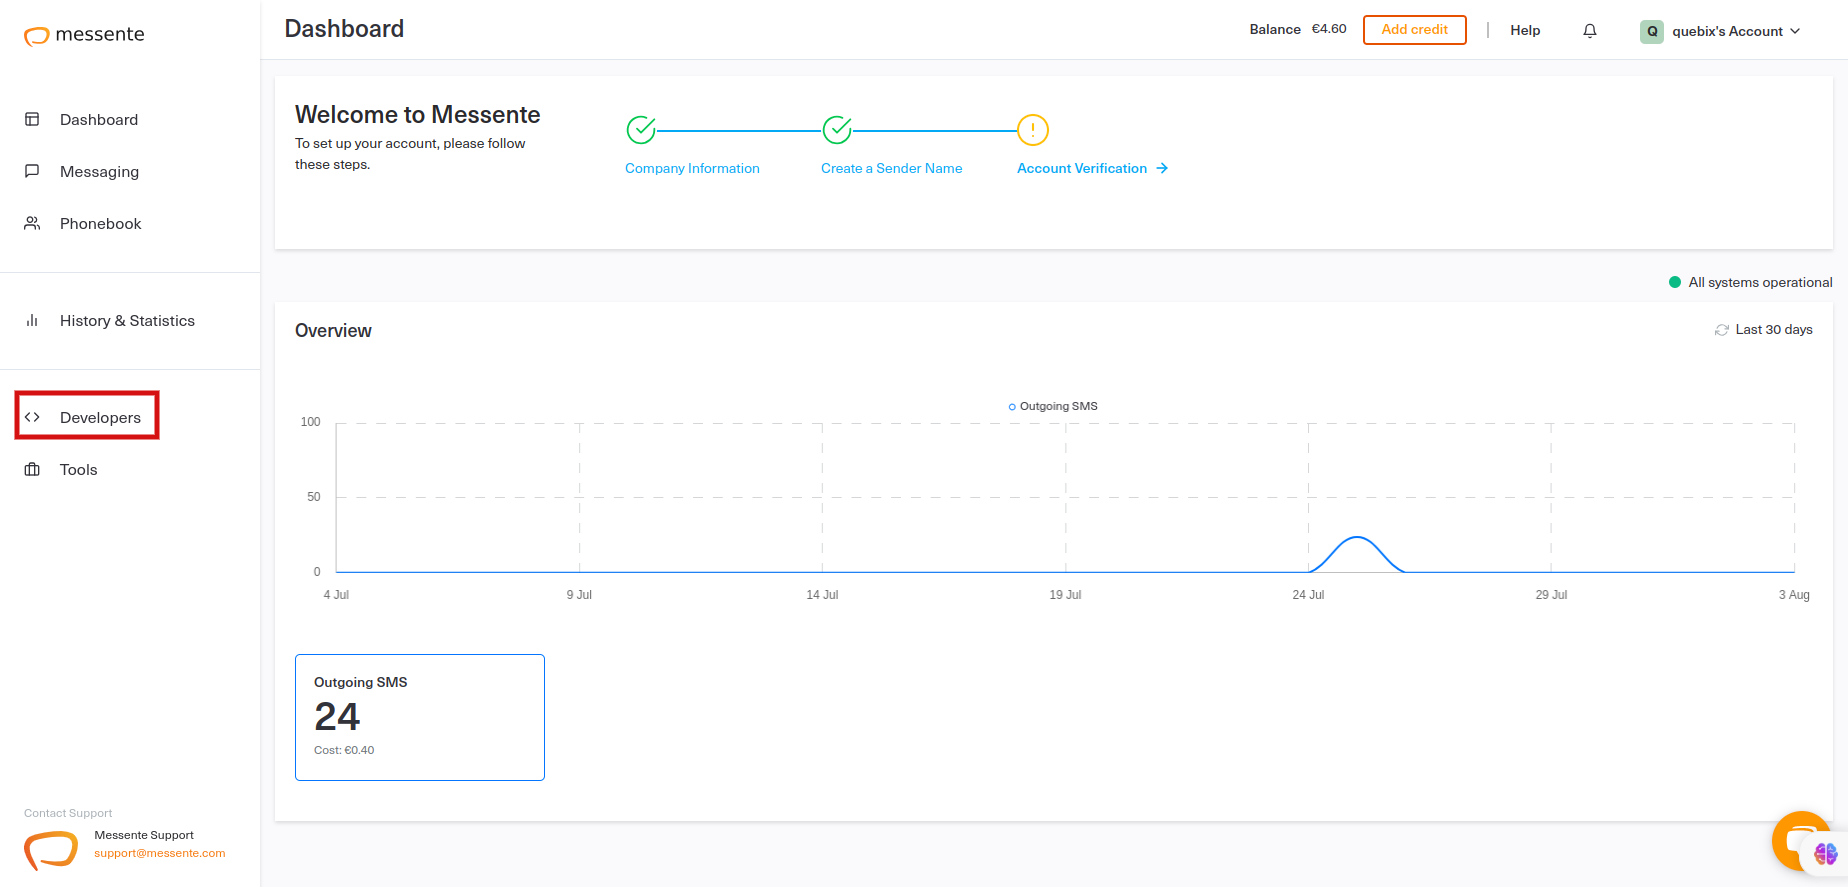
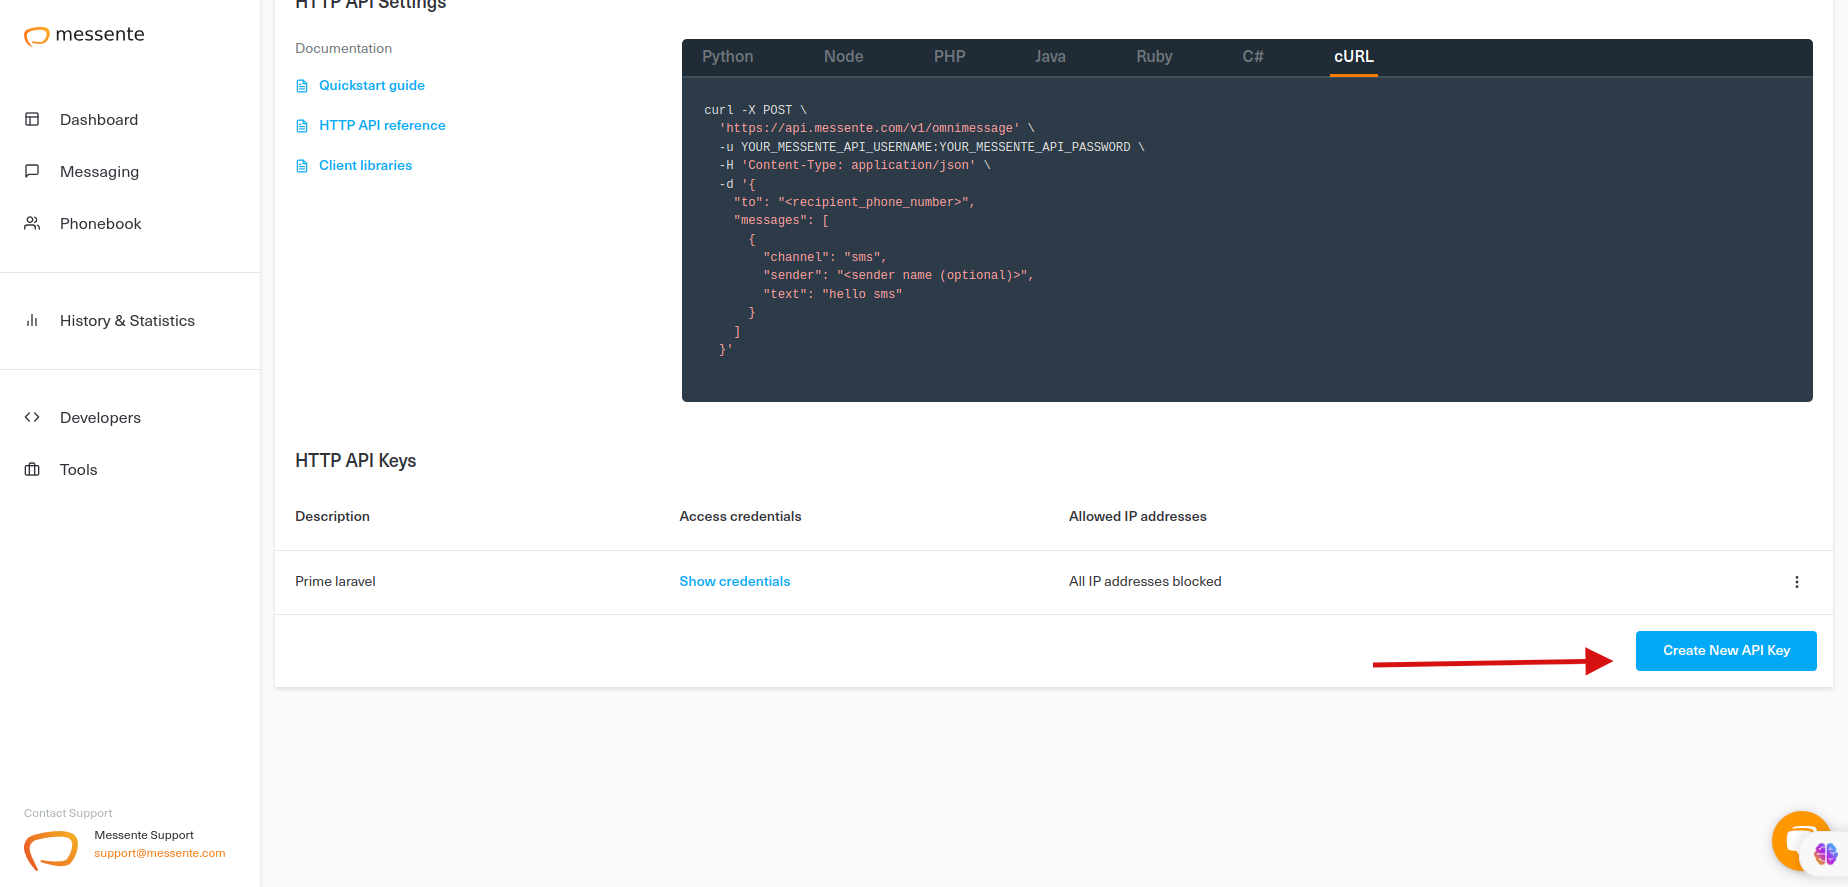
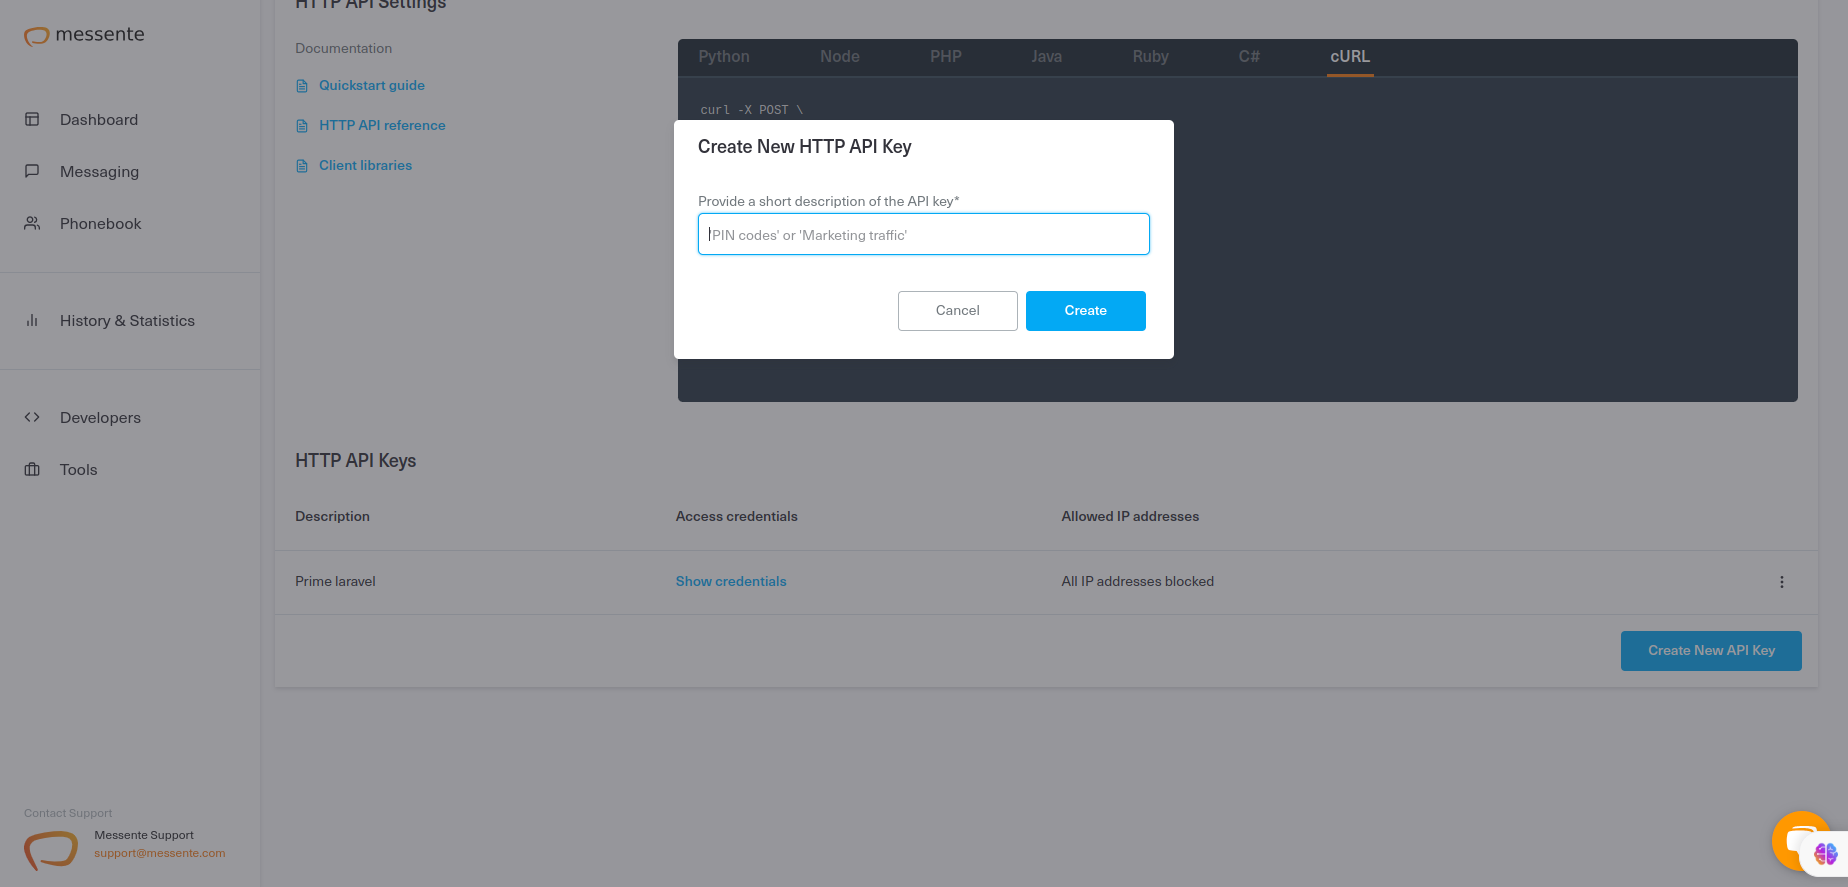
Messente SMS
First complate your login and signup in https://dashboard.messente.com/login
website.
Click "Developers".
Goto messaging > "Sender Names" create sender.
Create your "Create New API Key".
Enter "project_name" then Click Create and get "Messente Api Username",
"Messente Api
Password" and "Messente Sender".
Messente Number : The phone number associated with the Messente service. This is typically
the recipient's phone number for
sending SMS messages.
Messente Api Username : An API username provided by Messente. It's used as part of the
authentication process to verify your
application's identity when interacting with the Messente API.
Messente Api Password : The corresponding password or secret associated with the provided
API username. This password is used
in combination with the API username for authentication purposes.
Messente Sender : The sender's name or identifier that appears when recipients receive SMS
messages sent through Messente. This
is often used to display the sender's name on the recipient's device.
Messente Field : This appears to refer to a field name within a form. It might be used to
indicate which field in a form contains
the phone number of the recipient for sending SMS messages. This could be part of your
integration to automate sending SMS notifications
based on form submissions.
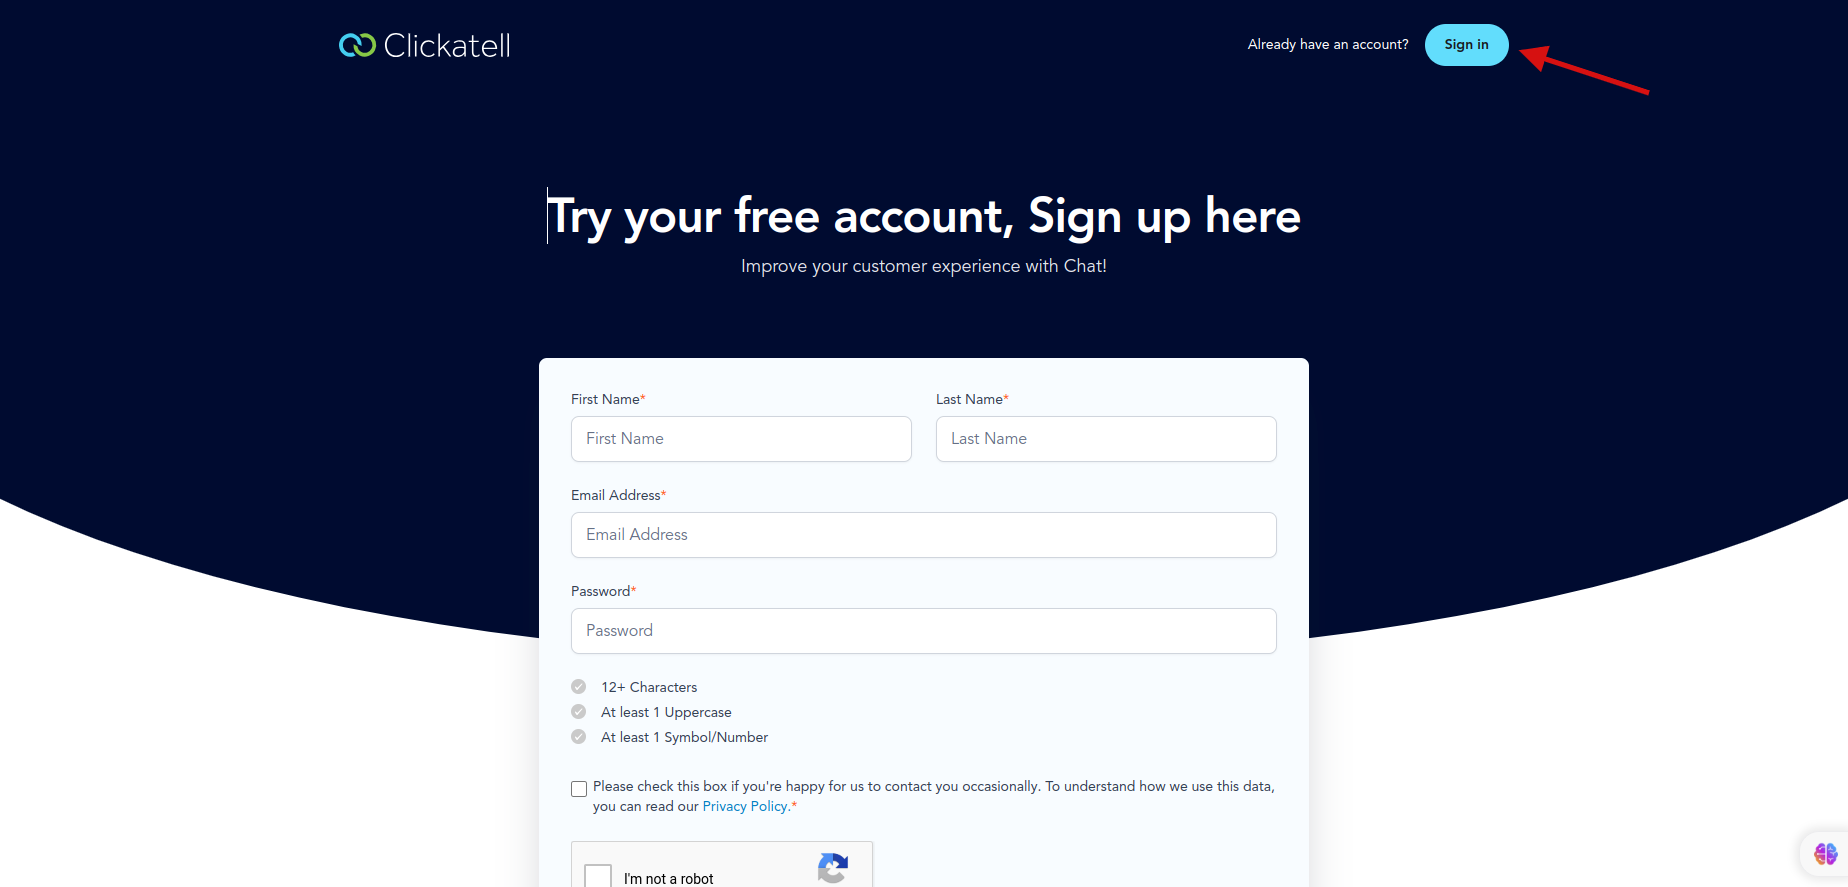
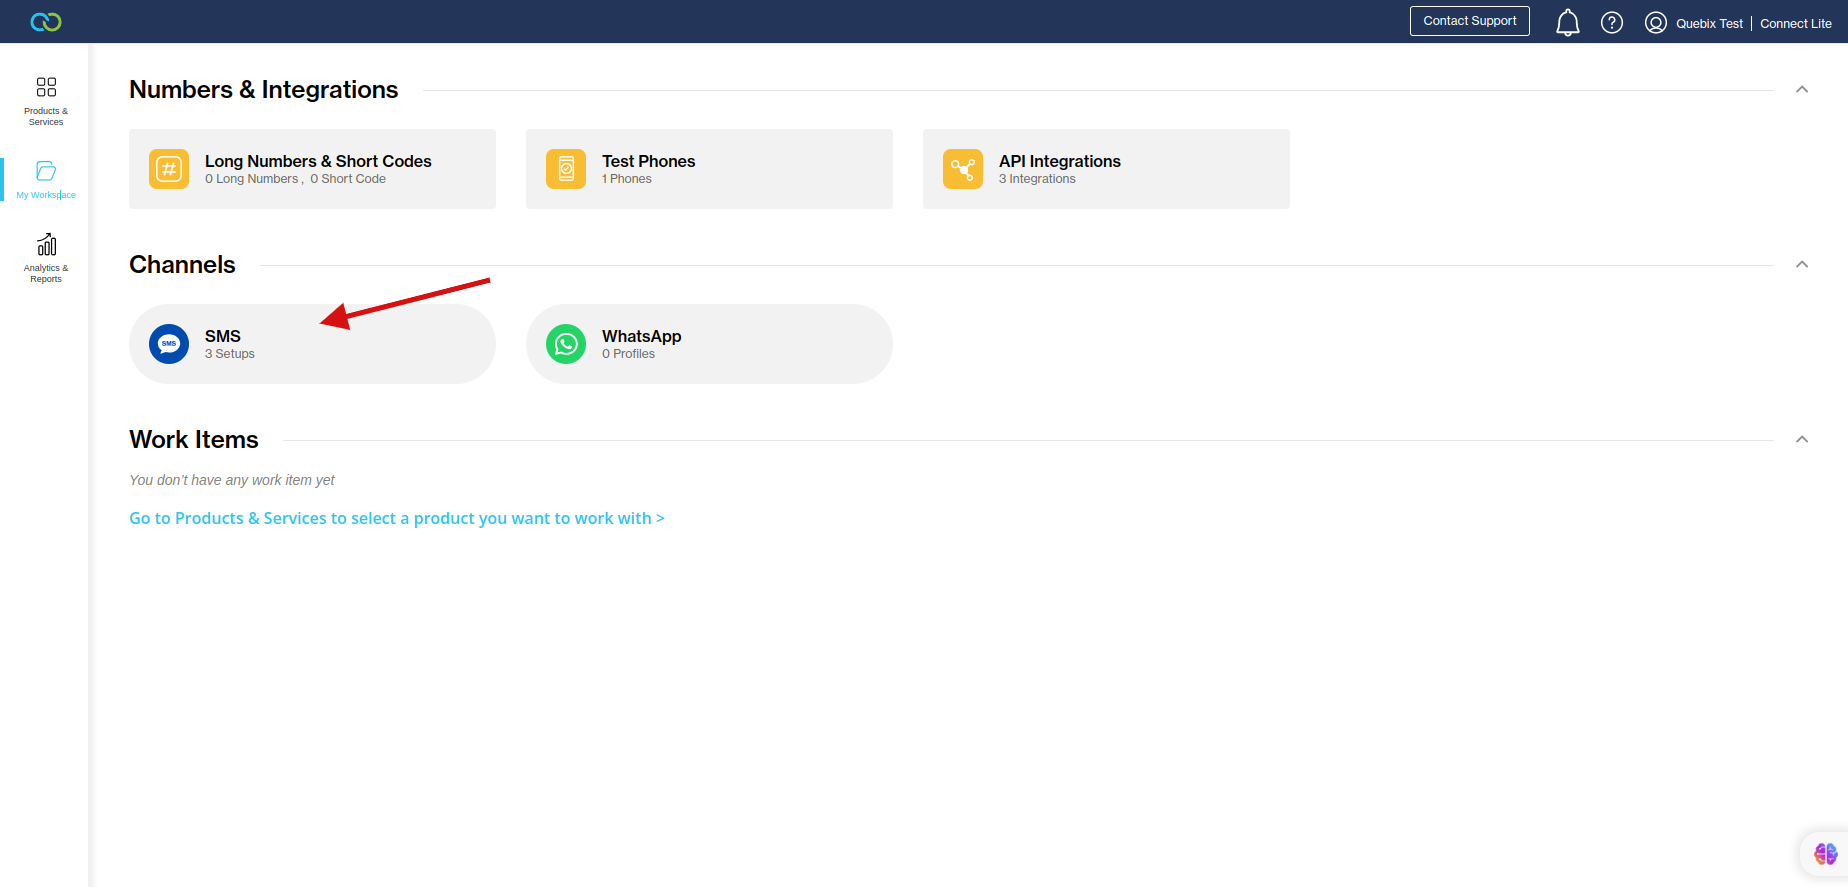
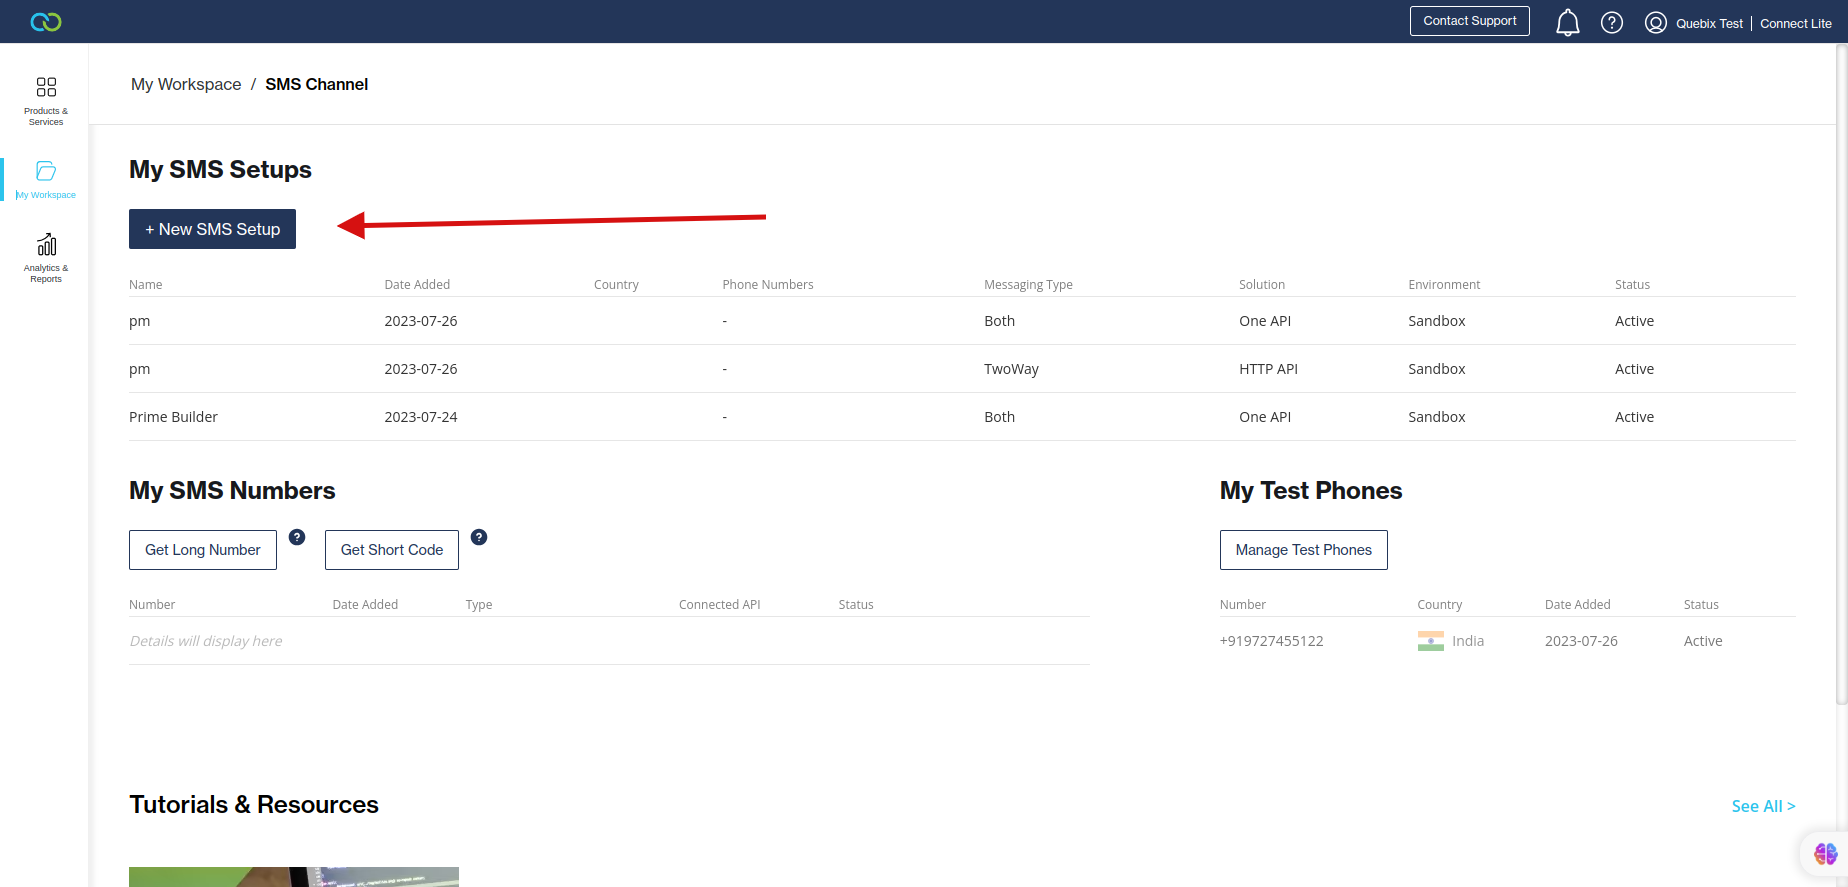
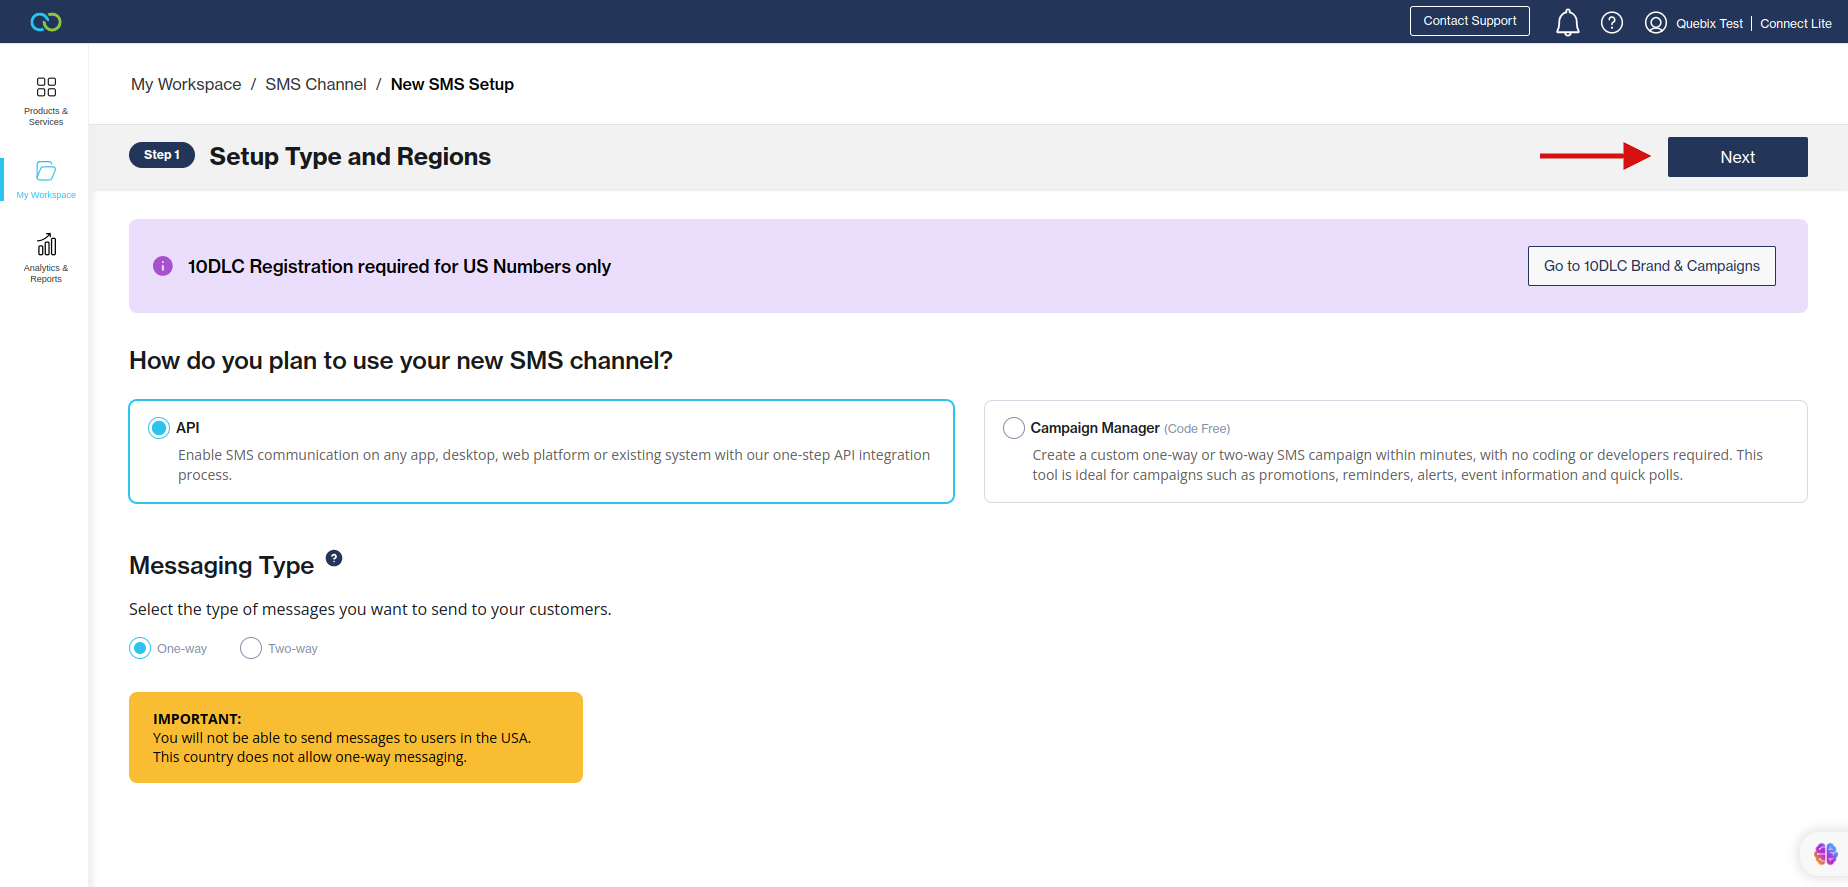
Clicktell SMS
First complate your login and signup in https://www.clickatell.com/sign-up
website.
After Login "SMS".
Click "New SMS Setup".
Fill Detail Click "Next" button.
Click Your Created App.
Then Get Your "Clicktell Api Key".
Clicktell Number : The phone number associated with the Clickatell service. This is
typically the recipient's phone number for
sending SMS messages.
Clicktell Api Key : An authentication key provided by Clickatell. It's used to authenticate
your application when interacting
with their API. This key allows your application to send SMS messages through the Clickatell
service.
Clicktell Field : This appears to refer to a field name within a form. It might be used to
indicate which field in a form contains
the phone number of the recipient for sending SMS messages. This could be part of your
integration to automate sending SMS notifications
based on form submissions.
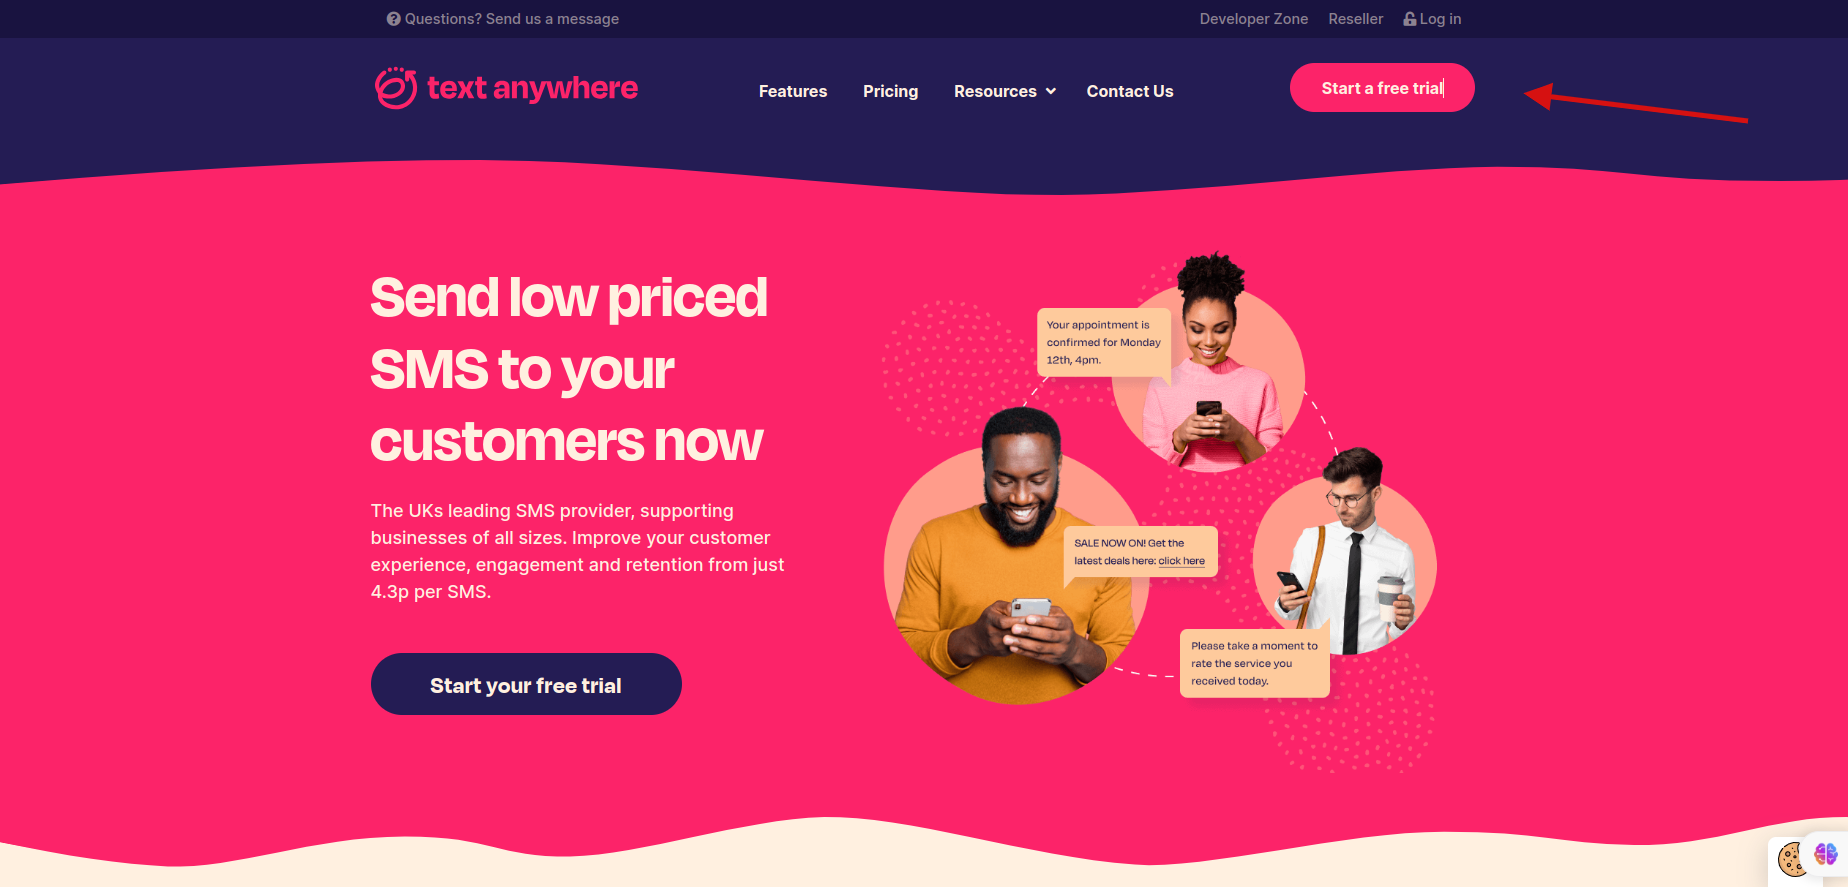
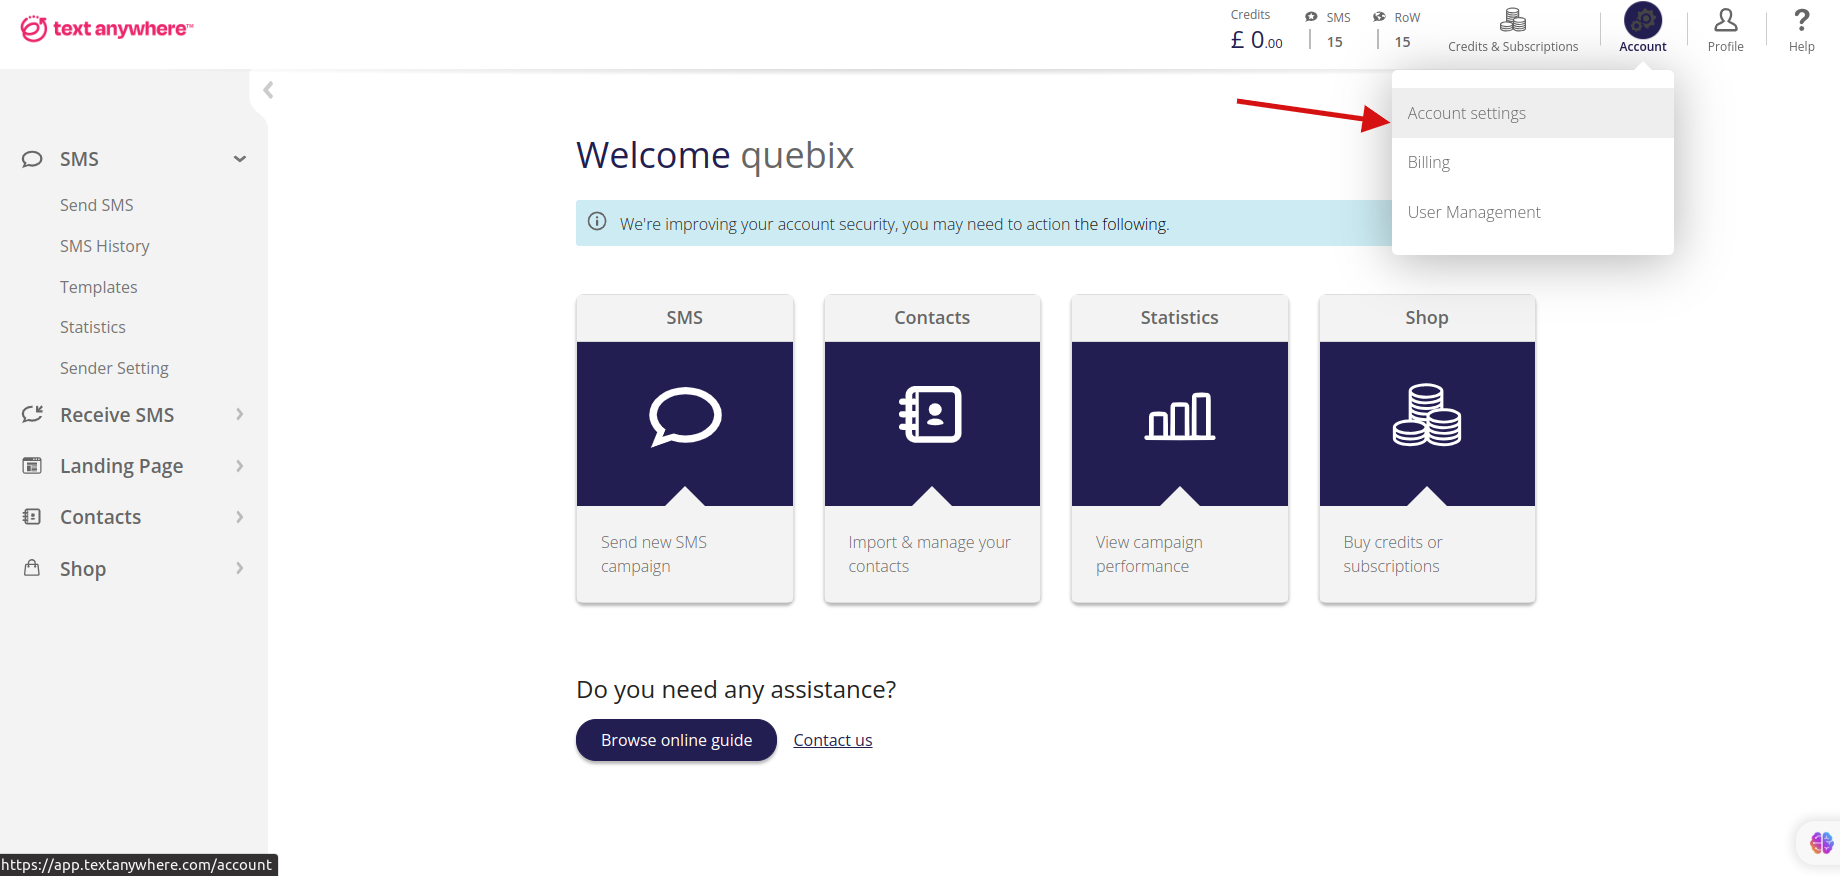
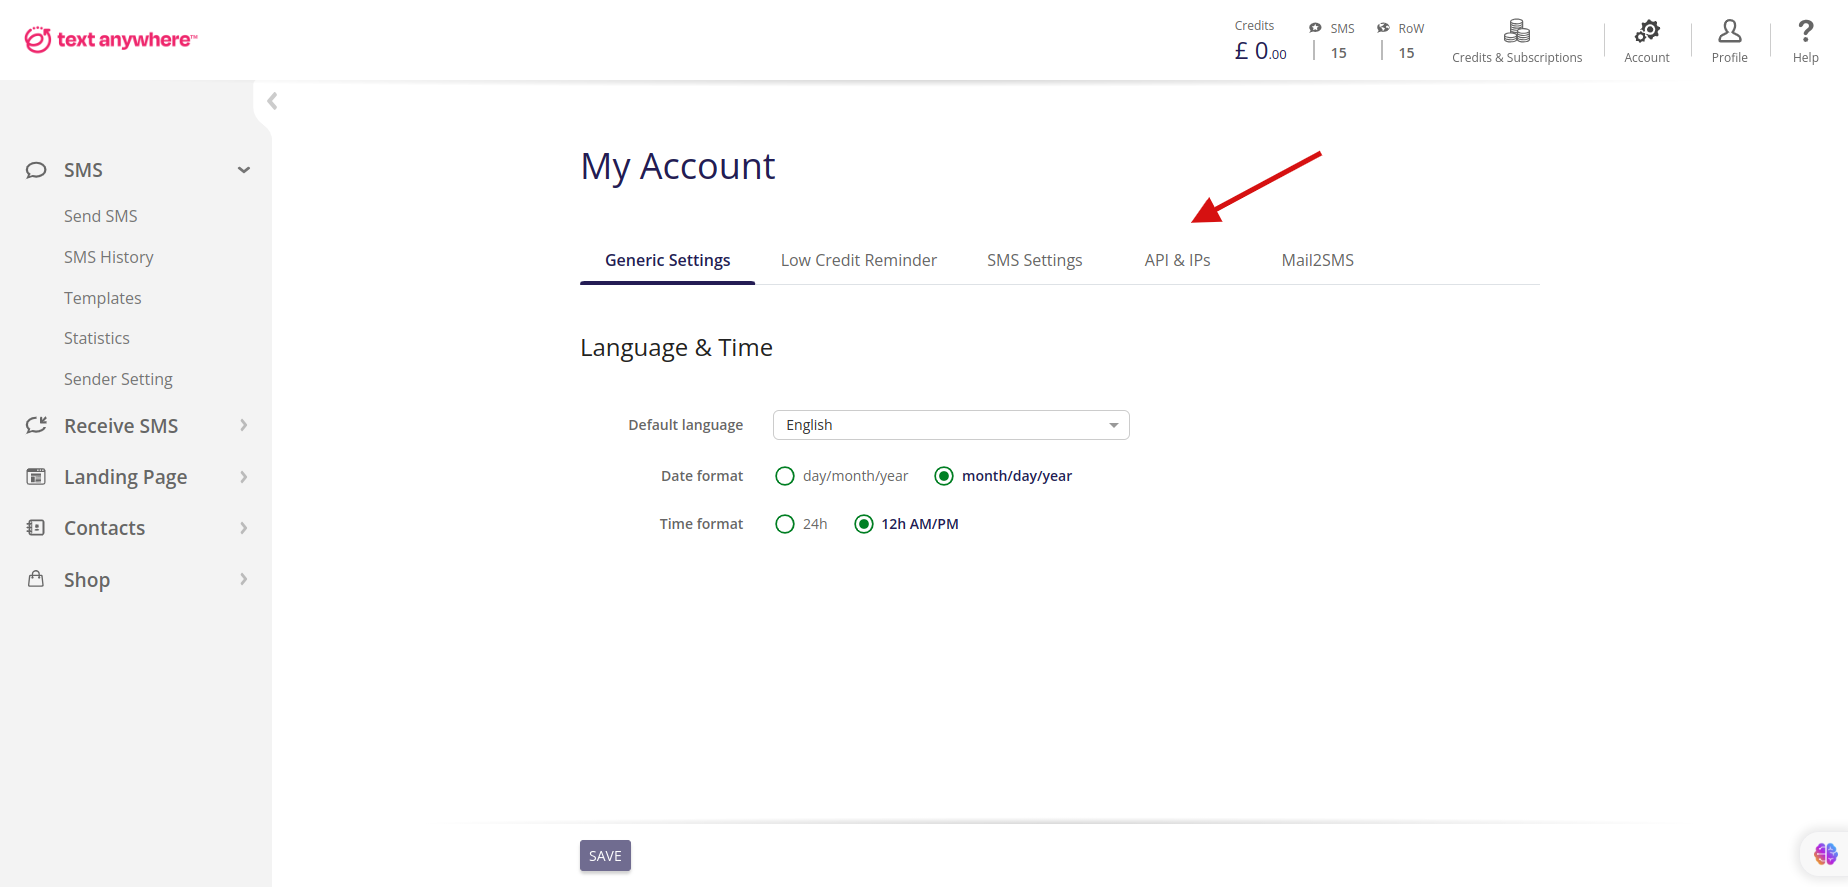
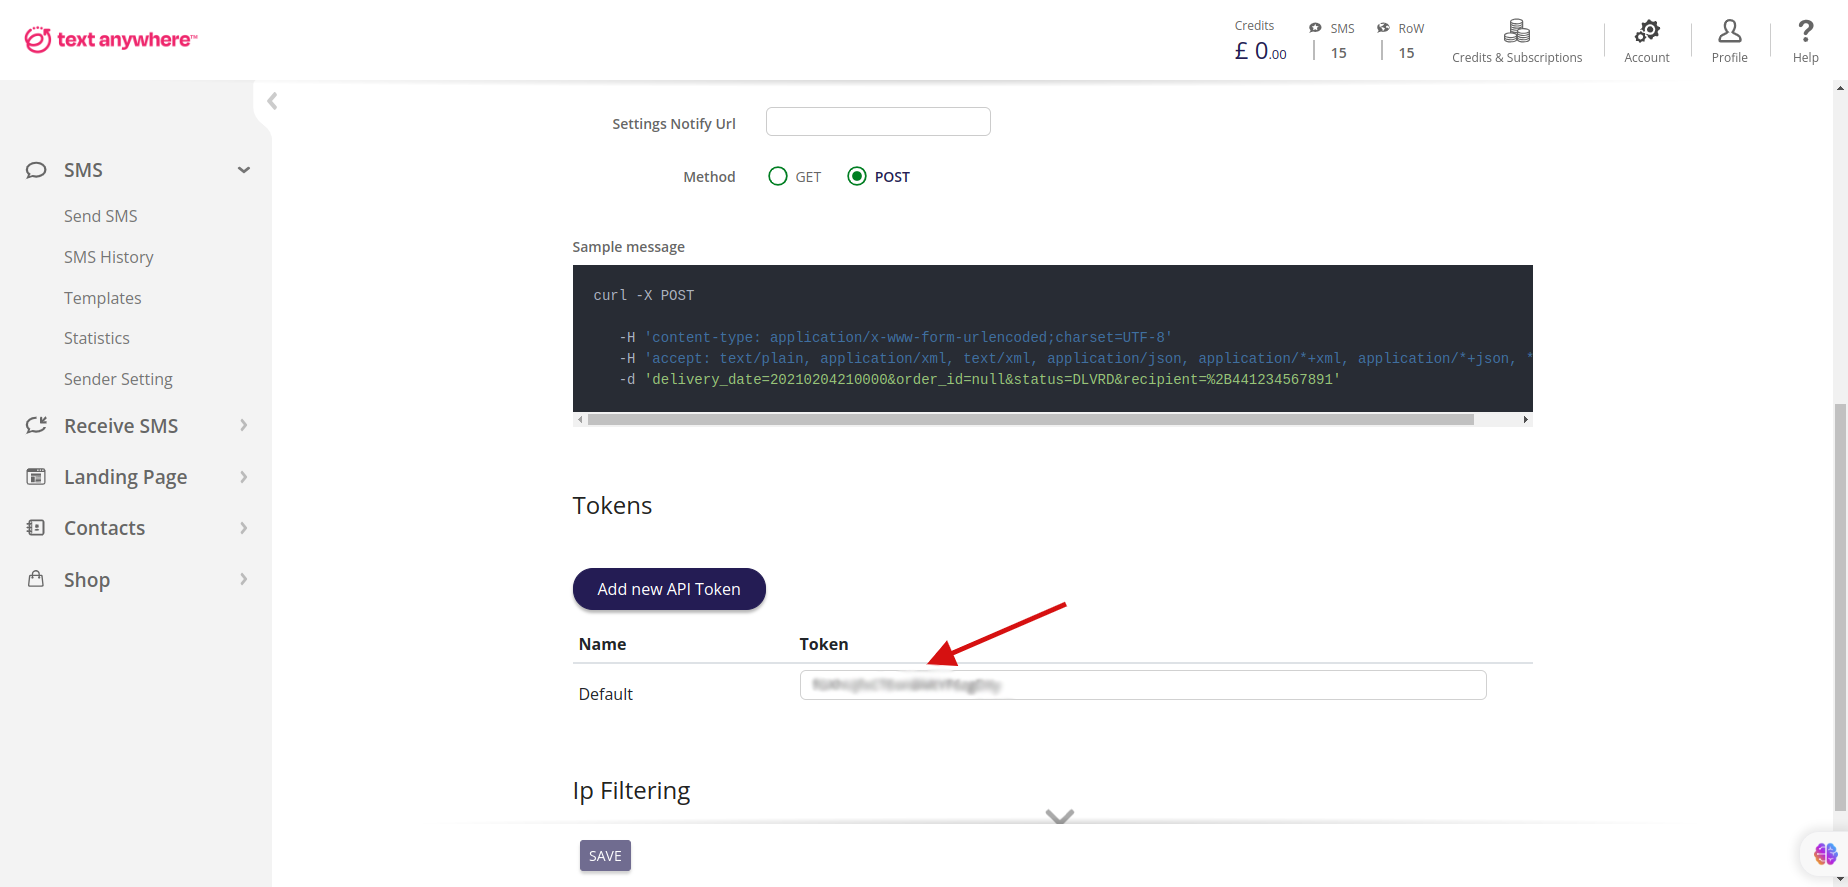
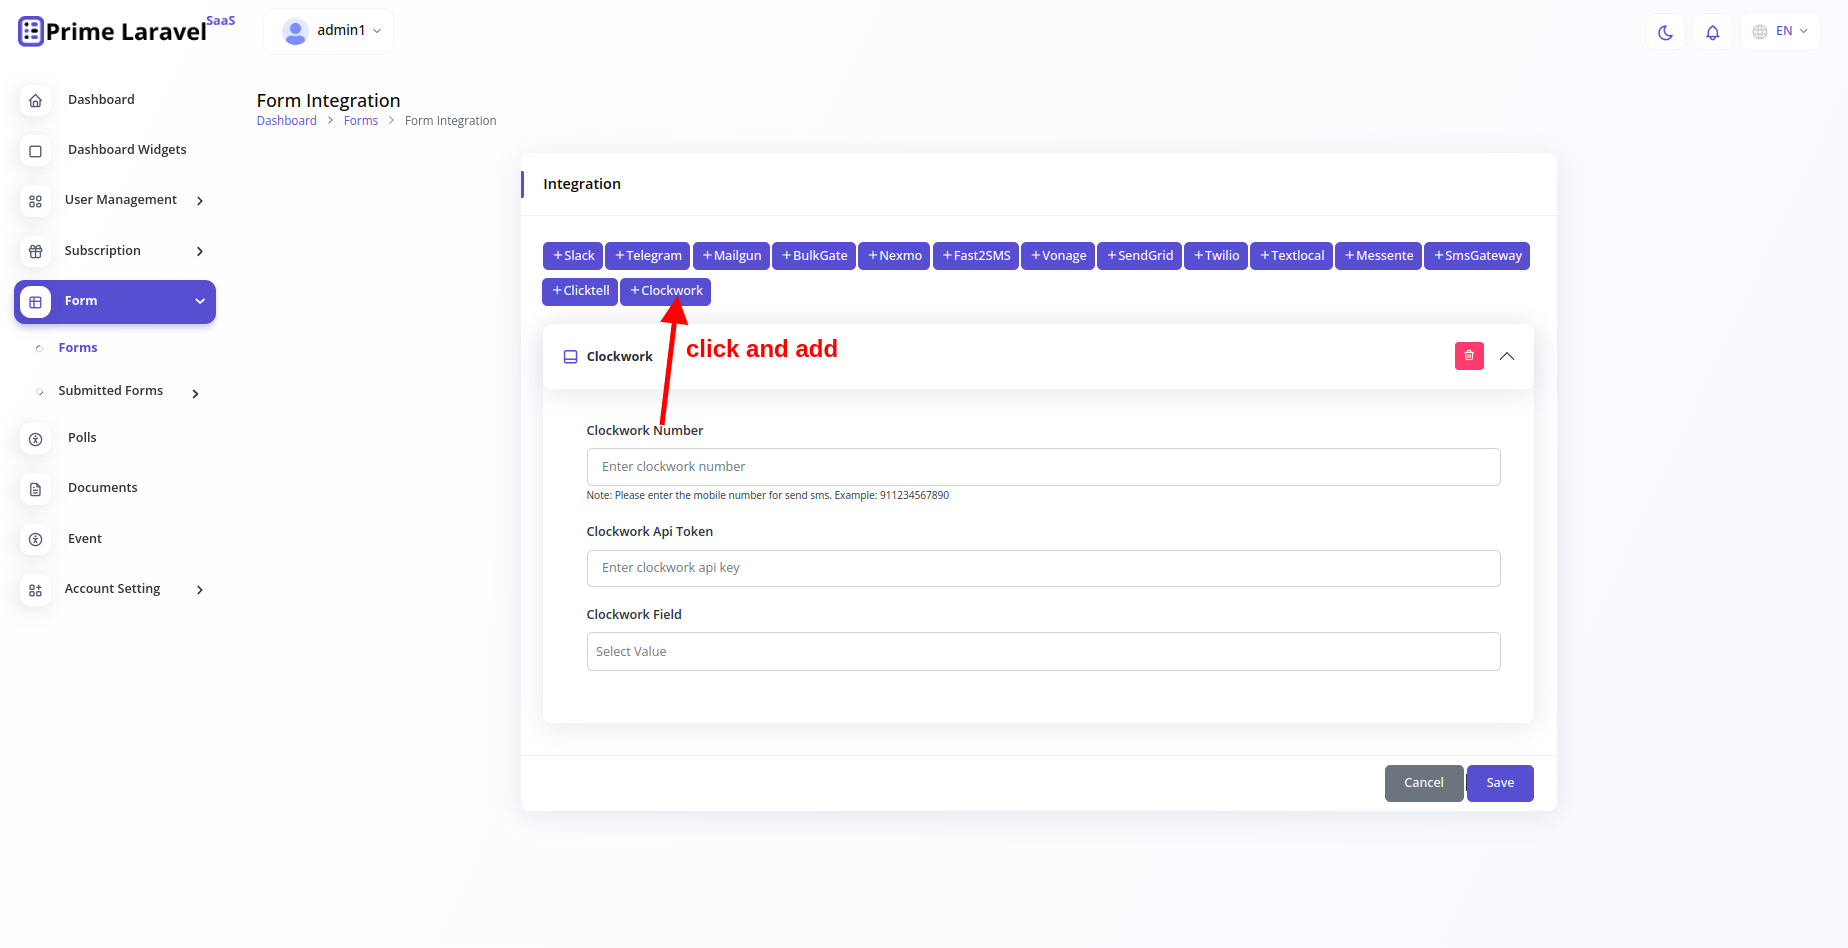
Clockwork SMS
First complate your login and signup in https://www.textanywhere.com
website.
After Login Goto Account > Account settings.
Goto API & IPs.
Then get your "Clockwork Api Token".
Clockwork Number : The phone number associated with the Clockwork service. It represents
the recipient's phone number
for sending SMS messages.
Clockwork Api Token : An authentication token provided by Clockwork that grants access to
their API. This token allows
your application to send SMS messages through Clockwork's service.
Clockwork Field : This likely refers to a parameter or customization option specific to
your integration with the Clockwork
service. It could involve additional settings, options, or data relevant to your SMS
interactions, such as message formatting
or delivery preferences.
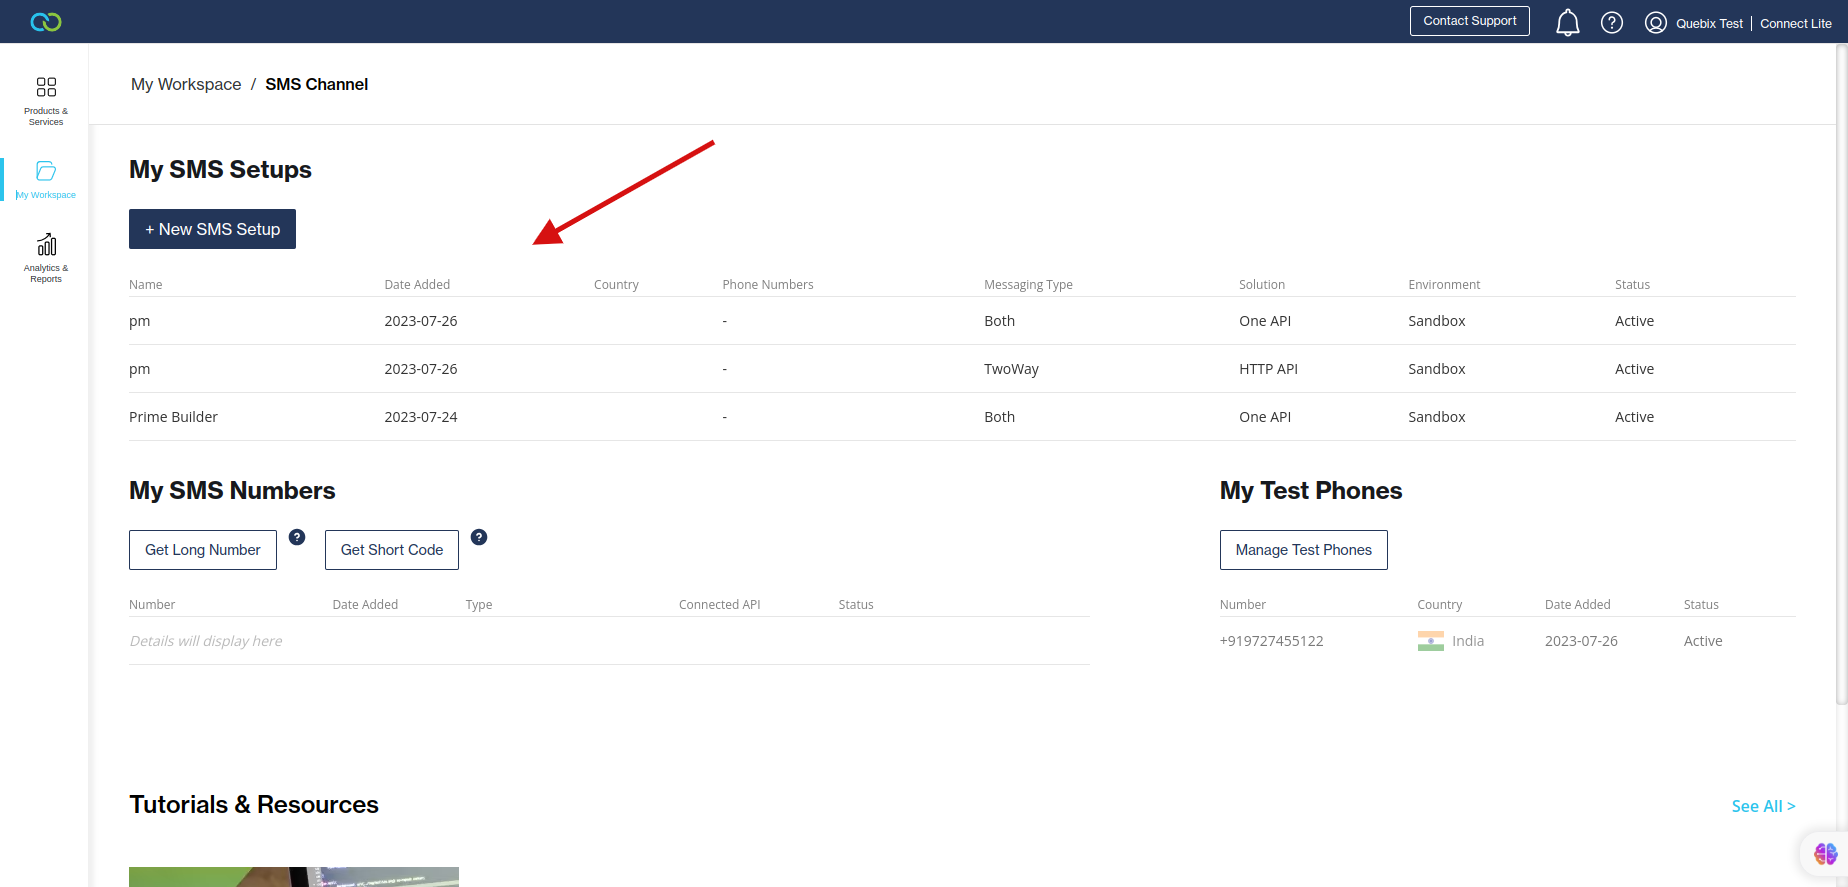
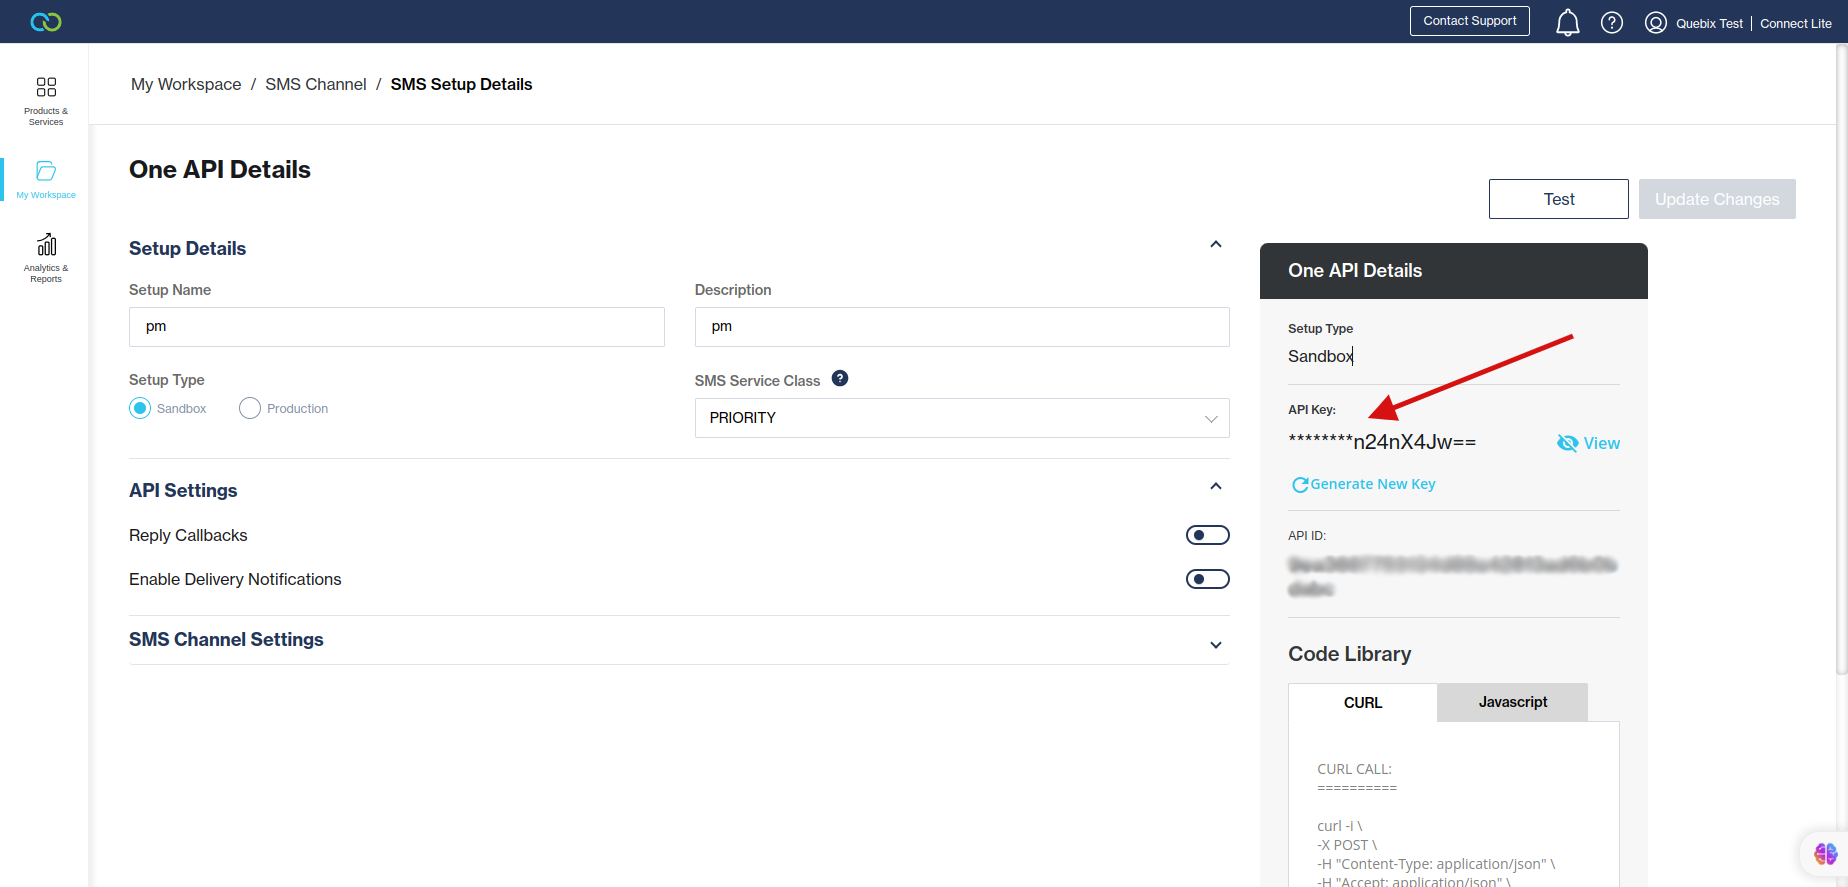
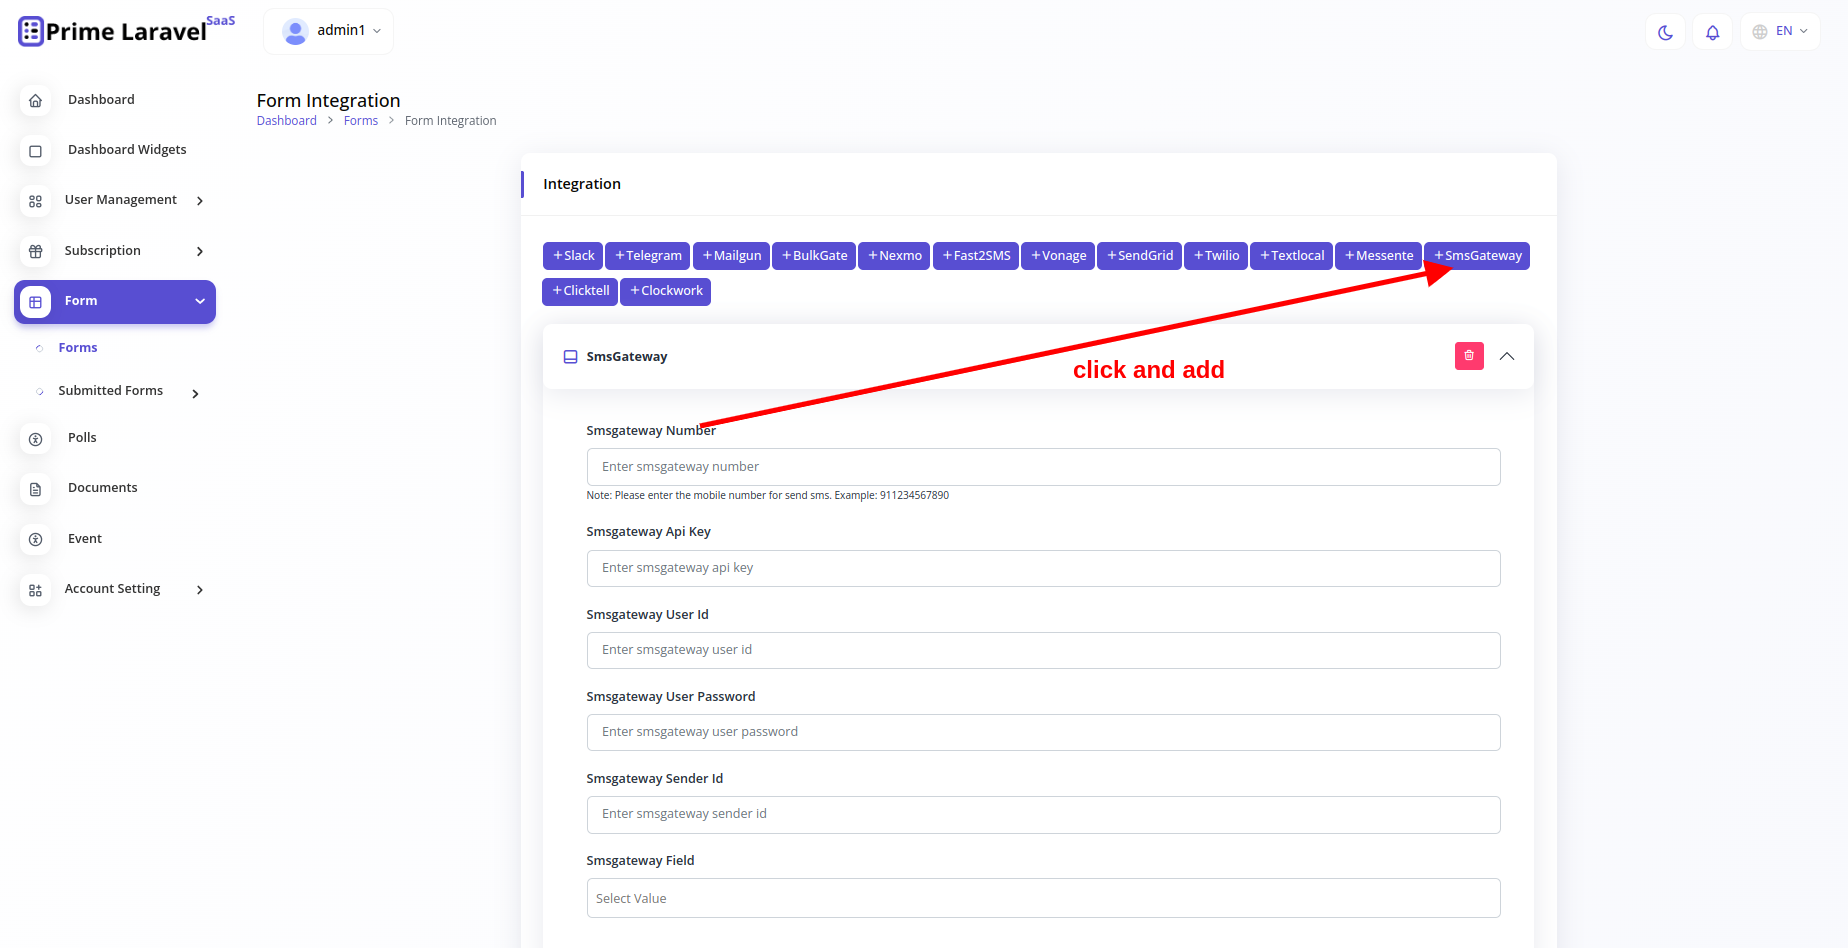
Smsgateway SMS
First complate your login and signup in https://www.smsgateway.center
website.
Then login "Web SMS Panel Login" and get your credencial.
Smsgateway Number : The phone number associated with the SMS gateway service. It represents
the source or destination
number for sending or receiving SMS messages.
Smsgateway Api Key : An authentication key or token provided by the SMS gateway service.
It's used to authorize access
to their API and enables your application to send and receive SMS messages.
Smsgateway User Id : A unique identifier assigned by the SMS gateway service to
authenticate your user account or application
when interacting with their platform.
Smsgateway User Password : The corresponding password or secret associated with the
provided User ID. It's used as part of
the authentication process to verify your identity.
Smsgateway Sender Id : An identifier used to indicate the sender of the SMS message.
Depending on the SMS gateway's capabilities,
this might represent a company name, brand, or a specific number associated with the sender.
Smsgateway Field : Refers to an additional parameter or customization relevant to your
integration with the SMS gateway service.
It might involve specific settings, options, or metadata used to tailor the behavior or
content of your SMS messages.
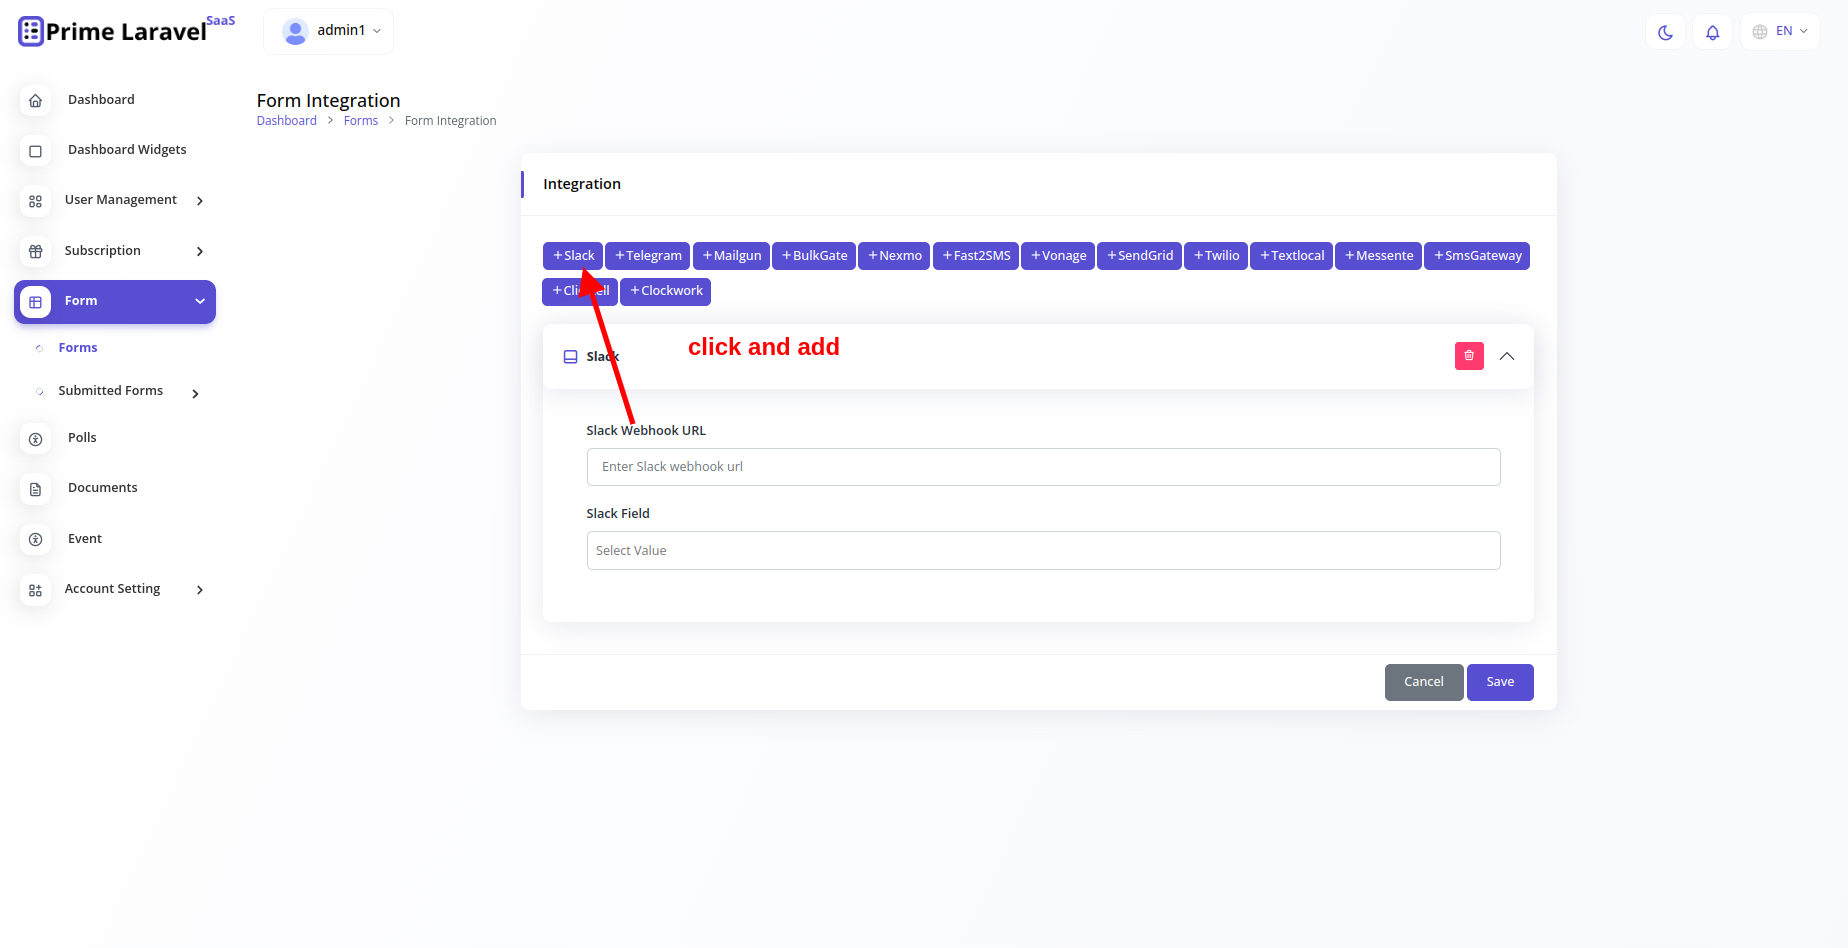
Slack
Sign in to your Slack workspace:
- Make sure you have the necessary permissions
to add integrations to your workspace.
Create a Slack App (optional):
- If you haven't already, you can create a new
Slack App to organize your integrations. Visit the Slack API website
(https://api.slack.com/apps)
and
click on "Create an App" to get started. This step is
optional but can help keep your integrations organized.
Add an Incoming Webhook to your Slack App:
- Go to the "Features" section of your Slack App dashboard.
- Click on "Incoming Webhooks" and activate the feature.
- Scroll down and click on the "Add New Webhook to Workspace" button.
- Select the channel where you want the messages to be sent and click on "Allow."
Copy the Webhook URL:
- After adding the webhook to your workspace, you will be provided with a Webhook URL.
This is the URL you'll use to send messages to your chosen Slack channel.
Configure the Webhook (optional):
- If you want, you can customize the name, icon, and other settings for your incoming
webhook
to make it look more distinct in the Slack channel.
Slack Webhook URL : A unique URL that serves as an endpoint for sending messages and data
from external applications
to specific channels in Slack. It enables automated notifications and integrations between
your app and Slack.
Slack Field : This likely refers to a parameter or customization option specific to your
integration with Slack. It
could involve additional settings, metadata, or data relevant to your interaction with
Slack's API or platform.
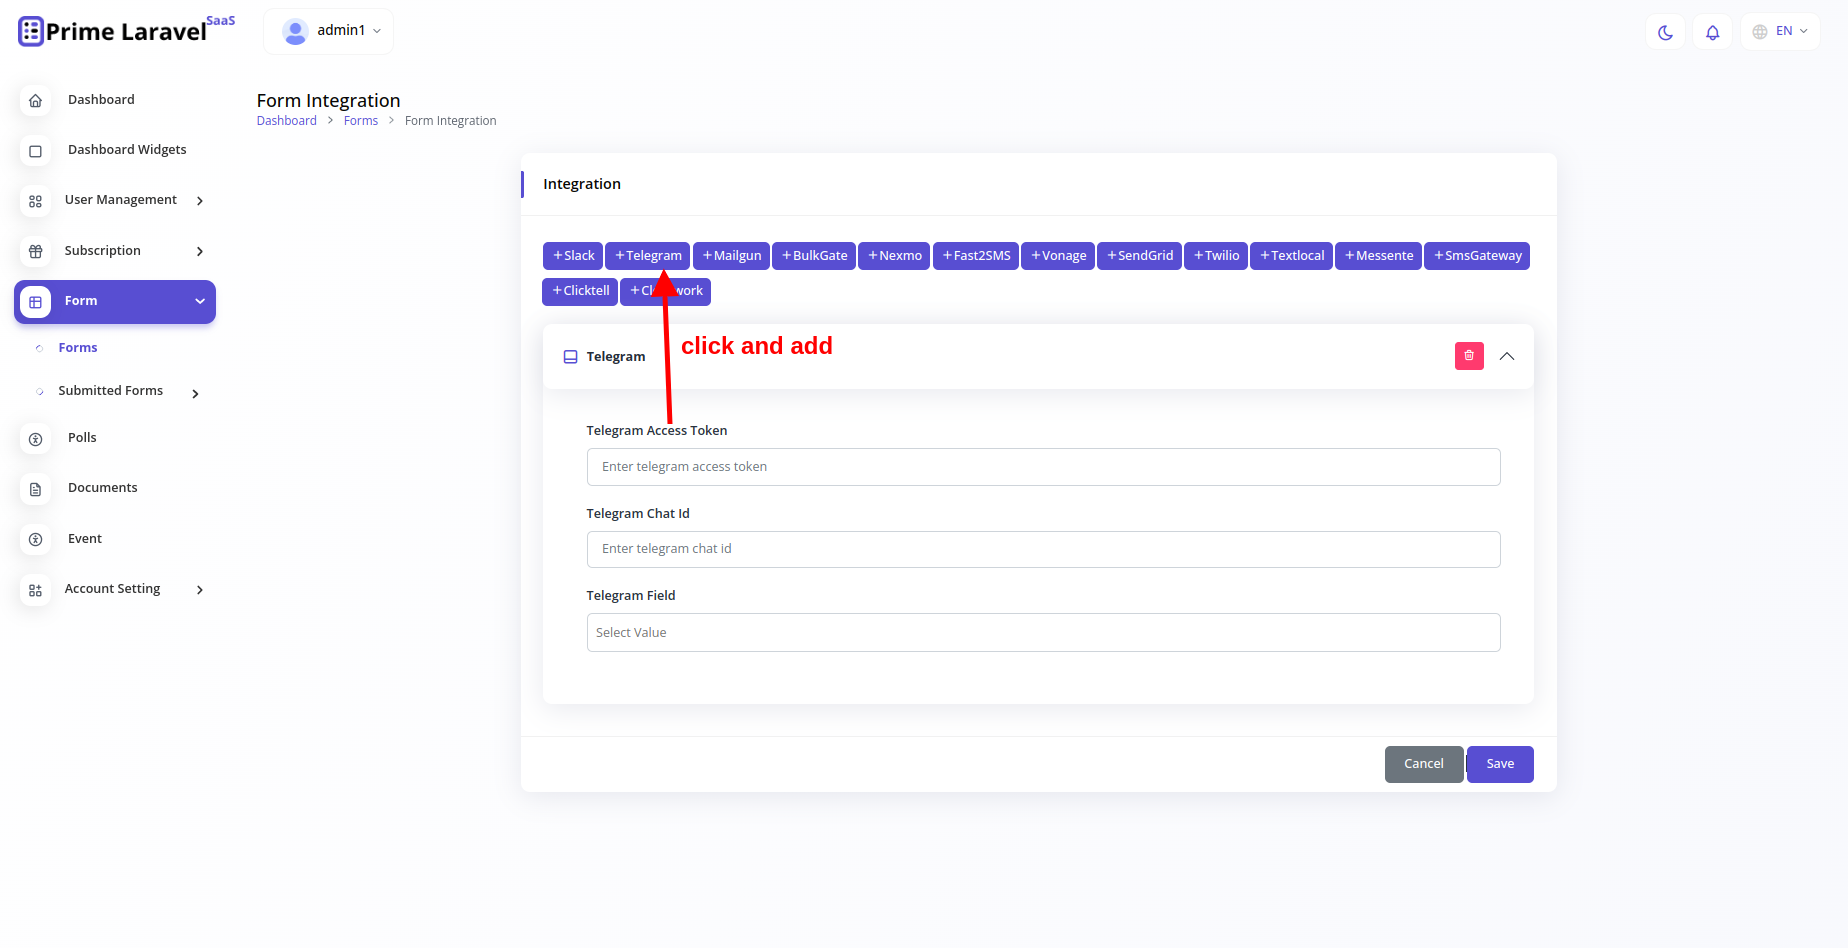
Telegram
First Login https://web.telegram.org Telegram Web In Your Mobile Device.
Then Please Follow These Video Link: Click Here.
Telegram Access Token : A unique key granting access to Telegram's Bot API, allowing your
application to interact with
Telegram servers and perform actions as a bot.
Telegram Chat Id : A unique identifier assigned to each chat or conversation on Telegram,
enabling targeted message
delivery to specific users, groups, or channels.
Telegram Field : Refers to a potentially customizable parameter or configuration relevant
to your Telegram integration,
allowing you to tailor bot behavior or interaction based on your specific requirements.
Sendgrid Mailer
Sign Up for a SendGrid Account:
- Go to the SendGrid website (https://sendgrid.com) and click on "Sign Up" to
create a new account.
- Follow the registration process and complete the necessary steps to verify your account.
Create a SendGrid API Key:
- After logging in to your SendGrid account, navigate to the "Settings" > "API Keys"
section.
- Click on the "Create API Key" button.
- Provide a name for the API key and choose the appropriate permissions. For mail
functionality, you typically need "Mail Send" permissions.
- Click on "Create & View" to generate the API key.
Copy the API Key:
- Once the API key is generated, it will be displayed on the screen. Copy the API key to
your clipboard or store it in a safe place, as you won't be able to see it again.
- get your credencial.
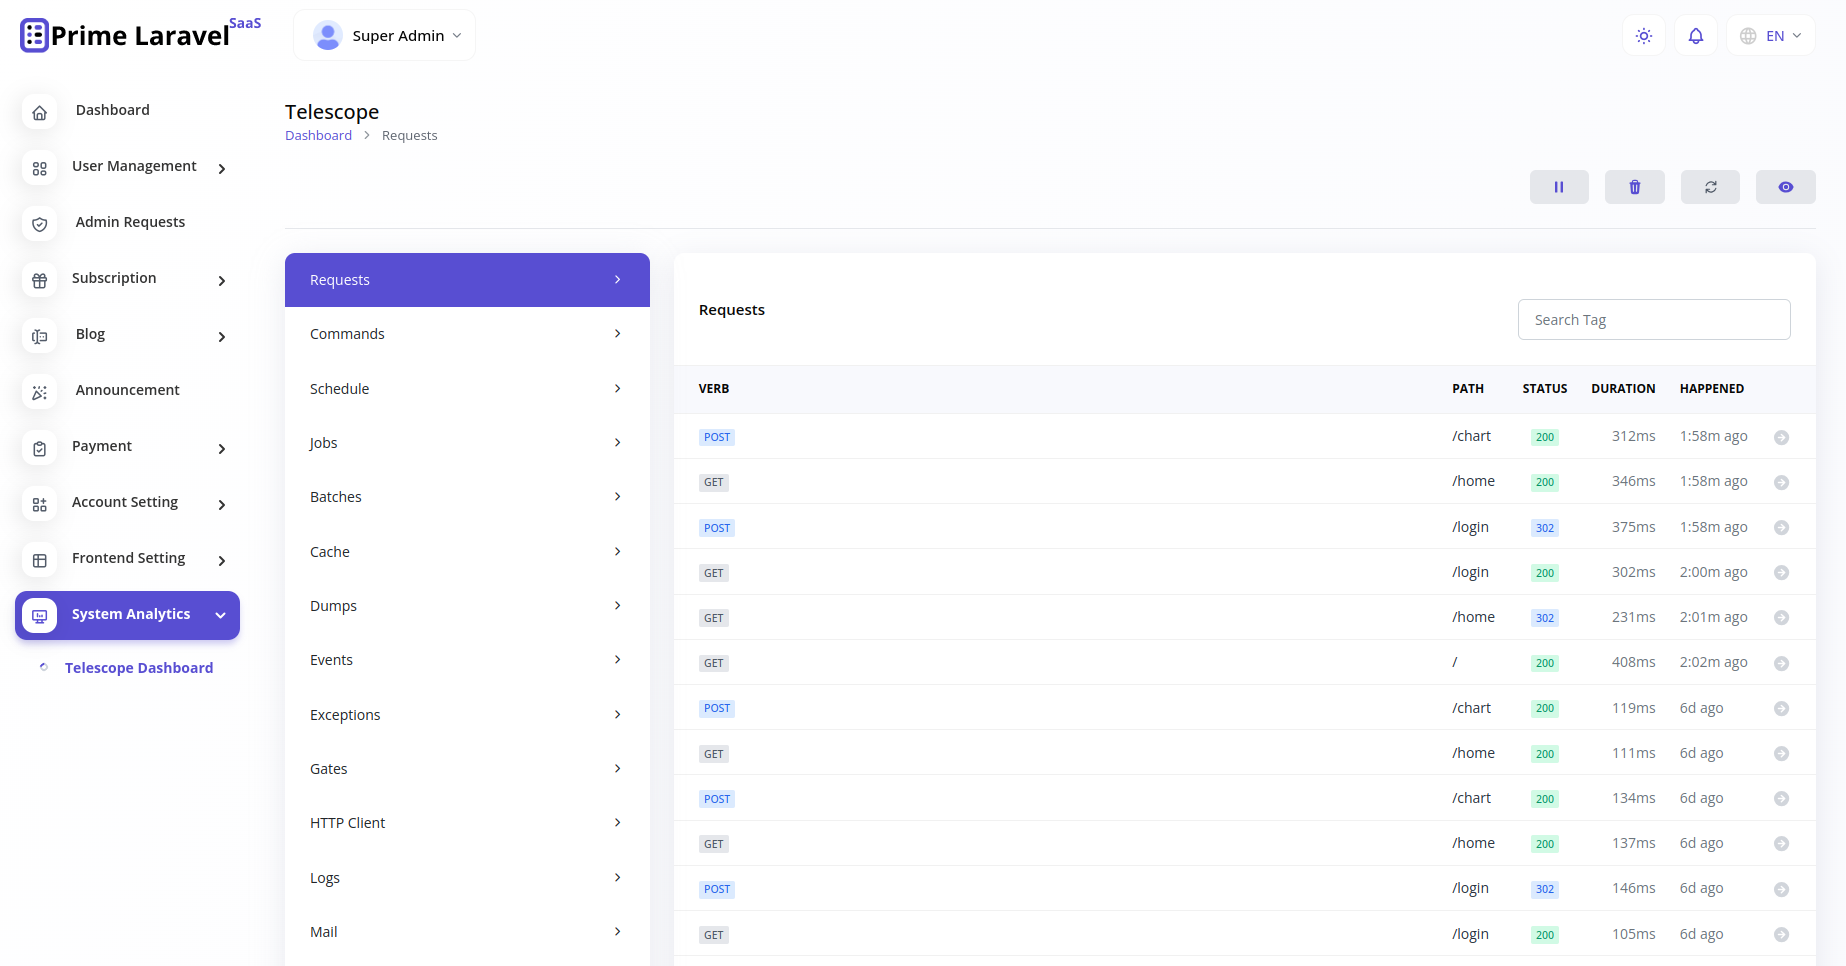
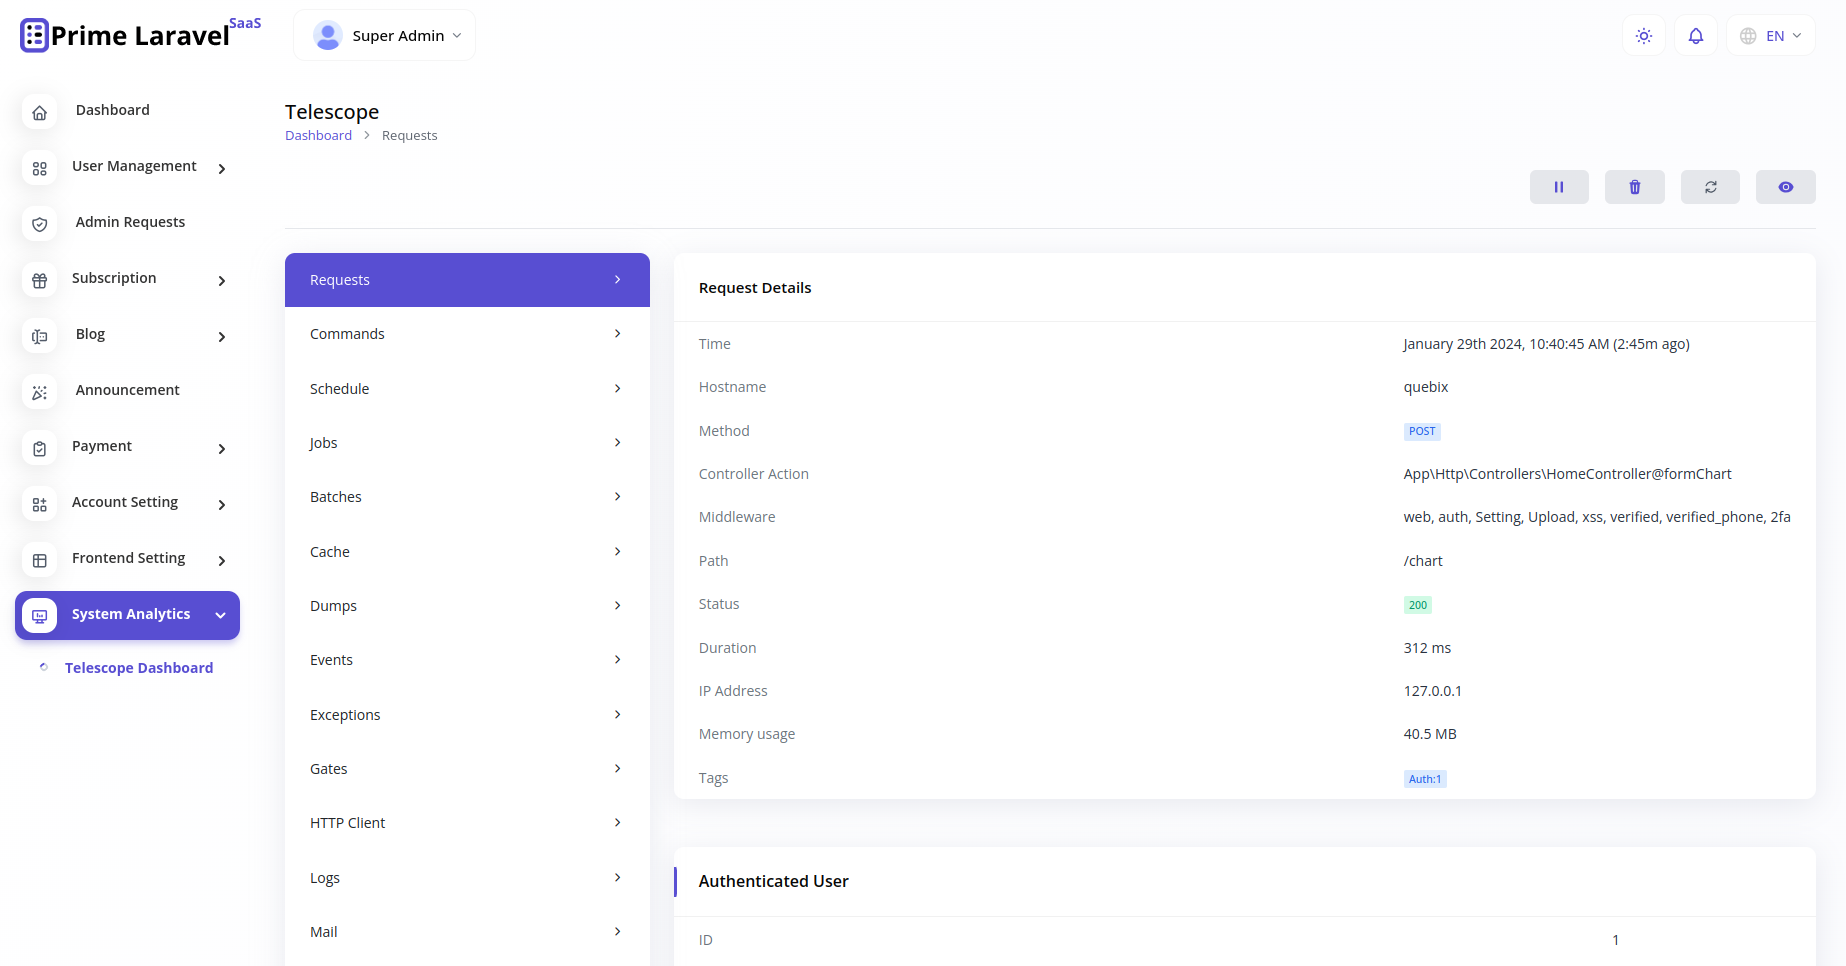
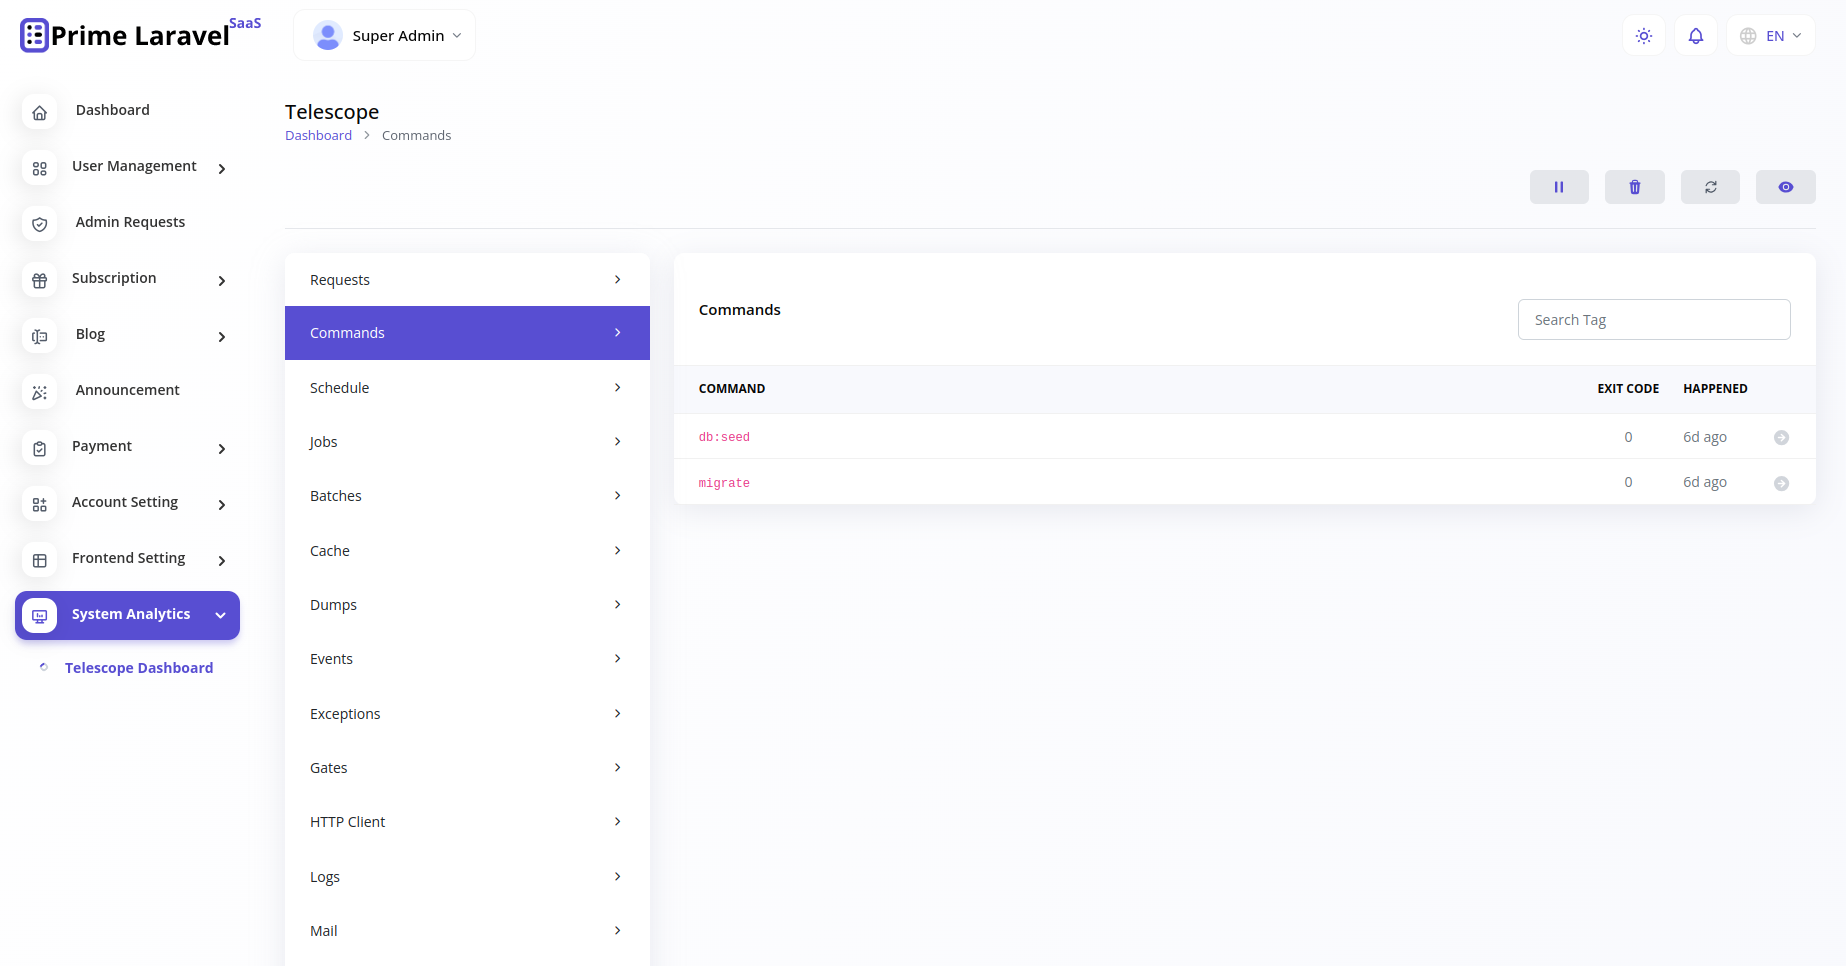
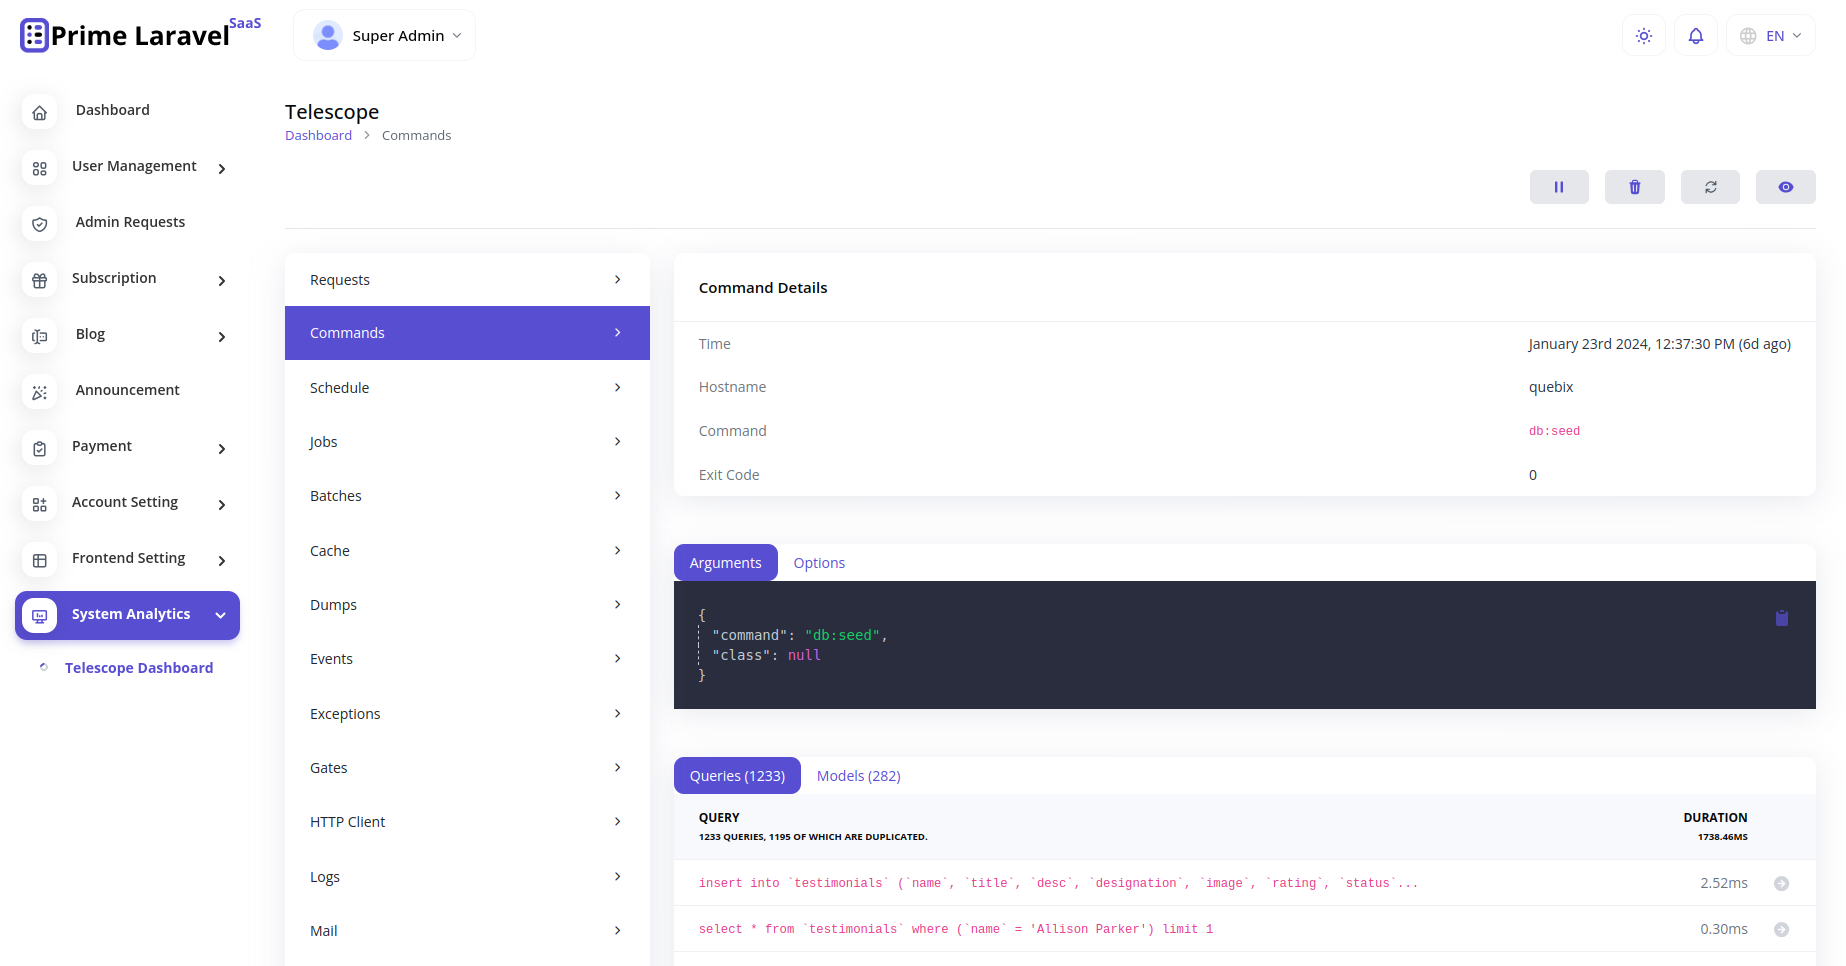
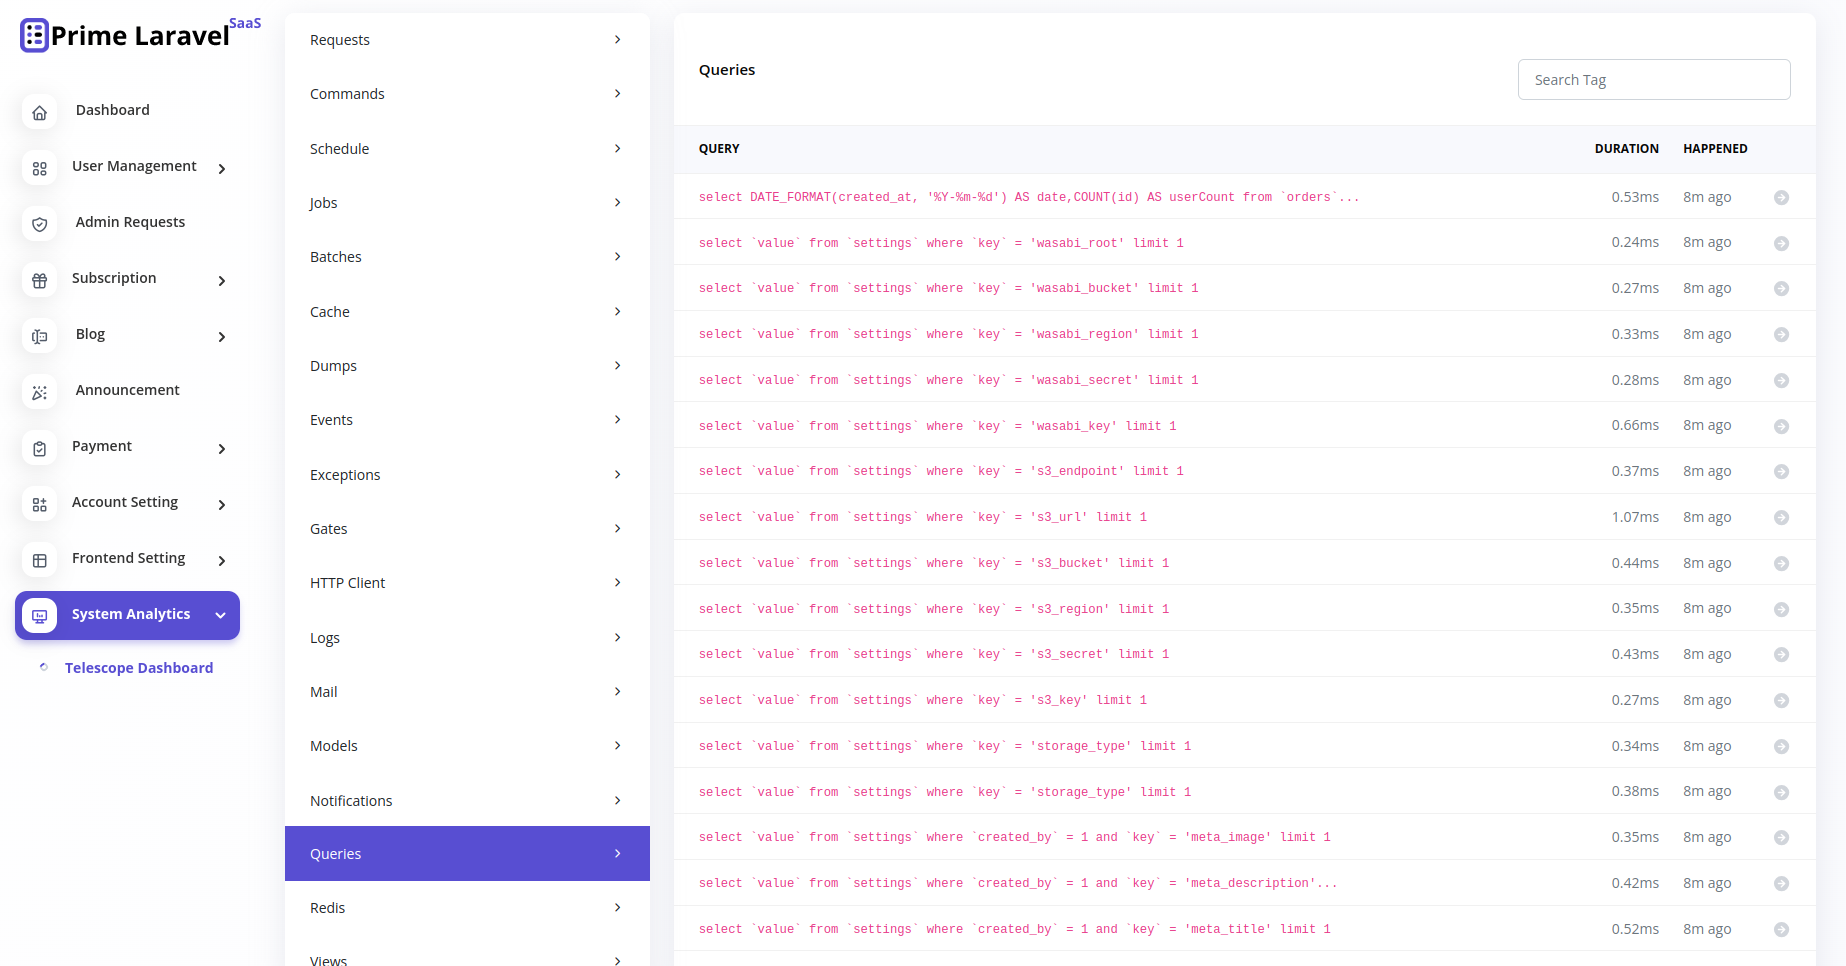
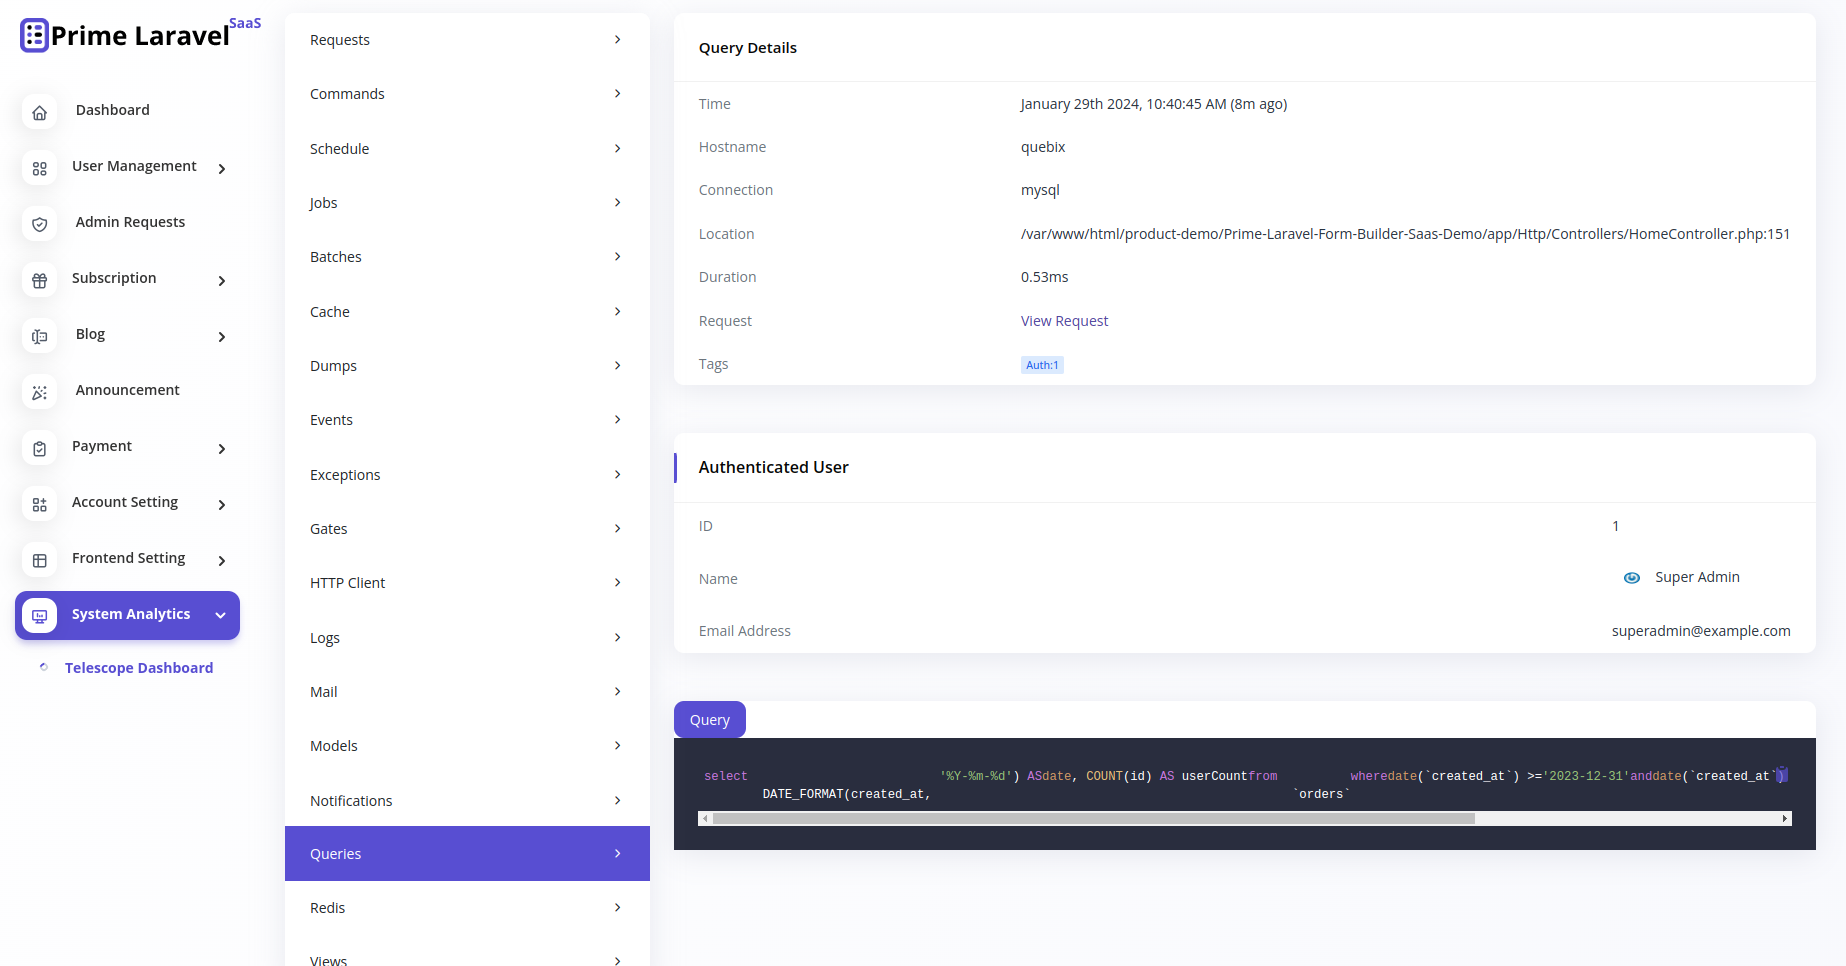
Telescope
Purpose of Laravel Telescope:
- Laravel Telescope is a powerful debugging and introspection tool for Laravel
applications. It provides a comprehensive dashboard for monitoring and debugging,
offering insights into requests, exceptions, database queries, and more.
Views of telescope dashboard:
- Your telescope show in System Analytics menu.
- Some layouts of telescope.
Upgrade
Before making an update, always remember to do a complete backup of your website.
If you've made any modifications to the language string, your changes will be lost. you can
find your old edited language file on resources/lang. but that will be lost as new version
have new language file. so take backup that files for reference of new version that you need
to manually again.
If you've made any modifications to the software's files, your changes will be lost.
For Upgrade version, you need to do it your self. And we are not responsible if you lost
data.
- Make a backup of the
.env
config
file and .htaccess located on your server.
- Upload and
replace all the
files
on your server with what's inside the main_file
folder.
- Restore your
.env config file
and
.htaccess on your server.
- Do login and follow the update wizard.
FAQs
Please ensure that you have mod_rewrite enabled on your
server.
This generally happens when one of the server
requirements is not met, please ensure your server meets the software's
requirements.
Please try to by press f5 or clear your browser
cache or try on another browser.
Please add this to your your .htaccess file configuration
RewriteCond %{HTTPS} !=on
RewriteRule ^/?(.*) https://%{HTTP_HOST}%{REQUEST_URI} [R,L]
Our theme files in resources/views, assets in public/assets folder.
You can edit them.
Support
If this documentation doesn't answer your questions, So, Please send us Email via Item Support Page
Note: While we aim to provide the
best support possible, please keep in mind that it only extends to verified buyers and only
to issues related to our template like bugs and errors. Custom modifications or third party
module implementations are not included.
Please Add your Review (Opinion) for Our template. It would be
a great support for us.
Go to your CodeCanyon Profile >
Downloads Tab > & then You can Rate & Review for our script.
Thank You.